>

Vanne's lightweight/ interior modification thread

Thanks guys.. :thumbsup:

Finally got around to fixing up the hand brake cover. Did the main bit in alcantara and extended the boot by 2 inches as there is no more tranny tunnel plastics so mounts straight on the metal. Came out pretty good I thought.

IMG_0177.jpeg
 
So back from Boston.. time to get back into the Rock and Archie show.

20250108_092312_lmc_8.4.jpg
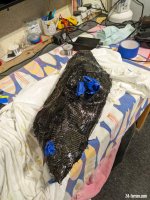
Nicked some glass resin from a mate, and set to work on the Achilles heel of this project. Ive been seriously racking my brain the last year about how to sort the back of the headlights nicely.. and you may wonder why the hell worry about the back of the headlights right? Well as there is only a cut down version of the inner wheel well guard, there is absolutely nothing between the light and the front wheel.. so it's gonna flick s**t up..

Which is why this needed to be done..

20250108_092317_lmc_8.4.jpg

looks like crap atm, but will clean up pretty nicely id say. not that anyone is going to look at the back of a set of headlights, but its gonna be solid as. Not shown is a pic of the rear headlight with expanding foam injected in it, cut to shape. also missing is a pic of Sikka Flex 221 used to mate the head light housing to the lens.
 

Attachments

  • 20250108_092336_lmc_8.4.jpg
    20250108_092336_lmc_8.4.jpg
    189.6 KB · Views: 1,283
Busy couple of days... Lots of bitser's of work done on the car, but this is one of the major milestones.. front nose cone complete..

IMG_0317.jpeg

Without its bmw grillz.. :thumbsup:
 
Vanne said:
Drove it out of the garage today, wheel alignment is next.

IMG_0319.jpeg

:driving:

Absolutely love it!!! It's the aero package I want, but I'm too chicken to run :lol: I wish APR offered a swan neck application for the E86.

I'm sure it's covered here but sifting through 30+ pages is little tough. Mind if I ask couple questions?
1. What exhaust are you running (from primaries to muffler)?
2. What steering wheel and hub adapter did you go with? Does the sw come with any buttons, if so what functions did you add?
3. How do you like the AIM dash?
4. Do you have or plan to run a fire suppression system?
5. Are you going to add FIA spec rain/fog light to rear?

PS - Keep up the great work, suffice to say only handful of non-race shop owners are pushing the boundaries of this chassis. My car feels so stock compared to this build lmao.. Also, perhaps you can add a ToC to front page one of these long weekends :D
 
Yeah no worries..

1. Euro headers into super sprint catless s pipes , into super sprint X pipe, which has the rear of the x section modifies to 3” all the way back to the cans where it connects to a 3 to 4” can.

https://youtu.be/aWhCT_DsFLE?si=1ImVcmwR2QjPB5Da

2. NRG quick release steering hub and sparco wheel, no buttons, I added those, they roll the info on the Racepak dash backwards and forwards.


3 it’s a Racepak IQ3L logger dash. Do I recommend it? Hel no! f**k all support from haltek these days, and bmw is not supported out of the box, which means that you have to write the formulas that intercept the data from the canbus. Why did I go for the Racepak? It’s half price of the Aim dash, and I thought it would have been easier to figure it out. Got there in the end with some help from one of the guys here on the forum. (Thx Martin) :thumbsup:

https://youtu.be/xT_u-JgI1xY?si=cJwt960UPnWK-nC8

Spot of coding going on here..
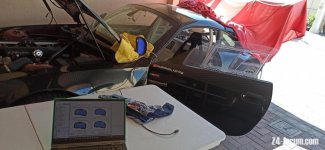
IMG_0323.jpeg

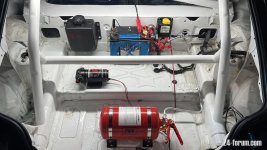
4. Yep, already installed

IMG_0324.jpeg :thumbsup:

5. I have the fia extra brake/fog light, but not sure I’ll install it yet.. we shall see..

ToC otherwise known as table of content? lol, probably not, the thread is more for me to keep me on track and what’s going on rather than enticing anyone else to follow. It’s taken a long time, much much longer than I ever anticipated, but that’s because mostly that I’ve either done everything myself or I’ve contracted someone to do something, and half the time, I’ve had to undo it, and then do it myself again anyways..

Maybe when the car is finished… we shall see.. also it doesn’t help when you’re a stubborn ass like me.
 
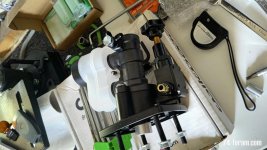
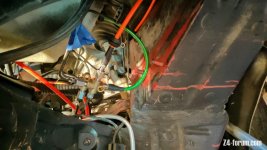
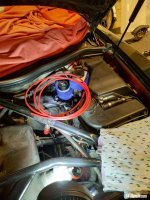
IMG_0681.jpegIMG_0680.jpegIMG_0679.jpegIMG_0678.jpegIMG_0682.jpeg

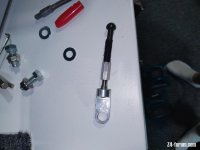
Couple of pics of the new Chase Bays master cylinder install.. the adaptors were a frikking nightmare, ended up making my own. What a beautiful piece of kit from chase bays.. all new banjo braided lines. ABS deleted.

:thumbsup:


Previously the willwood master wasn’t putting out enough pressure (and its Wllwood’s biggest) for my liking, so I contacted Chase Bays, excellent guys to work with and super knowledgeable. Easy to recommend them. I’ve been putting this job off for about 2 years.. I didn’t end up using their Clovis device as I had already calculated and modded the moment around required for this on the brake pedal to work properly, just that willwood didn’t provide the desired results, (not sure if that was due to the abs still being in place or just not enough size in the valving.) either way, all sorted now. :thumbsup:

https://www.chasebays.com/

(Edit, just for completeness, make no mistake, that Chase Bays unit is also a customized valved Willwood unit)

So in the final pic there is there willwood resiviour on the right for the clutch and the brake master just to the left and below. Super stoked.
 

Attachments

  • IMG_0677.jpeg
    IMG_0677.jpeg
    47 KB · Views: 30
Back
Top Bottom