for a minute then I thought the car was propped up on some sort of gym equipmentbobo075 said:
Polished my aero skirt

for a minute then I thought the car was propped up on some sort of gym equipmentbobo075 said:
Polished my aero skirt

ErrErrminator said:First hand wash and polish in my ownership. Even now the heat of the day is deminishing it’s hot work. A good chance to get to know the car’s exterior though, noting any dinks, grazes and scuffs. I’m really happy to report that there are very few. Amazing for its age.
The previous owner must have got busy with the clay and DA polisher I reckon, as the paint is as smooth as glass and there’s almost no swirlies!
 Guilty as charged :roll:
ErrErrminator said:Test fitted a newly acquired set of style 189s. They passed the first test - I like ‘em.
They need a bit of TLC so considering a refurb in either same colour or gunmetal (as per my ramblings in my own thread on the topic).
45AA599B-9E07-4D42-B222-D0E87BA77AFB.jpeg
")


Russ59 said:IAmOrion, I put my spoiler on at the weekend aswell but I only used tape, clamps weren't needed.20180505_133321.jpg
I used white spirit to get tape sticky stuff off, although not as much as you had left.
 bbbuuutttttt - at least it's on now lol

Marlon said:ben g said:Changed the old Philips (crystal vision I think) bulbs for some GE sport ultra lights.
The light output is massively better, and I'm not surprised after checking out the old bulbs. Surprised they were still working :lol:
Got a link to these bulbs Ben?
I'm using Osram Night Breakers H7 12v 55w @ £15 a pair - wondering if yours are any brighter?

Darkangelv2 said:Finished my headlight washer retrofit ready for finishing my MOT tomorrow
ben g said:Marlon said:ben g said:Changed the old Philips (crystal vision I think) bulbs for some GE sport ultra lights.
The light output is massively better, and I'm not surprised after checking out the old bulbs. Surprised they were still working :lol:
Got a link to these bulbs Ben?
I'm using Osram Night Breakers H7 12v 55w @ £15 a pair - wondering if yours are any brighter?
Managed to get a photo tonight. For halogens, they seem very bright. As said, the old Philips bulbs were as good as dead.
sketch-1526076451245.png
I might try thoseIAmOrion said:Darkangelv2 said:Finished my headlight washer retrofit ready for finishing my MOT tomorrow
Erm.... aren't they supposed to spray for like a 2 or 3 seconds then close back down!? At least, that's how they work with Xenons I'm sure :?
Edit: I just realised you note you piggybacked - what I assume was the washer jets
 absolutely shocking build quality for an OEM part. No wonder some of the LED'S had failed!
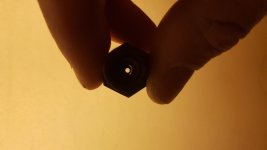
Is this a red brake light or clear? I've only heard bad stuff about the clearsben g said:My centre brake light led has had a section missing for ages. I replaced it in late 2016, so it wasn't even 2 years old.
It wasn't worth my time and petrol to drive all the way to the nearest dealership twice to get it replaced under warranty, so I bought on from a BMW dealer on eBay for £53.20
Replaced it yesterday and upon removal of the ''old'' one, it literally fell apart in my hands
Anyway, I had to end up smashing it to pieces to get the entire housing out. Fitting of the new one was simple, but the gasket type sealant stuff that sits around the edge of the clear brake light cover looked absolutely terrible, so I ended up rubbing it down slightly, as it was protruding from the tailgate and looks unsightly.
Much better now, but I'm always worried how long it will actually last. This is my 3rd or 4th new genuine centre brake light, the first one cracked, so I bought new springs and bolts for the next one. Now the casings just fall apart or the LED'S fail.
Oh well, looks like it's a yearly maintenance item :lol:
philbo909 said:Is this a red brake light or clear? I've only heard bad stuff about the clears
I don't like the look of a red centre brake light on sterling grey, so I have to keep paying out for a clear one