Z4M - progress update

pvr

Lifer
South East UK
My son and I have had the M now for about 6 weeks so about time for an update.

Items purchased for it so far:

- Atomic CSL wheels
- Clear breaklight
- CarPlay unit
- Steering wheel
- Aero skirts
- Gear lever surround
- Storm gearknob retained from SI


First job, and by far the biggest and still ongoing is the cleaning of the car inside. Prior to delivery, it had a spit and polish detailing performed on it and came with an air freshener in it. I am struggling to remove the sickly sweet smell from the interior. When you open the garage, a whiff of sweet smell would hit you. Tried white vinegar mixed with water, bi carbonated soda and every leather cleaner under the sun but only managed a 50% improvement so far. Any other suggestions welcome.
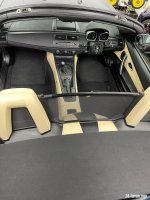
Interior view.jpg
Extended Leather.jpg
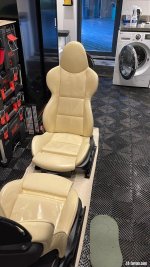
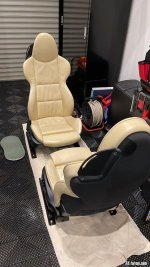
Chairs in garage.JPG
Chairs in garage 2.JPG

The gaitor leather was too tight (as it had been damaged at the top) so got a replacement for that as well (to be fitted yet)

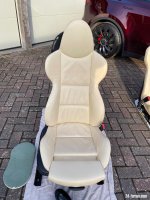
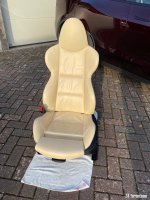
Got the leather paint and protector to do some work on the driver's seat bolster. Planned do be done this week whilst the seats are out.

The extended leather was removed to clean the smell of it as well as re-sticking the leather back on as in some places it was lose.

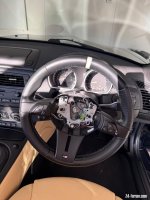
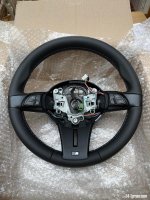
The steering wheel was removed as it was re-covered in perforated leather which we didn't like and felt sticky no matter what the cleaning we did, so that went off to Royals, returned today. Very nice job,

Old one:
Old steering wheel.JPG
New one:
Steering wheel - new.jpg

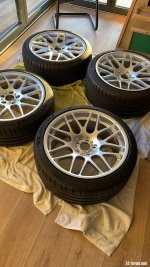
Got the Atomic CSL wheels again, the M wheels which are perfect, will be sold with first refusal for RMB.
CSL wheels.JPG

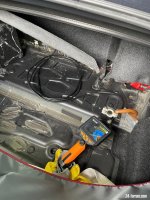
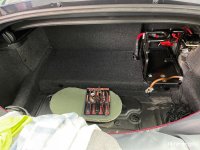
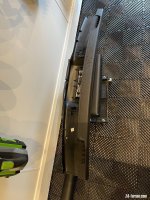
The CarPlay project started as well to fit all that in the boot (again). This M has the DSP amp so it was a bit of a faff to get the cabling sorted for that. Also adding a reverse camera to the setup which unit will replace one of the number plate light (split light / camera).
The endoscope came in really handy with trying to locate the plugs in the rear centre console.

Boot with cam.jpg

All back together again.
Boot - tidied.jpg

The Aero skirts need to be painted yet, got the quotes for that but need to see if I can fix a couple of touch up paint drops on the bonnet which are a bit of an eyesore. Might have to repaint the bonnet as well which is a shame, as 99% is very good but just those 5 blobs look bad. Will try to see if the blob removal tool works on them (festool).

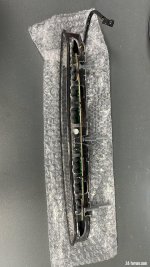
The rear brake light was only half working, so replaced that in the meantime as well.
Centre brake light.JPG
 
Looks great!

Good work! I need to strip all mine out too, but my garage is a bit small so its hard to store the bits.

How is the CarPlay installation? I started the thread but have yet to sort; lots of jobs to do!

Also there isnt a definitive thread on the steering wheel removal anymore as all the image links have broken. I have new buttons and surrounds but haven't tackled yet. Is it just a case of removing the battery and unclipping the airbag from behind? Would also like to have mine re-leathered while im at it. Was the re-leather done with nappa? Does it feel as good as the original?
 
The CarPlay on the M is a bit more involved as the battery is in the way so has to be removed completely. Mine also has the roof motor in the boot so I could not easily lift the carpet on the left side, I cut the carpet as far in the corner I could which is then covered by the roof motor carpet cover.

If you have an Amp, that means that you have the full size bracket for the TV tuner as well. The amp needs to be removed and then the bracket itself as it is covering the hole that is in the back of the centre console and where you have to put your hand in to reach behind the nav computer. This time, I got the additional cable as well so that the original BMW system works completely the same as before and you can switch to Carplay. On the previous installation, I didn't know about that so tha always goes to CarPlay and the original info is there to be seen. The camera is an add on to the CarPlay tuner, so just fancied it for the sake of fancy (and I don't have rear parking sensors for some strange reason).

The steering wheel - I took the entire battery out for the other work, but from my research you have to disconnect both positive and negative leads. Then the best tip I found was to use a torx screwdriver to disengage the airbag through the holes that are at the 10 to 2 position (two holes). Push the screwdriver in there and the airbag pops off from that side. repeat on the other side. You push with the screwdriver a leaver spring that frees up the plastic tabs from the airbag. That part is actually really simple, and then disconnect the three plugs (two for the airbag, one for the MF buttons). The cost of Royals was £170 + shipping which for a brand new wheel I thought was really good. I did not need new buttons etc as mine were perfect.

You can spec any leather you want, so we specced nappa and three colour stitching - with the instruction to make it 100% OEM everything. They did that very well.
 
Awesome info! Yes DSP and motor in the boot too! Sounds great I would love to add this at some point makes using the car so much better.

Good to know on the other elements thanks for that! Still have mine sorn and just managed to get hold of a ISOFix kit to integrate so I can bring my lad along he is absolutely obsessed with cars already and I think it would be really nice to take him to a few car meets. I see you have that option too. I really want to have it OEM look but drilling through the carbon leather is a bit of a worry!
 
pvr said:
I am struggling to remove the sickly sweet smell from the interior. When you open the garage, a whiff of sweet smell would hit you. Tried white vinegar mixed with water, bi carbonated soda and every leather cleaner under the sun but only managed a 50% improvement so far. Any other suggestions welcome.

Have you tried an odour bomb? My mate used one in one of his older cars with good results.
 
Is that a zedshed roof motor relocation? I'm guessing by the use of a badly matched carpet tile. :rofl:
 
Big Andra said:
pvr said:
I am struggling to remove the sickly sweet smell from the interior. When you open the garage, a whiff of sweet smell would hit you. Tried white vinegar mixed with water, bi carbonated soda and every leather cleaner under the sun but only managed a 50% improvement so far. Any other suggestions welcome.
Have you tried an odour bomb? My mate used one in one of his older cars with good results.

I used a bomb with the SI which I found disappointing and very expensive at £16 at the time. If I could find one that is much more reasonable and actually works I would certainly try it.
 
enuff_zed said:
Is that a zedshed roof motor relocation? I'm guessing by the use of a badly matched carpet tile. :rofl:

I don’t have a bill for that one, so no idea when or where it was done. If only I kept some of the carpet I used for the si :lol:
 
pvr said:
Might have to repaint the bonnet as well which is a shame, as 99% is very good but just those 5 blobs look bad. Will try to see if the blob removal tool works on them (festool).

Have you seen this before

[youtube]eYidvimUiwAvHBiz[/youtube]
https://youtu.be/oWgxSgDEvzo?si=m-dVY_Bk654ErX7k

https://www.amazon.co.uk/Mirka-MINF-Denibbing-File-Coarse/dp/B00XN2CRAS/ref=asc_df_B00XN2CRAS?mcid=b89d877cdf0f38ac8e1fb6bf98f0096c&hvocijid=4263651395418394384-B00XN2CRAS-&hvexpln=74&tag=googshopuk-21&linkCode=df0&hvadid=696285193871&hvpos=&hvnetw=g&hvrand=4263651395418394384&hvpone=&hvptwo=&hvqmt=&hvdev=c&hvdvcmdl=&hvlocint=&hvlocphy=9193760&hvtargid=pla-2281435177618&psc=1&gad_source=1

These tools are awesome. Have to be careful tho.
 
I had seen the video from the Merc, and have the Dr Colourchip products which work very well to do the actual touching up. I just need to undo the attempt someone else had done which looks terrible, almost like a load of varnish poured over those chip.
 
pvr said:
I had seen the video from the Merc, and have the Dr Colourchip products which work very well to do the actual touching up. I just need to undo the attempt someone else had done which looks terrible, almost like a load of varnish poured over those chip.

Those cut tools are good at taking the blobs off the top, then sanding and polish it back. Inevitably, it's never perfect, but it's better than silver on a dark car.
 
The good points of the SI is that it is such an easy car to drive. You get in, turn the key and drive away. The first mile and the 100th mile of that trip are identical.

The M on the other hand is like getting on a wild bull and ride a rodeo. The first few miles of a drive are pretty hard, you have to handle the clutch much more gently than later on in the trip as you will look like a learner driving a cold M away. The warm up time is 10 miles so there are no such things as short enjoyable trips.

When the M has warmed up, the drive becomes a delight far exceeding the drive of the SI. The gearbox becomes really a pleasure to use and with the engine revving so freely that it is so nice to drive. The sound is intoxicating as well, my current M has the eventuri air box as well which is very nice.

You are aware of course of the M tax for everything and that is a disadvantage of the M.
 
Good to see you are making good progress getting it exactly how you want it. :thumbsup:

And you've been on the E85 journey both ways, from M to Si then back to M!

I've only gone from Si to M.
 
Today was paint the seat day as it was lovely and sunny. So sanded the driver’s seat and applied a number of coats at the bolsters.

IMG_9759.jpeg
IMG_9760.jpeg
 
That is Tim’s, performance model. Brutal in performance but he has kept the 140 as well as the drive is so different.
 
pvr said:
That is Tim’s, performance model. Brutal in performance but he has kept the 140 as well as the drive is so different.

I’ve just got one too 7 seat for the fam. Hate to say it but it’s a wonderful car and cheap as chips. Saved £400 in fuel already! Got the long range but it’s 2.6 tonnes and quicker than the Z. Thing I love the most it’s quiet and smooth… becoming an old man 😂
 
Yes, they have their place for fast and cheap transport. Costing a fiver for 350 miles is a no brainer for dull miles.
 
Back
Top Bottom