Z4M - progress update

Well the lease is less than the fuel I was putting in the JCW. I don’t think it’s that boring think it’s quick and handles pretty well considering its size and weight.

We do a lot of miles and the math just makes so much sense compared to buying like a disco or something similar. Plus they are so cheap to lease and we got a years free super charging and we’ve got £1250 worth of credit which will probably fuel it for the whole lease. So £0 fuel cost just tyres.
 
The process on the seats was as follows:

- Woolite 1:7 mix to clean the seats (three times)
- Bicarbonated soda on all the seams and base overnight for odour removal
- White vinegar and water mix 50/50 over the seats
- Gliptone leather cleaner, applied with horse hair brush
- Autoglym leather cleaner, applied with horse hair brush
- Sand w&d 800 on the bolster and remove previous colour attempt on the base

Using microfibre sponge (Furniture Clinic - leather repair paint) to apply paint to the affected areas. About 5 layers in the end, hairdryer to dry in between. Furniture Clinic sealant (Mat finish)

seat-before.jpg
Seat-after.jpg

Seats and steering wheel to go back in on sunday so the battery can be connected and the CarPlay can be tested. Reverse camera connection to follow (and wheel replacements)
 
pvr said:
Today was paint the seat day as it was lovely and sunny. So sanded the driver’s seat and applied a number of coats at the bolsters.

Paul, what did you use to sand the seat down? Any links?
I have some black leather restorer myself to put on my seats, but they need sanding/prepping and I am not sure what to use.
 
I got some 800 wet and dry from Amazon for a fiver. That worked well (wet) and stripped the paint in small rolls off the chair
 
Put the car back together (some extended leather not put back as working on those) and the CarPlay is working lovely, the new steering wheel is 1000 times better and the seats look good. The replacement gear shift leather is also very much nicer than the old one.

IMG_9796.jpeg
IMG_9794.jpeg
5ACA1B29-A1CE-41ED-94EE-A5895670036B.jpeg
4EF85B92-E4F4-4B79-A30C-D291B8577E6F.jpeg
 
Looks great, seats came up well and the new, matte steering wheel leather looks lovely 8)
 
That looks so good in the sun, and with some really interesting posts, great to see some love going into restoring a classic Z4M
 
Your car looks great in the sun pvr. :thumbsup:

Similar weather prompted me to take mine for a drive on Sunday - I just didn't stop for photos. :roll:
 
Thanks Chaps and Chapesses :thumbsup:

In the process of repairing a very bad touch up on the bonnet, so the Festool denibber worked great on that fortunately to cut off the mass amount of paint that was sloshed all around it. Aero skirts to be painted yet.

Stuck caliper repaired with Bigg Red kit during our M owner meet last saturday, so all is good :thumbsup:
 
Car looks great!

That festool looks great! Just watched a few vids on youtube! Need to get myself one!

Got my MOT on Thursday 🤞🏻
 
Thanks Tom. With this weather, TVR and myself enjoy the work on it and then the play with it. The Eventuri intake sounes really, really nice and you don't need to rev high to get it to produce it's growl.

Now the excess paint has been removed from the chips, I can use the Dr Colourchip kit I have to keep filling it until level. With the alcohol that comes with it, you simply wipe anything that is on the clear coat next to the chip so you have no residue.
 
I saw the pic on Tim's insta really nice combo!

Yes, there are a lot of things that I need to do. I would like to get an intake.

I've got an inspection pit and did some rust prevention over the weekend, as the rear shocks were rust advisories last year. It wasn't awful compared to some ive seen and the rest of the car looked great. I cleaned it up and used rust inhibitor and wax oil to sort it, but I really need a new suspension kit the shocks are done. The main issue is, as standard, the car just about catches at the front on my driveway, so a lowering kit isn't really on the cards. Maybe its that the shocks are doing so little that they dont push back when hitting a bump.

Had a look at my engine mounts and they look like new too, no cracking or compression, which was a surprise.

Also need to sort the stuff I have before buying more stuff 😂 
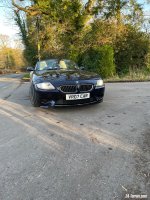
I have some areo skirts that have been sat in my shed for 5 years :headbang:

On the paint side these tools really do make refreshing easy without repainting. I know it would be better, but I kind of like it original. The nicer it is the less I want to take it out and get it damaged again 😂
 
As it is still sunny and warm, work on a back burner and refitted the extended leather that had become detached and bubbled in various places.


IMG_9879.jpeg
IMG_9880.jpeg
 
The extended leather on the roadster looks great, it’s a shame that in the coupe they did not wrap the A pillars in leather. I wonder if anyone has done that 🤔
 
Micke said:
The extended leather on the roadster looks great, it’s a shame that in the coupe they did not wrap the A pillars in leather. I wonder if anyone has done that 🤔
I've owned 2 E86's and an E89 with the extended leather option but never an E85. For me it wasn't the extended element I enjoyed but more the fact that it came with Nappa leather rather than standard Oregon or Kansas option. I think all the ///M's came with Nappa anyway.
 
I've only ever seen one Z4 with extended leather and it was a Coupe so it didn't have the leather A pillars, and as it had black leather the extended element didn't really stand out too much. It must look much better with any other colour trim.

As Garrie says I'm pretty sure Nappa was standard on the Ms.
 
Back
Top Bottom