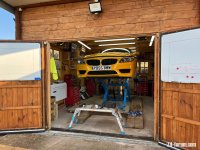
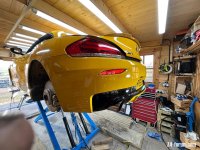
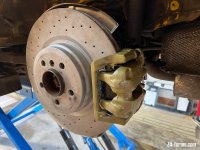
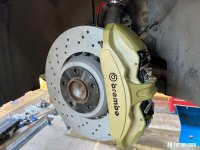
What have you done to your E89 today

Christopher72 said:
B21 said:
Reassembling front and rear bumpers with all their sensors, lights, washers, cameras, grills and covers..
Sadly my paint man’s colour match 2nd attempt hasn’t worked out well on the small covers….

Hay! How soon after painting do you get it polished to level it?

Hello..you can’t the colour is 2 pack clear coat on top…spoke to my man..he’ll have a 3rd go.. :tumbleweed:
 
Fitted the front and rear bumpers with all their original and later sensors…first bleed of the brakes showed 3 leaks in the re-made connections..cinching then up has hopefully sorted them out..left overnight..

Used over 1.5 litres of dot 5.1 and still need more..

Thanks to PeeblesZ4 and CherryM..three sets of hands made fitting the bumpers so so much easier..
 

Attachments

  • IMG_0743.jpeg
    IMG_0743.jpeg
    198.3 KB · Views: 1,230
  • IMG_0744.jpeg
    IMG_0744.jpeg
    183.1 KB · Views: 1,230
  • IMG_0745.jpeg
    IMG_0745.jpeg
    140.1 KB · Views: 1,230
  • IMG_0746.jpeg
    IMG_0746.jpeg
    125.6 KB · Views: 1,230
Fitted a pair of rear drop links as the OS had snapped. No more clunking while driving now :)
 
Another round of brake bleeding including running the DSC purge ..took about an hour to get the frigging ISTA laptop to connect..USB drivers etc..

So CherryM helped me on that..all air purged I hope..hard to tell till we run it..

Used these stud extenders to help me slip the wheels on…not easy as you get older..

Interior trim around the FRM to replace..it was too cold for so long..one more wheel and a tap into a 12v switched feed in the boot then time for a test flight..
 

Attachments

  • IMG_0755.jpeg
    IMG_0755.jpeg
    156.6 KB · Views: 1,081
Deepseaskateboard said:
Big Andra said:
Fitted a pair of rear drop links as the OS had snapped. No more clunking while driving now :)

I need to do this, due to perished bushings!

How difficult of a task is it?

Tbh, it wasn't as difficult as I was expecting. Getting them off the anti roll bar was probably the worst of it.
 
First test run of the yellow peril..brake peddle still a bit soft..but..after the run with a few full abs activated stops from 30/60 etc seems now firm…1,500 miles doing the NC500+ (more like 1,200 miles) should see it..
 

Attachments

  • IMG_0767.jpeg
    IMG_0767.jpeg
    373.9 KB · Views: 926
  • IMG_0770.jpeg
    IMG_0770.jpeg
    257.2 KB · Views: 927
  • IMG_0769.jpeg
    IMG_0769.jpeg
    269.4 KB · Views: 927
  • IMG_0771.jpeg
    IMG_0771.jpeg
    223.3 KB · Views: 927
  • IMG_0768.jpeg
    IMG_0768.jpeg
    165.1 KB · Views: 927
Smile back on my face, BMW wind deflector just fitted. Got lucky spotted a Z4 being broken for spares and spotted it in it
 

Attachments

  • PXL_20250327_162650259.jpg
    PXL_20250327_162650259.jpg
    228.6 KB · Views: 907
Hello

Saturday, fitted Mr12volt mmi box and dash cam. First time working on Z4. The fuse box is such an annoying design.

Still to fit:
rear dash cam
Rear reversing camera
Front camera, once I can work out how to get from engine bay to cabin.
 
Add custom image to mmi box.


Attachments

  • IMG_6856.jpeg
    IMG_6856.jpeg
    134.1 KB · Views: 692
Hello

Yes that image is on Mr12volt box, currently get a bmw logo, then that image.

Z4 silhouette image found online and I added text underneath.
 
Over a few hours in March, I finally got around to my first (second and third!) attempts to vinyl wrap the interior trim of my car.

I bought car with Carbon fibre wrap that is not to my taste so I removed it to reveal original cheap looking silver paint that was marked: again not to my taste, so bought three shades of admittedly cheap wood effect on eBay. After choosing the best colour to match the leather I did my best.

I love the colour and the real grain effect texture, but it is not a soft pliable vinyl, but quite hard and brittle so I could stretch it a little but not shrink it, instead having to cut and overlap corners. :cry:

It was inexpensive and has taken enough of my time that I am in no hurry to do it all again with a better quality vinyl, however I really prefer it to the shiny dark wood that BMW supplied and it doesn't look bad from a distance, so it is staying for a while. :)

BEFORE
 

Attachments

  • Wood-wrap-1.jpg
    Wood-wrap-1.jpg
    130 KB · Views: 718
  • Wood-wrap-2.jpg
    Wood-wrap-2.jpg
    141.3 KB · Views: 719
  • Wood-wrap-3.jpg
    Wood-wrap-3.jpg
    140.4 KB · Views: 719
  • Interior.jpg
    Interior.jpg
    139.5 KB · Views: 718
Been quite a productive day of tinkering today. Upgraded the door and rear speakers along with the door tweeters with the AliExpress Harmon kardon ones, and replaced the footwell ones with a set of hetz cento 6.5's. Had to make my own adapters for them to fit, which was actually quite easy, but what a difference in sound with just that simple upgrade! Subs and a secondaty amp may come at a later date. Once that was all put back together, I finished off with renewing the creaky bonnet and tailgate struts.

20250406_121403.jpg

20250406_143452.jpg

20250406_143951.jpg
 
Full wax and seal.

Gloss is amazing, it does not have paint correction.
This is the most gloss I have got on the paint!

Demonshine as drying aid
Chemical guys wet mirror finish
Collinite 845 insulator wax
Collinite beadcoat


IMG_2185.jpegIMG_2189.jpegIMG_2187.jpeg
 
Deepseaskateboard said:
Full wax and seal.

Gloss is amazing, it does not have paint correction.
This is the most gloss I have got on the paint!

Demonshine as drying aid
Chemical guys wet mirror finish
Collinite 845 insulator wax
Collinite beadcoat


IMG_2185.jpegIMG_2189.jpegIMG_2187.jpeg

Like glass :thumbsup:
 
I had an issue with one of my brake carrier bolts backing out…maybe caused by the stress of the uprated rear brake, maybe cause I didn’t use the old caliper cradle bmw bolt which has some primitive antilock washer fitted..maybe because I’d remounted the caliper cradle several times the loctite had worn off..

So using these fancy nord lock washers in super harden steel..arguably the best anti vibration washer…

Fresh 10.9 high tensile bolts…double locked the through bolts..

Did try the wire lock strategy but close to impossible to drill the bolt heads to allow the wire to be threaded..

Lots of medium strength loctite this time..
 

Attachments

  • IMG_3448.jpeg
    IMG_3448.jpeg
    180.2 KB · Views: 559
  • IMG_3449.jpeg
    IMG_3449.jpeg
    135.9 KB · Views: 559
  • IMG_3443.jpeg
    IMG_3443.jpeg
    188.3 KB · Views: 560
I crawled under the rear of my car to find.......i didn't fit poly bushes to rear anti roll bar :|

So just sprayed the rubber with some silicone spray.
 
Back
Top Bottom