nfbr's 2007 Ruby Black Z4 Coupé! Blog/Build-Thread

John002 said:
that's good to know, sure you'll get some work from here

Would you believe it, I'm not even a mechanic/technician/engineer!
I'm actually a product manager (Online Product and Promotion coordinator) but I just love working on cars so much.

To add to the list I'm doing a little development on the exhaust side of things with my Z too, but I'll keep it quiet for the time being as I'm unsure if it'll work yet.
 
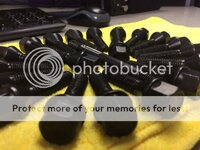
Totally forgot that my Extended Black wheel bolts had turned up!
So here's a complimentary photograph! :) And also my new Schwaben wheel installation tool that makes fitting/removing wheels much easier! Especially when using bolt through wheel spacers!
0128_zpse8876b47.jpg
 
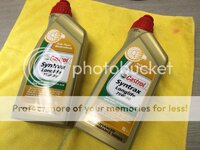
Excellent news - My Differential oil has turned up this morning - Gives me a nice easy job to do at the weekend along side cleaning and painting up the calipers!

2-Litres of Castrol's finest Syntrax LL 75w90 :)
0129_zps978094d1.jpg
 
nfbr said:
Transmission: Diff oil
Suspension: Rear trailing arm bushes, M3 Front ARB, Geometry Reset, Rear top mount reinforcement plates
Brakes: Paint Calipers, Drilled Discs and Slightly uprated pads, Braided Hoses, brake fluid upgrade
Exterior: Recondition Fog lamp units, Possible wheel refurb if I can find a set of loaner wheels

Be ready to enjoy in summer then :)

Just thought I'd mention if you go for Braided hoses call hel and get some two piece hoses made up. The standard setup uses 3 hoses per side but if you call they will make them up and also save you about £40
 
greenson said:
Nice work dude! :thumbsup:

Thanks man! :)

adam1985 said:
Just thought I'd mention if you go for Braided hoses call hel and get some two piece hoses made up. The standard setup uses 3 hoses per side but if you call they will make them up and also save you about £40

Nice one! I deal with Hel for some of the E46 stuff we do at work so should be able to sort something out with them.

I did have thoughts about making up full front to back braided lines and doing away with the crappy metal pipe work as I have all the kit at work for making them up. It usually only gets used on Mk1/Mk2 golfs though.
 
The first of another bunch of jobs on the Coupé this weekend! A diff oil change.

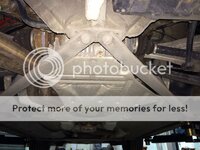
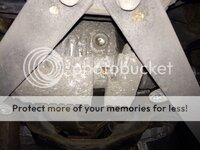
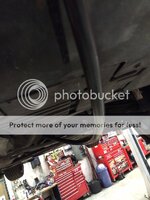
For the first part of this job, the Heatshield/Undertray protecting the diff needs to be removed to give you access to the Drain and Fill Plugs:
0130_zps5f47065f.jpg

Next up, You need to located the fill plug, and make sure that comes out cleanly! If it doesn't come out, then stop what you're doing and do not drain the oil!
0131_zps948cb6d2.jpg

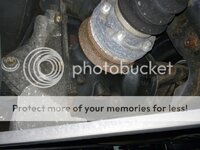
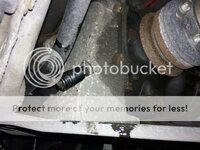
Once you have confirmed the fill plug comes out nicely, you can now locate the drain plug and eject the original diff oil! The Drain plug is just below the right hand inner CV Joint.
0132_zps1e8fa8ac.jpg

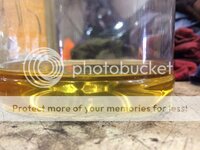
Here's a quick snap of a Sample of the fresh diff oil.
0133_zps8330d0e7.jpg

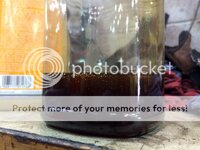
And now for a quick snap of the Sample of the old diff oil. I'm happy with how it's come out! Have seen this stuff much much blacker, so this shade of Cola was good news to see! Not bad at all for 75,000 miles!
0134_zps24d2ce1b.jpg

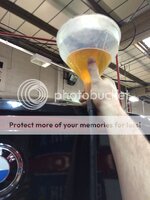
As I'd lost my gearbox oil filling tool, I had to rig up a temporary filling device! This came in the way of a 18mm Silicone hose and a funnel to fashion a gravity feed
The hose needs to be inserted by around 1-2 inches to properly fill the diff.
0135_zpsed9f881c.jpg

Once in position, the funnel will need holding up high and the first litre of the oil pouring into said funnel.
This bit takes a while and you'll probably need to swap hands a few times.
0136_zps0d36b1de.jpg

Once the first litre is in, Get a spotter under neath the car and pour in another 250ml.
Once the spotter sees the oil coming out of the fill plug, that's when you're full! Get the pipe out, and pop the fill plug back in!
0137_zpsd7863207.jpg

That's it! Done :)
Next job to come soon!
 
For the next bit, I rolled two jobs into one. Cleaning up and Painting of my Brake Calipers, alongside installing my new Eibach Hubcentric Wheel Spacers.

So first thing's first, I put the car up on the ramp and whipped off all four wheels.
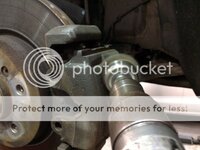
I then removed the anti-rattle clips from the calipers and set about cleaning them up on the wire brush machine.
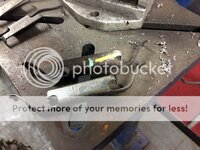
0138_zpsc8cfcdba.jpg
These have been painted black now, but are still drying.

Next, I noticed how my calipers already had some overspray on them, as it would appear my wheels have been refurbed on the car (Hmmff...)
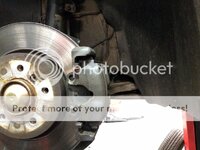
0139_zps7a652ed4.jpg

So that had to be cleaned and stripped using a wire brush attachment on an air drill :)
0140_zpsc7c04224.jpg

After stripping with the wire brush and spraying over with a good dose of brake cleaner, here's how they came out:
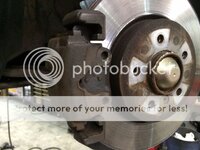
0141_zps90d62d4f.jpg

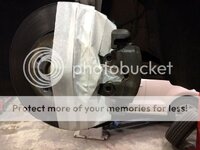
Now time to mask stuff up! I tried to mask anything that'd be in the way of the spraying area to avoid overspray
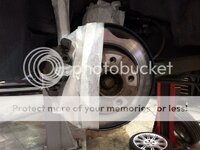
0142_zpsbd1be7bc.jpg

0143_zps82751e6f.jpg

Using Hammerite Smooth Silver in an Aerosol format, I gave the calipers their first coat:
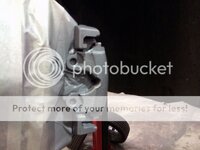
0144_zps73468eb7.jpg

The stuff seamed to coat well, but I still did 4-coats of paint overall to give a nice hard durable finish.
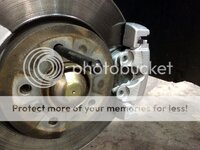
0145_zps85ec6f0d.jpg
At this point, You can see a bit of overspray on the disc/pad but that's no biggie as I'll be replacing them fairly soon anyway.

On goes one of the wheel spacers using my new Schwaben Wheel install tool (Man this thing is a godsend!)
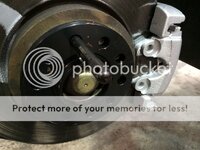
0146_zps369224b6.jpg

Such an Ace tool! Screw it in, Slide the wheel over, 4-bolts in, Tool out, last bolt in! Easy one man wheel swap with no faffing or misaligning the holes!
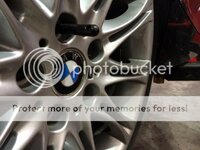
0147_zpsd9bdcebc.jpg

Finally a pic of one of the calipers through the wheel - looks like I'll be needing centre caps when the wheels get refurbed
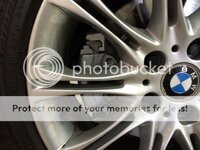
0148_zps05b08313.jpg

And a pic of the car sat nicer with the spacers on: 12mm Front, 15mm Rear.
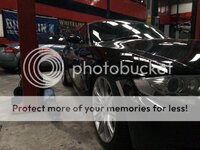
0149_zpsc3d88464.jpg

At the moment, I've left the anti-rattle clips off until they are properly dry, so that I don't tarnish the finish of them, but the car is going to be kept off the road for a few weeks whilst I strip and re-build the fog lights.
Overall, Happy with the job :) Can't wait to get these fogs sorted.
 
Nice work! However the 'after' photo of the car is distinctly sub standard. We want gratuitous shots of the car in decent light :P
 
Find me a day where I'm not working and there'd a reasonable level of natural light and I'll get plenty of shots ;)

That and I've had no chance to give it a proper clean yet :(
 
nfbr said:
Thanks Dale!
Love your Alpine White! Wish I'd have been able to find one in that colour when I was buying
Cheers mate, Ruby Black also looks the business 8) ... Have to let us know if changing the diff oil has made any difference. This update has made me realise I need to pull my finger out and get 12mm & 15mm spacers ordered.

I noticed many don't bother with locking wheel bolts when fitting spacers?
 
Dale_B said:
nfbr said:
Thanks Dale!
Love your Alpine White! Wish I'd have been able to find one in that colour when I was buying
Cheers mate, Ruby Black also looks the business 8) ... Have to let us know if changing the diff oil has made any difference. This update has made me realise I need to pull my finger out and get 12mm & 15mm spacers ordered.

I noticed many don't bother with locking wheel bolts when fitting spacers?

Soon as I have it back on the road, I'll let you know :)

The thing with locking wheel bolts is that even the good ones are no harder to remove than a standard bolt if using the correct specialist tools.

The way I see it, is if a thief wants your wheels, whether you have locking bolts or not, they'll find a way of taking them. That and I have the most common BMW wheel ever made, so hopefully less desirable.

When I eventually upgrade the wheels and tyres however, I'll be using McGard locking bolts despite my above opinions.

With the spacers I believe most people go for 20mm on the rear. I would say the 15mm look good, could do with a couple of extra mm, maybe a 17.5mm/18mm spacer, but I didn't want to change the handling characteristics too much by creating a bigger difference between front and rear spacing.

Extra width on the rear and not the front translates into +understeer -oversteer.

adam1985 said:
Will be interested in how you find the fog light refurb as mine are in need of one too!

So far, a total b*****d.

The owner of the company I work for runs "xenondoctor ltd" which is a small company based inside Awesome's building that reconditions Audi TT mk1 headlights - he has all the correct gear for splitting the lenses, but even using this the lenses were a total four letter 'C' word often used as a noun for lady parts.

So far I've got the lenses totally clean inside and out, all the glue/sealant off and the outside of the housing stripped clean. The inside I've started on, but I'm waiting for some more equipment to arrive in the post to give me an easier time doing it.

Interestingly, with both fogs unplugged, the bulb out light doesn't come on.
 
nfbr said:
So far, a total b*****d.

The owner of the company I work for runs "xenondoctor ltd" which is a small company based inside Awesome's building that reconditions Audi TT mk1 headlights - he has all the correct gear for splitting the lenses, but even using this the lenses were a total four letter 'C' word often used as a noun for lady parts.

So far I've got the lenses totally clean inside and out, all the glue/sealant off and the outside of the housing stripped clean. The inside I've started on, but I'm waiting for some more equipment to arrive in the post to give me an easier time doing it.

Interestingly, with both fogs unplugged, the bulb out light doesn't come on.

:rofl: I had heard that they were a PITA to refurb which is why I haven't done mine yet. Am seriously considering getting some Lamin-x and just tinting them so you can't tell that they are corroded inside!
 
You have paint all over the rear discs? hate seeing poorly painted calipers, just take them off and paint off the car, nothing worse then paint on the brake pads :thumbsdown: :headbang:
 
adam1985 said:
:rofl: I had heard that they were a PITA to refurb which is why I haven't done mine yet. Am seriously considering getting some Lamin-x and just tinting them so you can't tell that they are corroded inside!

Wait until you see some of the photos I've taken during the re-furb... Lamin-X isn't the answer.

synthedup said:
You have paint all over the rear discs? hate seeing poorly painted calipers, just take them off and paint off the car, nothing worse then paint on the brake pads :thumbsdown: :headbang:

To be fair, If you look at the condition of the discs, They are absolutely shagged... These are coming off in the next 3-4 weeks and a fresh set will be going on with a new set of Pads, So the overspray on the discs doesn't bother me much at all at this point as the car is a bit of a restoration project (not that there's much wrong with it). I think I forgot to mention that in the picture comments.

Less of the hate please brother ;)
 
Spotted an ebay bargain the other day and this got delivered today
IMG_20150212_162723.jpg

Just need to find a passenger side one now :rofl:
 
Good find! I am sure the dealers will happily sell you a passenger side one for many £££££ :(

Also, where did you source your extended wheel bolts from?
 
adam1985 said:
Spotted an ebay bargain the other day and this got delivered today
Just need to find a passenger side one now :rofl:

Lucky man!

Mine are almost done now, not really happy with the finish on the paint, but they are going to be hidden and still look way better than before, my originals were particularly bad :(

Dale_B said:
Also, where did you source your extended wheel bolts from?

The company I work for :)
 
Back
Top Bottom