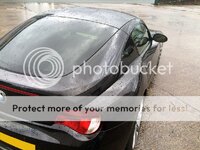
nfbr's 2007 Ruby Black Z4 Coupé! Blog/Build-Thread

adam1985 said:
You need to try and persuade awesome to sell some z4 parts

I can get an absolute butt load of stuff and would be able to do forum specific deals, however - Due to the policies of the forum, I'm not allowed to advertise or trade on behalf of the company I work for on here, despite being a contributing member :(
Of course there's nothing stopping anyone contacting me directly and asking about any parts they may be in the market for.
 
nfbr said:
I can get an absolute butt load of stuff and would be able to do forum specific deals, however - Due to the policies of the forum, I'm not allowed to advertise or trade on behalf of the company I work for on here, despite being a contributing member :(
Of course there's nothing stopping anyone contacting me directly and asking about any parts they may be in the market for.

Oh I didn't realise, but will keep in mind when I need a few things next. I have bought stuff from you guys before when I used to run my Fabia vRS :thumbsup:
 
Also another FabiaVRS owner here.

I was talking to my mate Alex at Aks about you and your car... well you giving it a shower to be precise!
 
bradz said:
Also another FabiaVRS owner here.

I was talking to my mate Alex at Aks about you and your car... well you giving it a shower to be precise!

Ahh good old Alex!
He's one of the good guys. Always have a good laugh with him when on the phone!
 
So, the other weekend I started the first part of a longer term project than my usual ones.
The dreaded fog light refurb!

First up, was removing the fogs. These release from a screw under the ledge of the rear bumper next to the fog light, and two screws from behind. I needed to undo the bottom half of the arch liner to allow enough room to get the fog light out of it's cavern.
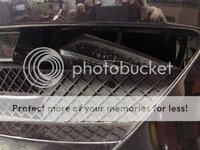
0150_zps99a9577e.jpg

As you can see, they didn't look good...
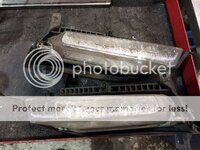
0151_zps0a77bc24.jpg

A bit closer up, They look even worse!
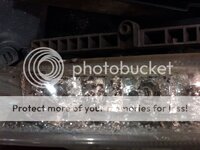
0152_zpse58e1a14.jpg

The hardest bit of the first half of the job was splitting the units. For this I used a heat gun to warm the original sealant and a couple of wallpaper scrapers to pry the lens away from the housing.
With the lens off, What was inside made me feel sick!
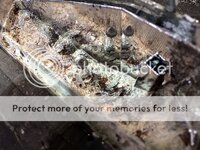
0153_zps6d78687c.jpg

But what is the cause of this? Some of you may ask... Well, Some bell end at 'Automotive lighting' the company who BMW Left in charge of designing the production of this lamp unit decided to make the main housing of the lamp from diecast alloy. Now any of you into engineering, electroplating or metals will know that if you chrome plate a non-magnetic metal (such as this alloy lamp unit) the finish is going to have a terribly short lifespan!
The poor quality alloy oxidises over time, lifting the surface of the chrome plating and leaving bits of Aluminium Oxide and flakes of chrome plating all over!

So next up was getting rid of the flakes of chrome and the aluminium oxide!
I did this using three methods - First of all our fixed polishing machine at work with a wire brush attachment, then an actual wire brush by hand with the housing clamped in a vice, then finally with a wire brush attachment on in a cordless drill.
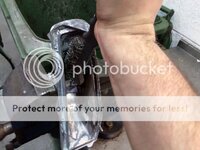
0154_zps1b6147d8.jpg
It took a fair bit of effort to get shut of all the oxidisation, but it got there in the end.

My next task was using a scalpel to remove all the remaining bits of glue/sealant from the lens units. I used some decent thick masking tape on the lenses to avoid scratching whilst handling them.
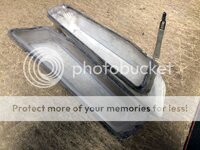
0155_zpsd9081d86.jpg

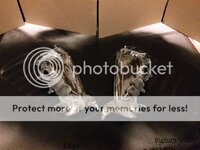
After a good clean and de-grease, the housings were then ready for painting.
0156_zps88672851.jpg

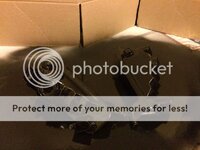
After four coats of direct to metal spray enamel, they were finally looking much cleaner and blacker.
0157_zpsdc9069e6.jpg

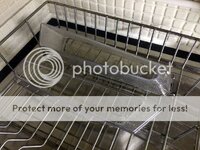
Next up was cleaning all the stuff out of the inside of the lamp lenses. I couldn't quite get them perfect, but did as good a job as I could using fairy liquid and a toothbrush.
0159_zps689d5e65.jpg

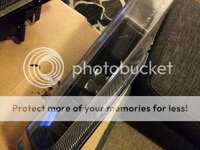
Once the paint had dried, I used a silicone rubber based adhesive sealant to bond the lenses back on. I re-applied some masking tape, applied the silicone sealant to the lamp unit, then pressed the two halves solidly back together.
I then used a couple of cable ties wrapped around the units to keep them held firmly.

36 hours later: With the cable ties cut, masking tape off, they came up quite nicely!
0158_zps3dcef7bf.jpg

Last step for now, was to re-fit them to the carrier brackets and bolt them all together.
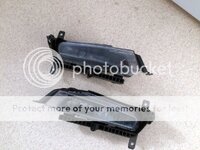
0160_zps87c132f0.jpg

Not 100% happy with the finish of them, I'm sure with more time and better prep, I probably could have got the paint finish a wee bit smoother - but they are looking a hell of a lot better than before!
Yes yes, I know, A bunch of you are probably gonna complain that I've painted a lamp reflector gloss black... With a degree in technical entertainment including theatre and studio lighting, I'm fully aware of the drawbacks of using a 'dark glossy colour' on a reflector. I understand that the light output will indeed be diminished by this, However - I never use fog lights and providing the light illuminates when they are turned on, the vehicle will pass it's MOT test.

Hopefully I'll get some pictures this weekend when they are back on the car!
 
Makes me feel ashamed I wrapped mine with Lamin X tint film :oops: .... Considering the fact that even if you were to purchase brand new sparkling new ones they would deteriorate in a few years, therefore your refurbishment is the best option long term :)

Painting the inner housing black will blend in nicely with your black paint work, you may have lost light output but in the real world doesn't matter IMO, can't remember the last time I even had mine on.
 
Yeah, that's it. I was hoping for them to look a lot more discreet as the front bumper looks miles better without the fog lights fitted!

Hopefully I'll get them back in place on Saturday, so I'll know by then if it works as planned or not!
 
The vehicle has covered 75,000 of motorway commuting mileage prior to me owning it.
With the never ending rain of good old' England, It's certainly taken it's toll.

Luckily the rest of the car is corrosion free! :)
 
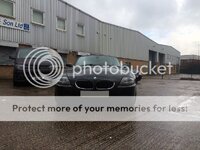
Finally got the fog lights fitted back in today.

Decided to go with some super 'scene' yellow fog light bulbs as yellow light apparently brakes fog better; that and they were free off a friend.
0161_zps0a6ac5c5.jpg

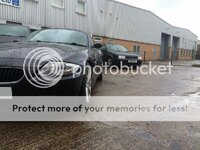
Really happy with the result, As you can see from these pics, It's quite difficult to see that the car even has fogs!
0162_zps3b20d4cb.jpg

Hardly noticeable at all from the front.
0163_zpsb67ef90f.jpg

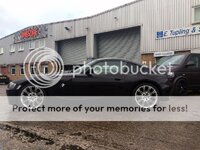
Whilst I was getting some pics, thought I'd show how it sits on the spacers! (12mm Up Front - No scrapes/rubbing)
0164_zpsff8d97ab.jpg

Looks loads better from the side too now that the springs have started to settle
0165_zpse7b7b229.jpg

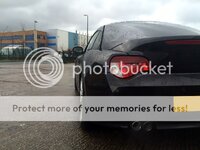
With the rear, I went for a 15mm Spacer, Absolutely no scrapes/rubbing, but I really wish I'd chosen 20mm.
0166_zpsfce8bf44.jpg

And the other side of the rear from above.
0168_zps41310547.jpg

Hopefully at some point this coming week I'll be borrowing the workshop for an evening and getting on with the job of doing the rear trailing arm bushes!
 
Z4M-2006 said:
Cars great..
Loving the project...

Cheers!

Z4M-2006 said:
Do you do Hunter alignment on a Saturday morning ?

It can be done. However it comes with warning! We book around 6 weeks in advance and have to take payment in full (too many people not turning up).

We don't like doing BMW alignment on a Saturday as the rear camber adjustment bolts have a habit of snapping, and that leaves us with a car on the ramp until mid/late Monday when we can get the replacement parts.

John002 said:
Following this also, well done looks way better :thumbsup:

Thanks John :)
 
Woo - Another nice delivery from the postman!

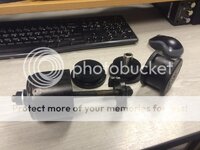
Today - My postman brought me a big black tool! Alright alright, get you're mind out of the toilet...
It's only a trailing arm bush removal tool...
IMG_5309_zpsooasumhj.jpg

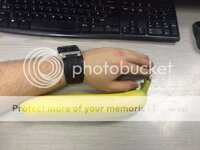
Although - Whilst in that frame of mind, check out the size of my banana!
IMG_5308_zpshedroym9.jpg

Sorry guys. It's Innuendo Tuesday...
 
Nice nana :P

Great looking car, I enjoyed the thread. Just a thought regarding the air filter. Is there not the chance that it has been replaced and it is a new one, its just been sat on a shelf since it was made?....
 
JimF said:
Nice nana :P

Great looking car, I enjoyed the thread. Just a thought regarding the air filter. Is there not the chance that it has been replaced and it is a new one, its just been sat on a shelf since it was made?....

It was a nice banana! I pealed it then sliced it up and ate it with chop sticks like sushi!

Thanks for the kind comments :)

Being in the industry and knowing the stock cycles of service parts for even the least common models, I really can't see it myself, but there is always that 1% chance! :)
 
Cracked on with the trailing arm bushes tonight. Again with my best guy Mike helping out!

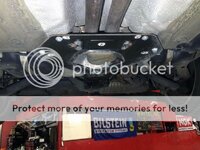
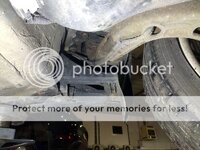
First up was stripping off the metal rear heatshield and the rear lower brace bars.
0170_zpshnznjp1d.jpg

Once this was done the plastic housing that fits against the sideskirt under the trailing arm bushes has to come off.
0171_zpsf4uj0l16.jpg

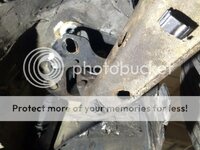
With that out of the way, we then loosened off the bolts holding the bush housing up to the chassis.
0172_zpswvo6qndu.jpg

Quickly followed by un-clipping and detaching the cables and clips that hold the brake pipes in position!
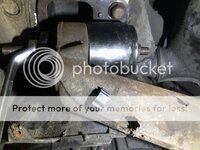
With that done, we could pull the arm down and set to work using my new big black tool to remove the bushes.
0173_zpspzl06ee2.jpg

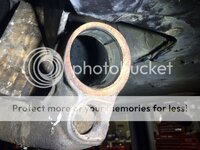
With the bushes removed, using a medium grade of emery cloth, I cleaned off the aperture of which the bush sits in and cleared it of any corrosion or debris!
0174_zpsqwpd18uz.jpg

The original bushes that came out were actually in pretty damn good condition! Far better than I expected for a 70,000 mile car, however the amount of play before and after was an absolutely huge difference!
0176_zpslzjaril5.jpg

With the Powerflex bushes lubed up handsomely I then pressed the outer one home by hand (easy) then after realising the inner one was a bit harder, used a few components of the big black tool to make a temporary press!
0175_zpse74dlpnx.jpg

Re-fitting everything back in position was relatively boring, so I didn't take any further pictures, however I have a video of the bush remover tool in action which I may pop up earlier depending whether it's any good or not!

We used tip-ex to mark the housings to try and get the alignment back as close to where it was as possible, but the car will be having a hunter laser alignment hopefully in the next couple of days, so that'll all be cleared up!

Really glad I went ahead and did these, despite not really needing them. - I'll report back with opinions once I've got the Hunter Laser alignment done!
 
nfbr said:
Being in the industry and knowing the stock cycles of service parts for even the least common models, I really can't see it myself, but there is always that 1% chance! :)

Ah yes I forgot you were in the trade!
 
Hunter Alignment tomorrow evening with a bit of luck!
Unfortunately a job I won't be tackling myself.
 
Back
Top Bottom