Newbie with a serious tuning disorder.

Managed to steal some time for my self and my project. So I pulled it on to the lift and started to remove complete rear axle. Fairly straight forward process as all standard setup. You'll have to excuse the workshop as kinda late and wanting to get home.71a38510658283f8be41d01f1afdce6e_zpszriqkvaa.jpg5e77334b7eb16a72b99a126c4e950c0c_zpsqzop8l9t.jpgccc86a9d8139b3f9af27d06efc202b02_zpsfporph7f.jpg
I've gathered most of the parts to complete the rear axle conversion to E46 M3. 07038ccc9e05b32b5bb1846642ac19ce_zps6tovfzie.jpg 8e8a9a638dcac79c959f58bbf98dcec9_zpshqj2wo6i.jpg
My brother popped in with my new bells and mounts that's just been hard anodised, so I've mocked up one of the fronts. I'm well impressed with the way the anodising has the factory look I'm always looking to achieve :D a9ed151e5a757ad28f056d8445c61c5d_zpsluphc2py.jpg243e9ce8d4ce43224642874e9ba5349c_zpswlcas4qs.jpg
 

Attachments

  • 71a38510658283f8be41d01f1afdce6e_zpszriqkvaa.jpg
    71a38510658283f8be41d01f1afdce6e_zpszriqkvaa.jpg
    133.8 KB · Views: 0
  • 5e77334b7eb16a72b99a126c4e950c0c_zpsqzop8l9t.jpg
    5e77334b7eb16a72b99a126c4e950c0c_zpsqzop8l9t.jpg
    122.7 KB · Views: 0
  • 07038ccc9e05b32b5bb1846642ac19ce_zps6tovfzie.jpg
    07038ccc9e05b32b5bb1846642ac19ce_zps6tovfzie.jpg
    99.7 KB · Views: 0
  • a9ed151e5a757ad28f056d8445c61c5d_zpsluphc2py.jpg
    a9ed151e5a757ad28f056d8445c61c5d_zpsluphc2py.jpg
    92.2 KB · Views: 0
I saw you painted your trailing arms.

It might be a good idea to apply some clear undercoating on them, especially on the area where that m logo is.
I also painted may trailing arms but after 6 months or so (few K miles, its a garaged non daily) that area already started to rust again. It gets a lot of stones etc.

After cleaning it up again and applying multiple layers of clear undercoating it's now still fine.

I used Tectyl glasklar (some valvoline product; it's like a clear laquer but more soft&flexible), but I don't know what you can get in the UK.

Did you make those front caliper brackets yourself?
 
simonlpearce said:
More and more excellent work. Love this thing!
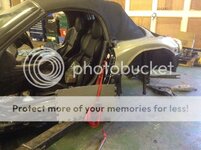
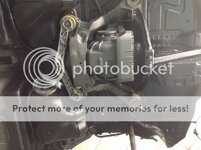
I'm trying my best Simon. Hoping to have rear end completed tomorrow, then I'll size the last part of prop and maybe able to take it round the block. Darn forgot I have to make up custom brake lines as aftermarket braided ones don't match my calipers.
 
Stevie.w said:
Hoping to have rear end completed tomorrow, then I'll size the last part of prop and maybe able to take it round the block. Darn forgot I have to make up custom brake lines as aftermarket braided ones don't match my calipers.

Who needs brakes :lol:
 
GuidoK said:
I saw you painted your trailing arms.

It might be a good idea to apply some clear undercoating on them, especially on the area where that m logo is.
I also painted may trailing arms but after 6 months or so (few K miles, its a garaged non daily) that area already started to rust again. It gets a lot of stones etc.

After cleaning it up again and applying multiple layers of clear undercoating it's now still fine.

I used Tectyl glasklar (some valvoline product; it's like a clear laquer but more soft&flexible), but I don't know what you can get in the UK.

Did you make those front caliper brackets yourself?
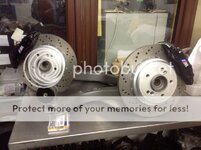
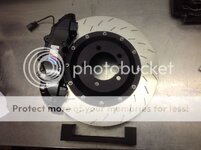
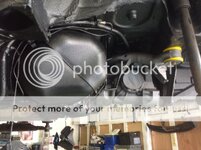
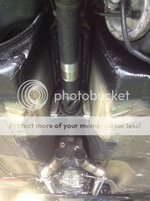
Yeh I did all the sizing up of the bells and mounts and had them machined then anodised. Often wonder if these custom setups are too much hassle tho. They may be a one of set but boy they ain't a cheap option :cry:
 
GaryT said:
Stevie.w said:
Hoping to have rear end completed tomorrow, then I'll size the last part of prop and maybe able to take it round the block. Darn forgot I have to make up custom brake lines as aftermarket braided ones don't match my calipers.

Who needs brakes :lol:
There's always the hand brake :driving:
 
Yesterday spent whole day'ish on motor and I prep'd the underside of the rear for its transplant to M3. So I made up new brake lines as original ones were showing signs of corrosion. Best done while subframe was out, then I prep'd the body work and coated it with Raptor bed liner for sound insulation. Rather nasty to work with but Wow is tough, can hardly put a mark on it. Certainly does what it says on the tin.
Once it had gone of I installed the rear subframe including diff, now I can complete the rear section of the prop and send it of for balancing. d4c2c2a7bab07db1068bef27a5824cb8_zpsaem7rj2l.jpg3e99939662cb91cc07c76cfb66003d67_zps5t1banuu.jpgea8003fe5aeafb0d29842711449d452f_zpsnvytfri2.jpg
After a bit of browsing I located a plate that I feel is perfect for the Z4, remember my business is SW Motorsport :) 75d79b14c687b3c8e0d70dcfeb1041a2_zpsqcgwhshk.jpg
 

Attachments

  • 3e99939662cb91cc07c76cfb66003d67_zps5t1banuu.jpg
    3e99939662cb91cc07c76cfb66003d67_zps5t1banuu.jpg
    111.6 KB · Views: 0
  • d4c2c2a7bab07db1068bef27a5824cb8_zpsaem7rj2l.jpg
    d4c2c2a7bab07db1068bef27a5824cb8_zpsaem7rj2l.jpg
    103.4 KB · Views: 0
Well things were going to plan concerning the custom prop, all mocked up and ready to be tig'd up as per pics. Then I thought let's start to put the rear end together for good. Mmm no happening, made a classic school boy error and didn't pre assemble the lateral arms on to subframe prior to fitting diff. Now need to drop it all down remove diff and fit them first before diff.
So now thinking yeh should have it all buttoned up tomorrow, but by now the old cogs were turning freely and thoughts of adjustable arms reared their ugly head :evil:. So if purchased I would have to go thru the same old procedure. Doesn't matter how much prep and organising you do there's always something to knock you down. 412277f5fbf47efcc33bae0402a254e6_zps8nrl9g5h.jpgc077797419545985836005418976079f_zpsfaxwz0mw.jpg589f8b341ee3286c36f02bc6748e8d1e_zpsizmqj8yh.jpg
The pics of the prop aren't great but it lets you see what's involved in making custom items. I normally call custom (grief)
 

Attachments

  • 412277f5fbf47efcc33bae0402a254e6_zps8nrl9g5h.jpg
    412277f5fbf47efcc33bae0402a254e6_zps8nrl9g5h.jpg
    150.2 KB · Views: 0
  • c077797419545985836005418976079f_zpsfaxwz0mw.jpg
    c077797419545985836005418976079f_zpsfaxwz0mw.jpg
    116.5 KB · Views: 0
Been looking at adjustable rear camber arms for the Z4 and e bay's littered with them. So thought I'd look a little further afield and came up with this company ECS tuning in the states. Their arms look very well made and from top grade materials.c85d5ea312625a6ed9cfedd23a776738_zps82nnwl30.jpg
Just wondering if any members have used these.
 
Well ECS camber arms arrived after 65.5 hrs from ordering them all the way from other side of the states :D
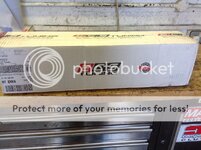
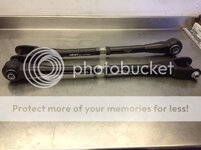
. They are a lovely bit of kit, especially as both bodies are billet machined and very stealth to go along with the whole project. fdf23de7093b81bb310558992c113bb4_zpsmuakkw7b.jpg4432cab9a5a13012182cba0cc7bd6750_zpspohicgng.jpg3c77bfcae3a321f85af006a8b806cd5a_zpspfrtlwf3.jpg
Time to progress and see if I can actually drive it this weekend :driving: Oh won't have panels fitted tho, so it'll probably resemble a Z1.
 

Attachments

  • fdf23de7093b81bb310558992c113bb4_zpsmuakkw7b.jpg
    fdf23de7093b81bb310558992c113bb4_zpsmuakkw7b.jpg
    125.3 KB · Views: 0
  • 4432cab9a5a13012182cba0cc7bd6750_zpspohicgng.jpg
    4432cab9a5a13012182cba0cc7bd6750_zpspohicgng.jpg
    90 KB · Views: 0
Yeh well impressive. Fed Ex priority which cost a whole $3 more than standard shipping. They send you a bill for import duty at a later date, not like other companies who want the cut before you receive goods.
 
Thought I had done my home work concerning the prop mod! Seems using machined inserts is a no no, I sent it away for balancing only to find it runs out by .020". Normally a prop will be within 0.001", so it's virtually scrap. Hopefully the guy doing it says he can machine both ends and make it a solid prop without centre bearing. I wasn't to keen on this route as BMW designed it with a bearing, but he assures me anything under 1.5 meters won't require one. Oh and it'll be way stronger.
Over the weekend I've completed the back end and made up custom brake lines as nothing out there that's compatible. I'll get some pics and post up.
 
So how do you extend (or shorten) a propshaft?

You cut it and use an inner sleeve, or is this outer measurement turned on a lathe and an outer sleeve fitted?

I'd say use an inner sleeve in slight oversize, heat the propshaft and cool the innersleeve, and crimp fit it in place. After that weld the edges.
 
Back
Top Bottom