You are using an out of date browser. It may not display this or other websites correctly.
You should upgrade or use an alternative browser.
You should upgrade or use an alternative browser.
Liam's Z4C race car project
- Thread starter Liam22
- Start date
Looks awesome Liam, and well worth the wait mate. :driving: I actually quite like the colour youve gone for, looks clean. exellent welding job , those seams look very nice indeed. How does it work over where you are? do you have to get FIA certification for the welding?
You just got me psyched up do do some more cable work on my car.
standing by while you piece it all back together.
exellent progress. :wink:
You just got me psyched up do do some more cable work on my car.
standing by while you piece it all back together.
exellent progress. :wink:
Got started on re-assembly.
Fuel tank back in. Wiring pulled through, tidied up, and wrapped in trunking. Was quite pleased when the car started but I have plenty of lights on the dash, including engine warning. I'll need to get a code reader on it, but there's no exhaust fitted at the moment and I don't want to upset the neighbours by running it for very long.
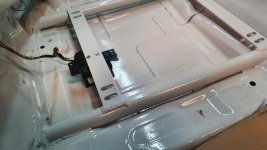
An unexpected hiccup was that the new seat mounts are in the way of where the ABS sensor sits. Modified the bracket so that I can hang it from the seat mount instead. Carefully measured the distance to the cross member so that it is still "square" in the car.
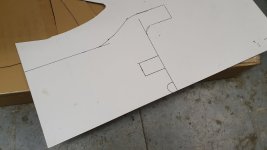
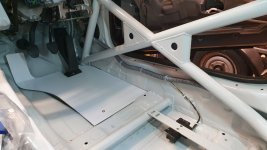
Made a new floor to take up the space where carpet should be. This is 6mm aluminium composite sheet which is stiff and light. I'll add some skateboard grip tape to avoid slippage. I may also need to bring the footrest further forwards but will wait until I've actually got the seat back in before deciding if I need to make adjustments.
The dashboard received some "butchery" to get it back in. Always difficult trying to remove the minimum amount to clear the roll cage while still leaving enough meat to mount securely. I also removed the entire inlay area, which will be replaced with a full width panel to mount switches, fire extinguisher handle, etc.
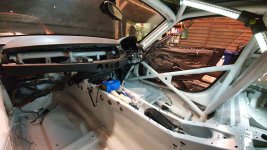
With the dash back in, I can now go about getting the windscreen replaced/refitted. Tempted by a heated item to avoid having to fit a custom demist solution.
The next big job is to overhaul the differential with a Kaaz 1.5 way LSD. Need to order new seals and bearings next.
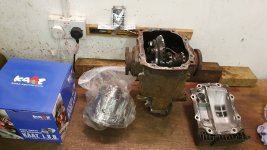
The BMW TIS is typically useless when it comes to actual instructions for rebuilding the diff and measuring backlash etc. Does anyone have any pointers for the real workshop manuals?
Fuel tank back in. Wiring pulled through, tidied up, and wrapped in trunking. Was quite pleased when the car started but I have plenty of lights on the dash, including engine warning. I'll need to get a code reader on it, but there's no exhaust fitted at the moment and I don't want to upset the neighbours by running it for very long.
An unexpected hiccup was that the new seat mounts are in the way of where the ABS sensor sits. Modified the bracket so that I can hang it from the seat mount instead. Carefully measured the distance to the cross member so that it is still "square" in the car.

Made a new floor to take up the space where carpet should be. This is 6mm aluminium composite sheet which is stiff and light. I'll add some skateboard grip tape to avoid slippage. I may also need to bring the footrest further forwards but will wait until I've actually got the seat back in before deciding if I need to make adjustments.


The dashboard received some "butchery" to get it back in. Always difficult trying to remove the minimum amount to clear the roll cage while still leaving enough meat to mount securely. I also removed the entire inlay area, which will be replaced with a full width panel to mount switches, fire extinguisher handle, etc.

With the dash back in, I can now go about getting the windscreen replaced/refitted. Tempted by a heated item to avoid having to fit a custom demist solution.
The next big job is to overhaul the differential with a Kaaz 1.5 way LSD. Need to order new seals and bearings next.

The BMW TIS is typically useless when it comes to actual instructions for rebuilding the diff and measuring backlash etc. Does anyone have any pointers for the real workshop manuals?
Which diff have you got? They don't, that's true, but with a bit of investigate sniff work you can figure it out. I plugged together a kit of my own. Though I did fluff up one or two of the bearings, which someone happily pointed my nose at. It's Def do-able. If you have the m diff, I can give you the part numbers you'll need.
Got some enjoyable jobs done today. Test fitted the seat so I could mark/measure for the belts. Needed to find the centre line of the seat for the crotch belts mounting points. So no sooner as the seat was in, I had to remove it again to drill holes for the harness eyebolts.
Crotch belts go through the floor, with spreader plates underneath.
Left lap belt goes through the transmission tunnel, with spreader plate (doing this now while the prop shaft is off the car).
Right lap belt mounts directly onto the OEM rear seat fitting (M8 thread).
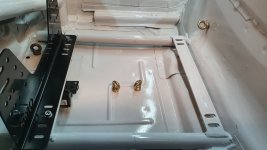
Then seat back in. Bloody fiddly job to get it firmly bolted into place and as far over to the LHS as possible. The centre line of the seat is actually in line with the steering wheel, which makes a nice change. But as you can see, the seat is right up against the transmission tunnel.
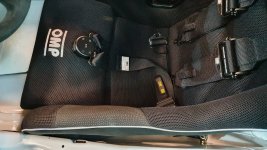
Adjusted all the belts for length and finished up by fitting a Momo steering wheel.
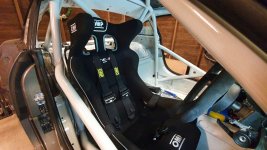
With the seat in its final position I realised that my foot rest is too far away. Removed and made up version 2, this one with added grip tape. Still needs 1-2cm removing to avoid snagging it when depressing the clutch pedal.
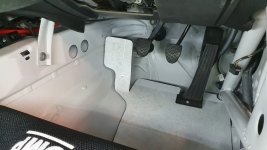
Crotch belts go through the floor, with spreader plates underneath.
Left lap belt goes through the transmission tunnel, with spreader plate (doing this now while the prop shaft is off the car).
Right lap belt mounts directly onto the OEM rear seat fitting (M8 thread).

Then seat back in. Bloody fiddly job to get it firmly bolted into place and as far over to the LHS as possible. The centre line of the seat is actually in line with the steering wheel, which makes a nice change. But as you can see, the seat is right up against the transmission tunnel.

Adjusted all the belts for length and finished up by fitting a Momo steering wheel.

With the seat in its final position I realised that my foot rest is too far away. Removed and made up version 2, this one with added grip tape. Still needs 1-2cm removing to avoid snagging it when depressing the clutch pedal.

Looks bloody awesome mate. :happyclap: I love that you took the seat into account into where it meets the door guards at the back. Perfect fit. Did you know that before hand and gave the cage builder the dimensions or thats just how it worked out? Pretty wide seat that.. Nice foot pedal Mk2. 
:wub:
No slider on your seat?
which anti sub straps are you using? the ones I have feel too thick and recon they would crush my nuts if I /ever/ did need them.
Awesome progress Liam, keep em coming mate.
Quick Q?, with your side intrusion protection from the cage, are you pulling the intrusion bars from the doors?
Vanne, I already had a seat but it wouldn't fit, so I searched for one with the narrowest upper width. Got lucky with the door bar bends - it was not by design!
No seat sliders. Kind of a no-no for racing purposes - heavier, weaker - although you can get some that will pass scrutineering. Proper race cars have fixed seats and movable pedals. I have some fore-aft adjustment on the side mounts.
I have these belts: https://www.msar.co.uk/race-harnesses/omp-lightweight-saloon-6-point-hans-harness-hsl.html
Make sure the shoulder and lap belts are properly tight, to avoid having to lean on the crotch straps!
These are the best harness fitting instructions. From Schroth, but apply to most belts: https://www.schroth.com/en/segments/racing/service/installation-instructions.html?file=files/schroth/pdf/installation-instructions/racing/eas-ab-2019/ea_8-2-qg_2019-10.pdf (PDF)
I bought some pre-cut door cards but have since decided to make my own. Not sure if I'll use carbon fibre sheet, or 3mm aluminium composite sheet. Kinda depends on cost/weight. PM me if you're interested in my spare ones.Wursle said:Its looking amazing! mines going in in may 8) what are you going to do for the door cards?
Fire extinguisher arrived so jumped on that over the last couple of days.
Got the bottle mounted on the only piece of flat floor on the passenger side.
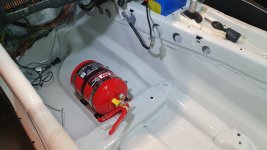
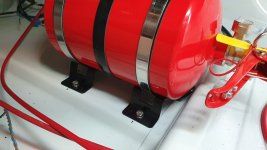
Secured with large washers underneath. Luckily didn't drill through any pipes!
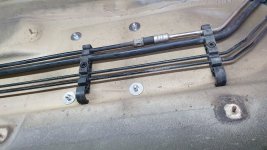
The extinguisher is operated through pull handles attached to cables. One external (for marshals) and one internal (for me). Always tricky to find good, secure mounting points that allow for a strong pull. Pretty happy with my choices here.
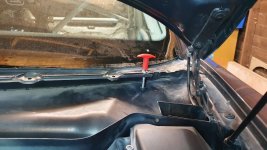
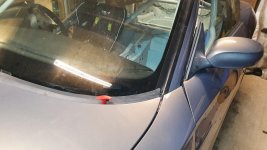
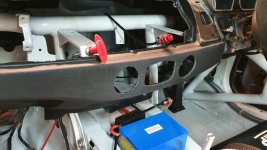
Then to the plumbing. 2 nozzles for the cabin, and 2 in the engine bay. Made some small brackets to position the nozzles in the right place.
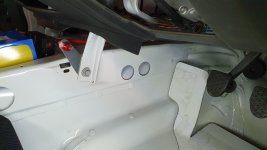
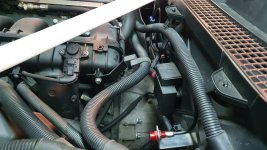
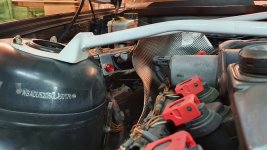
Got the bottle mounted on the only piece of flat floor on the passenger side.


Secured with large washers underneath. Luckily didn't drill through any pipes!

The extinguisher is operated through pull handles attached to cables. One external (for marshals) and one internal (for me). Always tricky to find good, secure mounting points that allow for a strong pull. Pretty happy with my choices here.


Then to the plumbing. 2 nozzles for the cabin, and 2 in the engine bay. Made some small brackets to position the nozzles in the right place.


Made a start on the front splitter this evening. I had a spare sheet of Buffalo board (plastic covered plywood). Used the plastic undertray as a template for some mounting holes and did a rough cut around the front. Will trim it back a couple of cm in the daylight.
The main work will be in the front mounting points, as when it is actually generating downforce it would pull the bumper off. Needs to be strong enough to stand on, which means mounting it from the front subframe. I have a plan but need to do some shopping for bits.
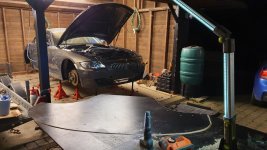
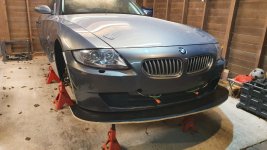
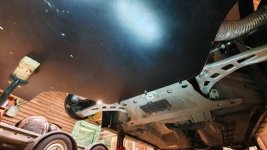
The main work will be in the front mounting points, as when it is actually generating downforce it would pull the bumper off. Needs to be strong enough to stand on, which means mounting it from the front subframe. I have a plan but need to do some shopping for bits.


Hi Liam,
What a fantastic project - I wish mine was as tidy !
A small point on the fire extinguisher outlets - I was advised recently by a good friend of mine - an ex F1 scrutineer and FIA technical delegate, that we should use all the outlets supplied by the extinguisher manufacturer as that is how they are homologated. Apparently using a different number can affect the flow and rate. Not sure how but that is what they said. I came across this when I had to change mine recently as the old one was too old to service. Having run for years with just one in engine bay and I in driver's footwell I now have 2 in engine bay, 1 in drivers footwell and one pointing at the fuel tank in the boot. The set came with 6 outlets so I may have to add the B pillar ones to the roll cage.
Just a thought as it would be a pain to have to add outlets once you are all closed up if the scrutineer's decide to look more closely.
My kit came with 4 nozzles https://www.f-e-v.co.uk/product/fes350mk/ and they're all fitted.
One point made in the instructions is that the pipework should be equal length to all nozzles for an even discharge. For that reason some of the pipework takes a deliberately long route to get to the nozzle.
One point made in the instructions is that the pipework should be equal length to all nozzles for an even discharge. For that reason some of the pipework takes a deliberately long route to get to the nozzle.