tintoverano
Active member
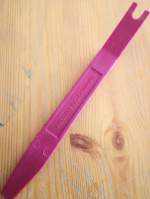
- what you need
- torx 10 screwdriver
- trim tool
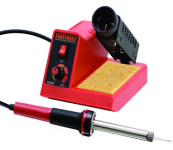
- soldering ironhttps://www.amazon.co.uk/28020-Fahrenheit-Analogue-Variable-Temperature/dp/B00HSJFKZ6?tag=z4fo-21 adjustable heat
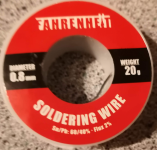
- soldering wire
- acrylic paints: baby blue, red (only need very small amounts and gloss doesn't matter, go for color match)
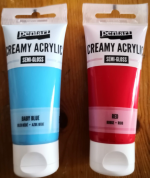
- paint brush, size 4 or 6
- 16 white SMD LEDs (buy 20 to be on the safe side)
- 4 blue SMD LEDs (buy 10 in case you would want stronger blue look)
[*]watch this video to get a feeling of the task ahead and see how to remove the cluster from the car
- don't bother removing the steering wheel, just lower it all the way down
- go to 2:15 (post editor doesn't like setting starting time)
[*]how to do it
remove cluster front and needles
- remove the 4 torx 10 screws from the cluster on the back
- using the trim tool remove the back cover (easier this way, than using a screwdriver)
- start on the right side, push the trim tool with the u-shape end into the clip and raise the cover
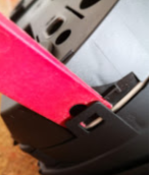
- repeat clockwise for the lower clips. do the top ones last
- IMPORTANT mark the position of the needles
- remove the 4 needles on the front using the trim tool as shown in the video (simply put a piece of paper under the tool, no need for taping)
- try not turning the needles while lifting upwards, so that their axes stay where they were, when you marked their position
prepare and paint the needles (so they dry out completely while replacing the LEDs)
- using the sanding paper remove the white film from the top and bottom parts of the needles completely
- paint only the bottom of the needles: bigger ones blue, smallers ones red
- also paint the part where the axis go into and around it, not only the needle part (sorry no pict), this will restrict the glowing effect around the axes
- this type of paint covers pretty good, but make sure you don't leave out spots, don't worry if the paint is thick
- don't worry about the sides getting paint, we'll remove it once the paint dried out
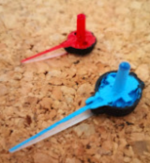
remove old and solder on new LEDs
- further disassemble the cluster as shown in the video, till you get access to the LEDs
- IMPORTANTmark the positives of the LEDs
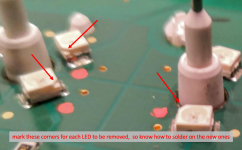
- turn on the soldering iron, set the heat knob to upright position (12 o'clock) and wait at least 10 minutes, higher temperatures can damage the LEDs
- remove the LEDs, indicated below on the pict, as shown in the video (tip: open the image in a new tab to see it in original size)
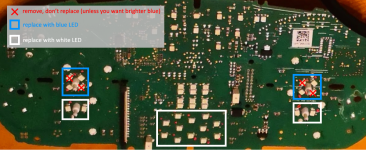
- solder on the new LEDs as indicated above on the pict, watch out for the marks you made earlier for the LED positive sides
- go to your car and connect the cluster to check that all LEDs lit up as expected
almost there, hang on
- assemble the cluster, so you can place back the needles
- by this time the paint on the needles dried out, better check to make sure
- the center part of the needle will have a different color, here's how to address (don't worry it'll look good, zoomed in on the pictures)
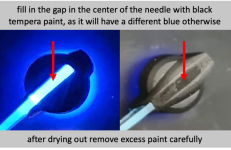
- clean the sides of the needles from excess paint, you can use e.g. a carpet cutter to scrape off the paint gently
- place the needles back, watch for their positions to match the marks you made earlier
assemble the cluster, put it back and turn on the ignition