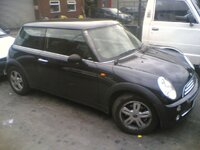
Fitted my c/f badges yesterday in the bloody freezing cold! Took a couple of hours in the end, but I was just being really cautious, and spent quite a lot of time on the bonnet one. Didn't take any pictures in the end, as went round to my parents to do it and forgot my camera. I think they look 8) and really freshen up the car.
My observations on fitting:
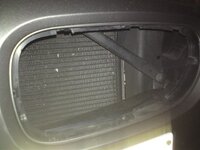
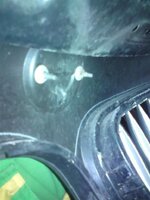
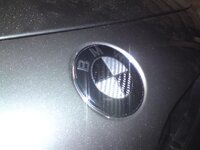
Bonnet - This is the most awkward one. The front grill removes quite easily by pulling the bottom first. You then need to get behind it and loosen the fittings, I had a bit of trouble with this but got there in the end. As mentioned elsewhere, the supplied badge is 73mm whereas the original is 70mm. Not having the luxury of a dremel, I used a manual file on the back and kept filing a bit off and trying it until it looked ok to my eye. I tried double sided foam to stick it, but this just raised it up again so used silicon in the end.
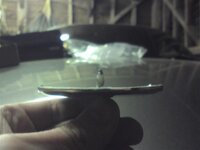
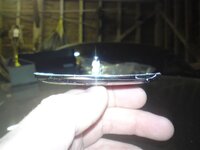
Side indicators - Just used a sharp knife to gently prise in between and cut the foam backing off. Not too difficult. I also found that I needed to file down the two plastic lugs on the indicator a few mm as they were stopping the new badge fitting flush. Clean, attach with silicon, then put masking tape round and left overnight.
Rear badge - As I have a coupe it is a bit different to the roadsters. The badge is the same size as the side indicators, and again is just stuck on with double sided foam. Used a knife again the cut the foam and gently prise off. Have to be careful here, as you are working right next to the paintwork and one slip with the knife could scratch your paint. Again here, I had to file down the two lugs behind the badge (metal this time) to stop them fouling. Used a towel to protect the paintword from the metal file. Used silicon here to seal and masking tape to hold until set.
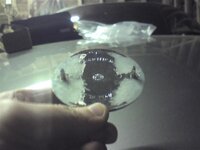
Wheels - These are a piece of cake. Pop out the whole inner fitting with a knife/screwdriver. The plastic piece that holds the badge is in two parts. Seperate, and take the old (slightly rusty in my case) badge out. Clean the plastic bits, peel the backing off the new badge, stick onto the bottom piece and clip back together. Push fit back into the wheel. You could probably do all four in a few minutes. One question - should they go a certain way up, in terms of them lining up with the little ///M badge on the wheels?
///M - Badges - (Sides and rear). Again really easy to remove as only held on by double sided tape. Clean the area. The only difficult bit here is refitting the new ones as there is no point of reference like for the round badges. I took some measurements of the existing ones before I removed them, and then just stuck the new ones on using a ruler and a spirit level to get them located correctly and level. Also had someone to help with this as an extra pair of hands is useful.
The only one I haven't done is the steering wheel, as Im a bit concerned prodding and buggering about with it having the airbag and reading the comments earlier in the thread. I may decide to leave the interior unchanged, unless anyone can convince me its relatively easy to do.
Noticed today that the door sills have red/blue ///M badges too, wondering if I should change those
Will post some pics when I get chance to take some next weekend.
My observations on fitting:
Bonnet - This is the most awkward one. The front grill removes quite easily by pulling the bottom first. You then need to get behind it and loosen the fittings, I had a bit of trouble with this but got there in the end. As mentioned elsewhere, the supplied badge is 73mm whereas the original is 70mm. Not having the luxury of a dremel, I used a manual file on the back and kept filing a bit off and trying it until it looked ok to my eye. I tried double sided foam to stick it, but this just raised it up again so used silicon in the end.
Side indicators - Just used a sharp knife to gently prise in between and cut the foam backing off. Not too difficult. I also found that I needed to file down the two plastic lugs on the indicator a few mm as they were stopping the new badge fitting flush. Clean, attach with silicon, then put masking tape round and left overnight.
Rear badge - As I have a coupe it is a bit different to the roadsters. The badge is the same size as the side indicators, and again is just stuck on with double sided foam. Used a knife again the cut the foam and gently prise off. Have to be careful here, as you are working right next to the paintwork and one slip with the knife could scratch your paint. Again here, I had to file down the two lugs behind the badge (metal this time) to stop them fouling. Used a towel to protect the paintword from the metal file. Used silicon here to seal and masking tape to hold until set.
Wheels - These are a piece of cake. Pop out the whole inner fitting with a knife/screwdriver. The plastic piece that holds the badge is in two parts. Seperate, and take the old (slightly rusty in my case) badge out. Clean the plastic bits, peel the backing off the new badge, stick onto the bottom piece and clip back together. Push fit back into the wheel. You could probably do all four in a few minutes. One question - should they go a certain way up, in terms of them lining up with the little ///M badge on the wheels?
///M - Badges - (Sides and rear). Again really easy to remove as only held on by double sided tape. Clean the area. The only difficult bit here is refitting the new ones as there is no point of reference like for the round badges. I took some measurements of the existing ones before I removed them, and then just stuck the new ones on using a ruler and a spirit level to get them located correctly and level. Also had someone to help with this as an extra pair of hands is useful.
The only one I haven't done is the steering wheel, as Im a bit concerned prodding and buggering about with it having the airbag and reading the comments earlier in the thread. I may decide to leave the interior unchanged, unless anyone can convince me its relatively easy to do.
Noticed today that the door sills have red/blue ///M badges too, wondering if I should change those
Will post some pics when I get chance to take some next weekend.

 Bet it looks much better
 )
) 


 :
: