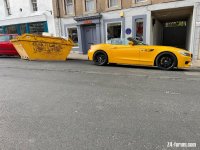
Atacama Yellow 35is build thread

Nanu said:
Should send the pics to BMW head office and it may persuade them to put Atacama yellow back on the options list. :thumbsup:

Imagine a G29 in that colour :roll:

Just can’t understand it…the Supra in a lovely yellow is made on the same production line in the same factory….
 
Well first limited shake down run to the local Chinese takeaway and I’m pleased…

Maybe a placebo effect but the change in front damping from almost no damping (whatever 20 clicks out is) to 9 clicks (one stiffer than recommended) means the front end is no longer nodding in left / right transitions.

The Conti Sports 7 are much better suited to the E89 than the MP4S..the steering has so much more feel and is better balanced…not as heavy at slower speeds (despite having a 245/35 rather than a 235/35 front tyre) but proportionally firming up with great steering angle…very nice.

Maybe the sizes are the perfect fit for the rims rather than being a tad overstretched on the 437Ms.

Getting there..much happier..
 

Attachments

  • D5C7746B-40D1-461F-BA72-0BB5789F36B6.jpeg
    D5C7746B-40D1-461F-BA72-0BB5789F36B6.jpeg
    242.7 KB · Views: 712
  • A331C816-88AE-418C-BC82-3E4F2FCEBDE6.jpeg
    A331C816-88AE-418C-BC82-3E4F2FCEBDE6.jpeg
    262 KB · Views: 712
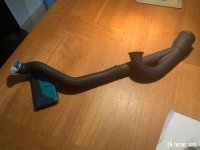
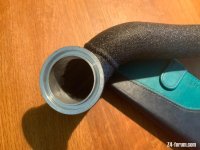
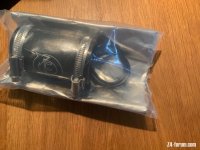
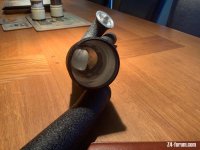
Finally after waiting for over 5 months my new VTT turbo outlet pipes have arrived.

https://vargasturbo.com/product/n54-aluminum-turbo-outlet/

These complete the plumbing required to take fresh air from the air filter box / dual cone intakes through the turbos and then out onto the inter cooler. I have a VSRF charge pipe to take the air from the inter cooler to the manifold ready to go plus the uprated piping from the airbox to the turbos.

The unavailability of these were one reason I halted the fitting of the TTE500 turbos as fitting all this plumbing is a real bitch and I don’t want to pay twice to open up all the pipe work.

In the flesh I’m surprised how small bore the turbo air outlets are..picture is an iPhone 12 Pro for scale.

So another goody for the winter upgrade program…
 

Attachments

  • 7B0177B3-ACA7-4FB6-95DC-73B04F711D2B.jpeg
    7B0177B3-ACA7-4FB6-95DC-73B04F711D2B.jpeg
    135 KB · Views: 664
  • D3F17FAE-4AC8-43EE-8752-1941BBD0B71A.jpeg
    D3F17FAE-4AC8-43EE-8752-1941BBD0B71A.jpeg
    119.2 KB · Views: 664
  • 0BC707A3-AE1B-488D-B5AA-927D48C4C39E.jpeg
    0BC707A3-AE1B-488D-B5AA-927D48C4C39E.jpeg
    127 KB · Views: 664
  • AF4DA529-A07D-4E4D-A089-EC531AC035CE.jpeg
    AF4DA529-A07D-4E4D-A089-EC531AC035CE.jpeg
    137.2 KB · Views: 664
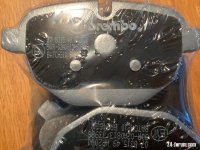
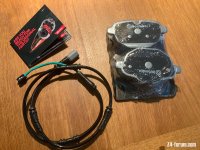
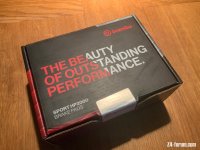
The same DPD man brought my new Brembo HP2000 rear pads for the 35is (has a larger rear disc than the 18i/20i/28/23i/30i)

They are another of the ‘ceramic’ marketed pads.

Nice quality feel of the packaging.

Interesting comparison calculator here..

https://www.racetechnologies.com/brake-pad-comparison

Will be interested to see how we get on with them, the rears are never as stressed as the fronts..but they do generate an awful lot of dust..they score well on that count..
 

Attachments

  • 19D07CFF-A94F-49D4-BBF8-DDCA9547A46D.jpeg
    19D07CFF-A94F-49D4-BBF8-DDCA9547A46D.jpeg
    154.1 KB · Views: 660
  • 88EE1508-7738-4D22-97C2-BBEB75960D0C.jpeg
    88EE1508-7738-4D22-97C2-BBEB75960D0C.jpeg
    190.4 KB · Views: 660
  • 44B201B7-92F0-46DA-8AF4-03274D36DC4D.jpeg
    44B201B7-92F0-46DA-8AF4-03274D36DC4D.jpeg
    124 KB · Views: 660
ronk said:
I’m looking forward to the Dyno’ run!

Yes Ron, once the ‘season’ finishes I’ll be tearing the old bits out and then the fun starts…

What’s your guess on the same dyno as I’ve always used for BHP and NM at the crank?
 
ronk said:
I really don’t know what torque figure to expect but BHP I suspect 425 (ish)

I think it’s going to be considerably higher..you will have to junk the air box though..

Looking good B21, how’s the handling now?
 
Love reading this thread even though I have no idea what everyone is talking about most of the time :?
 
ronk said:
I hope it is higher :thumbsup:
A pal has an Audi R3 and with some tweaks it’s running 490 ish

Those Audi engines are very impressive…but he’s already starting at 400 BHP as stock..

550 BHP at the crank is my target / plan …FWIW
 
ronk said:
550 BHP - that should do you well for a while!

It will be the end of the power development line….after that point it becomes power for only the pursuit of power and an arbitrary increase in various straight line performance characteristics that bear no relevance to a road based car.

The only subsequent refinements will be issues relating to drive ability ie spool up time, throttle response, power modulation.

I still maintain a 300 BHP N20 powered E89 will show a clean pair of heels to a 400 BHP 35is on almost all UK public roads that have a few corners …but I’ve now sold that puppy..

Just have to enjoy the torrrrrqqquuueeeee… :driving:
 
ronk said:
Would you return to a 300 BHP N20?
Now If I were a betting man :rofl:

If I could re-roll the dice then I wouldn’t have bought the 35is , a further iteration was that once I bought it, before I started spending big bucks on it then I would have sold it.

If the N20 E89 had been trashed for whatever reason I would have bought a second hand G29 M40i and started modding that.

However we are where we are…I’ve sorted almost all the issues you can sort out on a N54 E89 and I have enough high value parts to keep it going at little cost for at least 10 years and 100k miles…so it’s a keeper.

Makes sense? :tumbleweed:
 
Hi B21
Reading your thread with interest…. The bit about the outside lower grills to remove the silver section. If you’re bumper is the same as mine, I had my lower grills off to spray them gloss black , I didn’t take the bumper off. They are on clips that need pushing towards the radiator, taking them of is the easy bit , getting them back on is more difficult, I put the 2 side ones back first because that allows you to get some hand help in the centre hole , the middle bit going back is tricky ( especially after just painting them and not wanting to scratch them. I jiggled it behind the hole an pulled into place ( back towards you) with a hook type tool through the holes covered in a small bit of cloth so not to damage the paint , some swearing later it was back in place. As I say , maybe your bumper is different to mine, but I thought this might help
 
Dave 2 dogs said:
Hi B21
Reading your thread with interest…. The bit about the outside lower grills to remove the silver section. If you’re bumper is the same as mine, I had my lower grills off to spray them gloss black , I didn’t take the bumper off. They are on clips that need pushing towards the radiator, taking them of is the easy bit , getting them back on is more difficult, I put the 2 side ones back first because that allows you to get some hand help in the centre hole , the middle bit going back is tricky ( especially after just painting them and not wanting to scratch them. I jiggled it behind the hole an pulled into place ( back towards you) with a hook type tool through the holes covered in a small bit of cloth so not to damage the paint , some swearing later it was back in place. As I say , maybe your bumper is different to mine, but I thought this might help

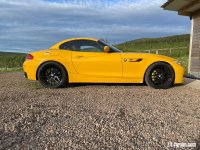
Hi there, thnx for the tips..in the end the tech guy managed to unclip them using a similar technique. My paint guy advise against spraying the grills as he felt with the grill like texture getting the paint to key may prove problematic so I decided to leave them as they were.
 
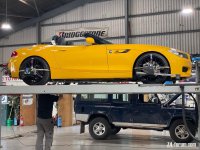
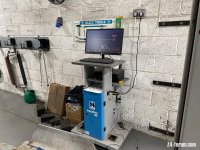
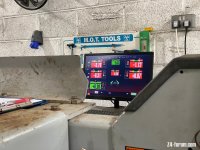
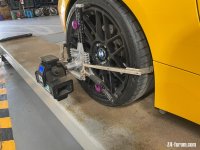
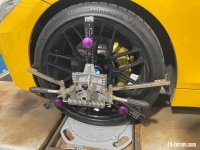
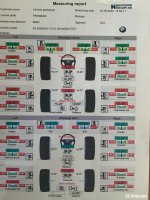
Visited the 4 wheel alignment centre to check on the alignment…bit surprised to find that despite only a very modest lowering effect of the new Ohlins suspension that it was sufficient to mean that the cambers couldn’t be brought into full alignment.


Guys use the next generation alignment tools that make lasers look passé..

So will need to get adjustable rear lower camber arms and a set of camber plates for the fronts..bit of a pisser but that’s what happens when you start serious modding..
 

Attachments

  • C88E8478-6D0F-4602-88ED-685CDB5E936F.jpeg
    C88E8478-6D0F-4602-88ED-685CDB5E936F.jpeg
    172.3 KB · Views: 877
  • 69854FD4-5E0C-48B4-B1FC-922DC02D692A.jpeg
    69854FD4-5E0C-48B4-B1FC-922DC02D692A.jpeg
    266.7 KB · Views: 877
  • 52B621F0-76C7-4809-A397-4766103B298A.jpeg
    52B621F0-76C7-4809-A397-4766103B298A.jpeg
    190.7 KB · Views: 877
  • 676815EC-93F5-431B-B2E6-00DB40457D26.jpeg
    676815EC-93F5-431B-B2E6-00DB40457D26.jpeg
    149.4 KB · Views: 877
  • 756D28C6-82B8-4DE8-89D3-C99525D8C557.jpeg
    756D28C6-82B8-4DE8-89D3-C99525D8C557.jpeg
    164.4 KB · Views: 877
  • 39ED6C3D-049C-48F9-BF2A-5B52A98EE924.jpeg
    39ED6C3D-049C-48F9-BF2A-5B52A98EE924.jpeg
    134.5 KB · Views: 876
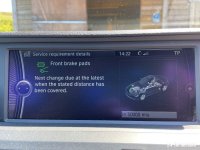
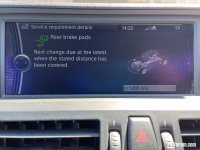
I think its fairly well know that E89s tend to wear their rear pads out quicker than the fromts.

However was suprised to see the rear brake pad light come on with a predicted remaining 1,200 miles as we were doing the alignment check..

The discs and pads were on my 20i for a while along with the 6 pot brake kit which leads it by a couple of thousand miles of wear.

So rear pads about 7,000-10,000 miles..front pads 60,000 miles..

Just shows how hard the DSC unit is working especially on a 400 bhp variant..
 

Attachments

  • 2022-06-04 14.21.34.jpg
    2022-06-04 14.21.34.jpg
    159.2 KB · Views: 845
  • 2022-06-04 14.21.18.jpg
    2022-06-04 14.21.18.jpg
    159.8 KB · Views: 845
Back
Top Bottom