What have you done to your car today?

1536Z4 said:
SqerrNipz said:
new gear knob.

Nice job :thumbsup: Where did you get the gear knob as I need to change mine to black .

Thank you :)

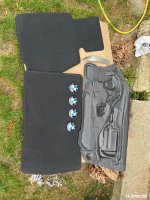
I bought mine from ebay - https://www.ebay.co.uk/itm/274933646501?mkcid=16&mkevt=1&mkrid=711-127632-2357-0&ssspo=tKtukwOJTG6&sssrc=4429486&ssuid=clSSYJBtT4i&var=&widget_ver=artemis&media=COPY

Feels a real quality product, genuine leather and the branding on the box is ‘youstar motorsport’. They have their own ebay store by the looks of it, but this seller was cheaper :thumbsup:
 
SqerrNipz said:
Finally finished interior bits! Leather coated dash and console trims, plus the door handle covers. Sprayed centre plastics matt black (

20230816-122742.jpg

Would love to know how you got that trim around the gear stick removed. Have heard you need to strip a lot of parts of to get to it.
any videos/guides you can point us to?
ta.
 
chanlon1 said:
SqerrNipz said:
Finally finished interior bits! Leather coated dash and console trims, plus the door handle covers. Sprayed centre plastics matt black (

20230816-122742.jpg

Would love to know how you got that trim around the gear stick removed. Have heard you need to strip a lot of parts of to get to it.
any videos/guides you can point us to?
ta.

The actual plastic trim around the gear stick is simply held in with clips and can be prised out. The centre console trim is a bit of a nightmare and involves removing the entire rear storage compartment and then lifting out the entire centre tunnel plastics. The trim is held on underneath with 27 screws! There’s a really good guide on ‘pelican parts’ with images to help. Just google ‘Z4 centre console trim removal’ and it should come up. The guide is for a Z4M but exactly the same in mine. Rob (Usel) was a great help with advice when doing mine. Give yourself a good couple of hours to do it, it’s frustrating but I managed it so I’m sure you can :D

Drop me a PM and I’ll help out if I can :thumbsup:
 
SqerrNipz said:
The centre console trim is a bit of a nightmare and involves removing the entire rear storage compartment and then lifting out the entire centre tunnel plastics.

That's what I was talking about!!
Thanks for the insights....It's something I would like to tackle at some point....just need to psych myself up for it!
 
Seat referb coming along nicely, not a great photo.. but ready for lacquer tomorrow which should seal the finish and give them a Matt appearance

IMG_1649.jpeg
 
j3nks79 said:
Looking good. It’s a real satisfying job doing this.

Not sure if you’re talking about the previous interior work, or my seat referb post.

If it’s the latter then yes it is, but the airbrush is a bit of a faff with regular clogging etc. I might just have been unlucky with the kit I received, but as with anything patience and perseverance is key.

I think it might be because the compressed air cans are only just powerful enough for the viscosity of the coloured paint, which is fairly thick. Would probably have been a lot easier with a mini compressor.

I’m going to have a good look at them this morning, and I’m hoping it’s now onto the lacquer stage and that will be thinner! :)
 
True-Blue said:
j3nks79 said:
Looking good. It’s a real satisfying job doing this.

Not sure if you’re talking about the previous interior work, or my seat referb post.

If it’s the latter then yes it is, but the airbrush is a bit of a faff with regular clogging etc. I might just have been unlucky with the kit I received, but as with anything patience and perseverance is key.

I think it might be because the compressed air cans are only just powerful enough for the viscosity of the coloured paint, which is fairly thick. Would probably have been a lot easier with a mini compressor.

I’m going to have a good look at them this morning, and I’m hoping it’s now onto the lacquer stage and that will be thinner! :)

I didn’t use an air gun just the old fashioned sponge. Changed to cinnamon. Takes a long time but we’ll worth it.
 
j3nks79 said:
True-Blue said:
j3nks79 said:
Looking good. It’s a real satisfying job doing this.

Not sure if you’re talking about the previous interior work, or my seat referb post.

If it’s the latter then yes it is, but the airbrush is a bit of a faff with regular clogging etc. I might just have been unlucky with the kit I received, but as with anything patience and perseverance is key.

I think it might be because the compressed air cans are only just powerful enough for the viscosity of the coloured paint, which is fairly thick. Would probably have been a lot easier with a mini compressor.

I’m going to have a good look at them this morning, and I’m hoping it’s now onto the lacquer stage and that will be thinner! :)

I didn’t use an air gun just the old fashioned sponge. Changed to cinnamon. Takes a long time but we’ll worth it.

Did you apply the clear coat with a sponge too?
 
True-Blue said:
j3nks79 said:
True-Blue said:
Not sure if you’re talking about the previous interior work, or my seat referb post.

If it’s the latter then yes it is, but the airbrush is a bit of a faff with regular clogging etc. I might just have been unlucky with the kit I received, but as with anything patience and perseverance is key.

I think it might be because the compressed air cans are only just powerful enough for the viscosity of the coloured paint, which is fairly thick. Would probably have been a lot easier with a mini compressor.

I’m going to have a good look at them this morning, and I’m hoping it’s now onto the lacquer stage and that will be thinner! :)

I didn’t use an air gun just the old fashioned sponge. Changed to cinnamon. Takes a long time but we’ll worth it.

Did you apply the clear coat with a sponge too?

Yes and had the hairdryer on it after every section that I coated.
4468450E-EB0F-4105-9837-6896B111C0D8.jpeg
 
New goodies day,
looking for recommendations for fixing foam barrier to the door,I recall enuff_zed recommending something in an old thread but can’t find it.
 

Attachments

  • image.jpg
    image.jpg
    290.6 KB · Views: 922
j3nks79 said:
True-Blue said:
j3nks79 said:
I didn’t use an air gun just the old fashioned sponge. Changed to cinnamon. Takes a long time but we’ll worth it.

Did you apply the clear coat with a sponge too?

Yes and had the hairdryer on it after every section that I coated.
4468450E-EB0F-4105-9837-6896B111C0D8.jpeg
:thumbsup:

Excellent, in hindsight probably easier than faffing with the spray canisters, although I am really pleased with the finish
 
Third coat of lacquer applied, will leave overnight to dry thoroughly before reinstalling in the car tomorrow at some point. Struggling to take decent photos, but Pretty happy :)

IMG_1659.jpeg
 
New rear badge put on.
Decided against buying OEM, and picked up an AliExpress special for £9 including p&p.
Said it was from a sender in France, but actually came from England.
Will see how long it lasts before needed replaced......

IMG_9850 Large.jpeg
IMG_9849 Large.jpeg
IMG_9852 Large.jpeg
 
Finally got around to fixing my wing. This got damaged way back in 2021 and local body shops wanted nearly two grand to fix it. Knowing I could get a new wing for cheaper I went looking for a Maldives blue on. But they're like hens teeth. A year later the z4 forum came to the rescue as per usual and honestly so grateful! Special thanks to Ben for messaging me out of the blue saying he had one, and then buying it out of good faith when I didn't respond straight away, knowing I'd need one.
I fitted it a few weeks ago but only just getting around to posting here.
 

Attachments

  • IMG20230623171153.jpg
    IMG20230623171153.jpg
    272.7 KB · Views: 847
  • IMG20230623124655.jpg
    IMG20230623124655.jpg
    283.7 KB · Views: 847
  • IMG20230623093911.jpg
    IMG20230623093911.jpg
    214.5 KB · Views: 847
Dr. Zed said:
Finally got around to fixing my wing. This got damaged way back in 2021 and local body shops wanted nearly two grand to fix it. Knowing I could get a new wing for cheaper I went looking for a Maldives blue on. But they're like hens teeth. A year later the z4 forum came to the rescue as per usual and honestly so grateful! Special thanks to Ben for messaging me out of the blue saying he had one, and then buying it out of good faith when I didn't respond straight away, knowing I'd need one.
I fitted it a few weeks ago but only just getting around to posting here.

That must be satisfying after all this time :thumbsup:
 
£40 on an MOT on the Z4 E85 after treating the underside to a coating of Lanoguard yesterday.
Passed with 'No Advisories' once again this time around. Pleasantly surprised with the emmission results, all looking good for another year.
Only sorted the exhaust downpipe bolts and replaced a post cat exhaust sensor this year and did 932 Miles between MOT Tests.
 

Attachments

  • MOT Emissions 2023.jpg
    MOT Emissions 2023.jpg
    64.6 KB · Views: 763
Back
Top Bottom