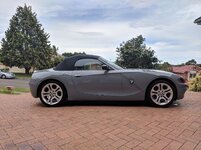
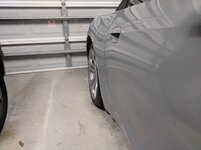
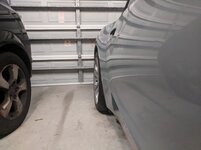
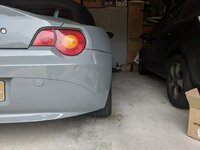
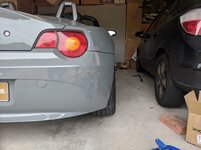
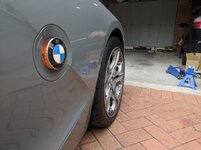
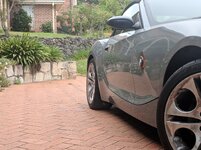
Tomrdy's Nardo grey 3.0i (Thank you and farewell!)

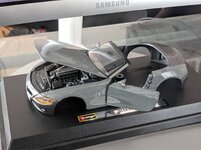
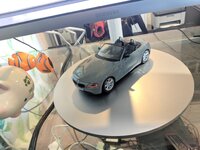
Got gifted a 1:24 scale model of the Z from a friend for secret santa!

He bought it in the colour of my car not knowing that I had wrapped it (ha!). He looked a bit nervous earlier in the day when he saw my car and asked "... is that... not the colour it was before??" :P

Welp, only one thing for it I thought... this weeks distraction from work.... :D

YTWkrex.jpg
 
Looks nice! Good job! How does the wrap stick to the car - is it heat or glue? If it’s heat I assume it leaves your paintwork nicer than glue?
 
Definitely not my best wrapping lol. It's actually quite hard to wrap because theres nothing to tuck the edges into.

Excuse my disaster of a study room... :P

JqG7MOM.jpg

uHi8Htt.jpg
 
Looks fantastic and very realistic. Great job, well done! Have you wondered how the front of your house might look with a wrap. :) Actually there is a bridge near you which could do with a makeover before New Year. :D
 
BeeEmm said:
Looks fantastic and very realistic. Great job, well done! Have you wondered how the front of your house might look with a wrap. :) Actually there is a bridge near you which could do with a makeover before New Year. :D
Haha if I'm ordering that many rolls of wrap for the bridge maybe I'll get a discount! 4-5 rolls should do it :rofl:
 
Quick update on the car as I suppose this is now a diary instead of strictly about the wrap!

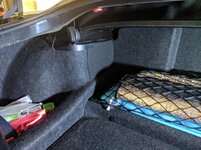
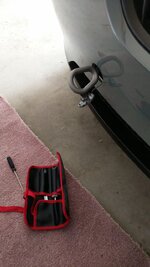
Got a replacement emergency kit as mine was missing from previous owners

xXWcdnL.jpg


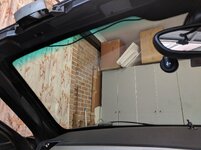
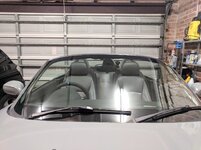
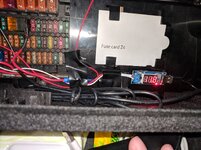
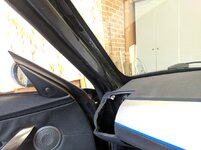
Hard wired in my dashcam. Line is run along the A pillars and into the fusebox on the passenger (LHS) footwell area.

V1mKTrz.jpg

hjCISQE.jpg

40t9FDp.jpg

wa0GFbI.jpg

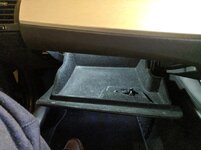
Also wired in a cheeky LED into the glove box (hooked in with the interior lights).

r2csEqD.jpg


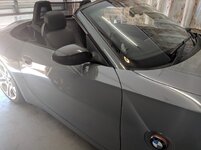
Gloss black plastidipped my mirrors. I have planned to try using Autodip instead but seeing how this plastidip holds up since I sprayed it already.

XUkLww0.jpg

bOMb9Yp.jpg


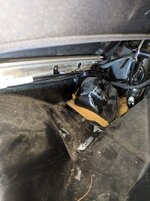
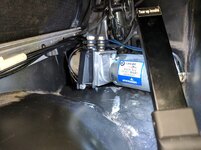
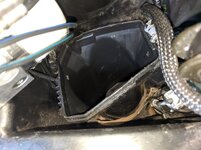
Did the roof motor relocate! This was a pretty annoying job to do just because of the contortionist style positions you need to be in!

Here's some pics in case there's a helpful angle for someone else when they're searching (I know i tried to find lots of pics myself before starting).

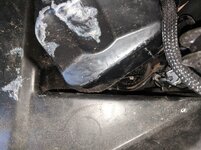
Mine had some foamy stuff around it.

39j89gn.jpg

Foamy stuff removed

XcSCq7W.jpg

I found the best way (for me at least) to take off the top cover (of the motor housing) was to stick my arm in from the passenger side (LHS). This way I could pull upwards instead of having my arm in a weird non-leveraging way from the boot.

UVt113s.jpg

With the top cover off, you still won't be able to pull the motor out all the way to the boot as the lines are looped UNDER the lower housing. This is how far you'll get:

8hCJvn9.jpg

YqqF75I.jpg

You'll just need to man-mode it and rip that F***KER out with all your strength (if your tab isn't broken like mine). It took me 2 hours of meddling - trying to locate the cable tie; use a camera to navigate etc.... - then just gave up and decided to just absolutely wring at it. Turns out that was the best way. There's no tips here really just... yank it as hard as you can until it breaks!

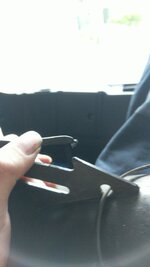
This is the clip/hoop you're trying to break off:

4Ob45uo.jpg


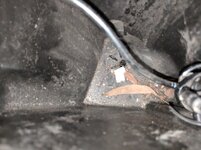
Here's the drain hole UNDER the housing:

GjTvyfA.jpg


After that it's just a case of following the instructions that forum pioneers have written :)

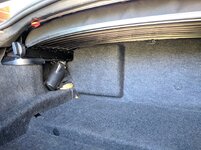
I reused my lower housing to sit the motor. Still need to sort out a piece of carpet trim but it's working great!

LPbWr3Y.jpg


And my most excited up-coming thing is... a new soft top!

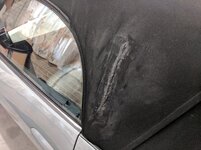
My car had a tear in it that was patched by the previous owner and I've somehow lived with it for the past few years. It constantly bothered me as I am quite a fastidious person - my previous car that I had from new was (pridefully) kept absolutely immaculate inside and out. Reason I didn't do it before was there just didn't seem to be any guides on how to replace the soft top (just the skin and not the entire roof). But somehow the other day while trying to search again, I found a PDF from Autotops that a member on Zpost had posted. Don't know why this thread never came up on my search in the past! Link here (https://www.zpost.com/forums/showthread.php?t=968789)

So I ordered a Sierra one and it'll be here in a few weeks from the US. To say I'm excited is an understatement!

Here's what it looks like right now:

UUfrYJT.jpg


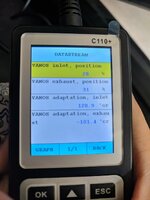
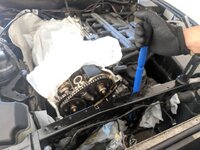
But before I can get to the top when it arrives, I need to sort out my VANOS service which I have been avoiding like the plague. I have run some basic diagnostics with my C110 and it does appear there's NO advancement/retardation of the cams which I am assuming means its borked (as expected).

G3m8tvA.jpg

The adaptation angles never move - not a nth - while the position % do vary but very abruptly. It would be on 31% and suddenly drop to 0% when I off throttle after WOT and back to 31%. No idea if that's normal either but regardless, this will be a cool experiment to see if this cheap diagnostic tool can be used to preliminary check VANOS function. I will of course check it again after I have replaced the seals to see what the readings change to.

Would be really disappointing and awkward if... nothing changes :rofl:
 
Good to see some photos involving the hood motor relocation. Keen to try it out on my Z4.

How comes you removed the top cover? I thought everyone goes from underneath the parcel shelf, without touching anything above? Only reason I ask is because I removed that cover last year to replace my rear shock absorbers, so will do it again if that makes the job easier, but I'm also aware that they are quite difficult to remove :lol:
 
Felix79 said:
Been a great read thus far, well done with all the different jobs you've managed.

Thanks :) when I bought this car I had an intention to try and do everything DIY as a means of pushing myself a bit so hopefully the list of completed jobs keeps growing!

ben g said:
How comes you removed the top cover? I thought everyone goes from underneath the parcel shelf, without touching anything above? Only reason I ask is because I removed that cover last year to replace my rear shock absorbers, so will do it again if that makes the job easier, but I'm also aware that they are quite difficult to remove

Ah so I did do the relocate as per "usual" - removed the parcel shelf and spent most my time in the boot. The shelf has to come out if you are to do the relocate no other way!

Maybe my post wasn't clear but I only went from the front to get better leverage to unseat the parts (top cap, motor, lower casing). I just couldn't get the right leverage from the boot side with my arm squeezed in. Maybe I have weak wrists and forearms :lol: after I unseated everything I continued to remove them through the boot.
 
Well done Tom, my son has a signage business and they do a few wraps on cars so I can appreciate the challenges you would have faced. Great way to get to know your car. Great reading and good hints re the roof motor.
 
tomrdy said:
Felix79 said:
Been a great read thus far, well done with all the different jobs you've managed.

Thanks :) when I bought this car I had an intention to try and do everything DIY as a means of pushing myself a bit so hopefully the list of completed jobs keeps growing!

ben g said:
How comes you removed the top cover? I thought everyone goes from underneath the parcel shelf, without touching anything above? Only reason I ask is because I removed that cover last year to replace my rear shock absorbers, so will do it again if that makes the job easier, but I'm also aware that they are quite difficult to remove

Ah so I did do the relocate as per "usual" - removed the parcel shelf and spent most my time in the boot. The shelf has to come out if you are to do the relocate no other way!

Maybe my post wasn't clear but I only went from the front to get better leverage to unseat the parts (top cap, motor, lower casing). I just couldn't get the right leverage from the boot side with my arm squeezed in. Maybe I have weak wrists and forearms :lol: after I unseated everything I continued to remove them through the boot.

Ah OK, that makes sense. I did wonder how people manage to do everything from inside the boot :lol: think I'm going to give this a go myself also, so appreciate the photos and tips :thumbsup:
 
ben g said:
Ah OK, that makes sense. I did wonder how people manage to do everything from inside the boot think I'm going to give this a go myself also, so appreciate the photos and tips

No worries! It's a pretty annoying job especially because I was doing it in 38 degree heat but ultimately worthwhile and satisfying for the long term :)

One extra thing to look out for is to clip as many cable ties as you can (reasonably) to free up the lines. I had one that I missed and I had already pulled the motor out. I later saw when I had the camera in there that I left a tinnnny kink in a line where it was still pinched with a tie. I did cut it (the tie that is) and it evened itself back out but just something to be cautious of.

Haggisman said:
Well done Tom, my son has a signage business and they do a few wraps on cars so I can appreciate the challenges you would have faced. Great way to get to know your car. Great reading and good hints re the roof motor.

Thanks Haggisman it was definitely a big challenge and you're right - helped me learn more about how the car is put together as you can see how bits are put together behind all the bumpers and fairings. Just a simple example is the rear parking sensors. I'd have no issue replacing those in the future if they needed doing :P
 
VANOS seal replacement job DONE!

Did this spread over 2 days and had some head scratch moments with figuring out the right tools to use (https://z4-forum.com/forum/viewtopic.php?f=2&t=111640) but got there in the end!

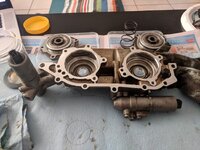
My seals were definitely gone so I'm glad I did this. Pistons in the chambers were very loose, especially the motor/cam side (that goes into the cover plate). I could pick the cylinders off and out of the plate without the plate leaving the table! That's how loose they were!

EpqmgR5.jpg

I was prepared to loosen the engine mounts but didnt end up needing to. I could pry on the subframe. One thing that no one seems to detail is specifically HOW to pry except to do it against the water pump. I wrapped my bar with some foam where it would touch the pump's center to help it grip and also protect it a bit from marring.

mOQQw97.jpg

The way I did it was i held the vanos in my left hand, and kept intermittently tugging on the pry bar. Every time i pried, I had my hand on the bottom inside of the vanos unit and try to push the bottom edges off the 2 longer studs. These arent neccesarily the ones that catch, but I realised that if you could get those 2 off, you can then rotate the vanos anti-clockwise which would let you get the furthest left (looking at the motor from front) stud off which is the one that can't clear due to the bulk head.

Car turned on without a hitch and idled perfectly. Did a short drive to check everything ran smoothly and all seems well. Coolant light did come on but that is expected as I hadn't topped up yet.

Will run the car for a few weeks and see how it goes as wlel as check the C110 numbers.

Glad this job is DONE though :rofl:
 
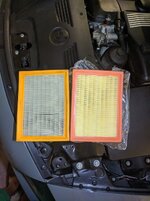
When the clean side of your airfilter starts looking like your dirty side, probably a good time to change!

ALE4Tlu.jpg

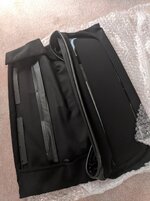
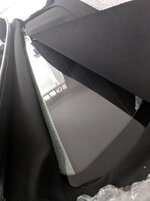
Also my new soft top arrived! Going to wait for some more downtime before I start cracking on with this (and probably non 40c heat waves in Aus) but sooo excited to finally not have a grubby torn roof!

On a quick inspection, the quality of the top looks great. One thing to note, the window seal on the Sierra tops is not the same as original - it doesn't have the edge moulding on the outside the same way but looks very tidy.

F5Dzgzf.jpg

ZQ5PlDp.jpg
 
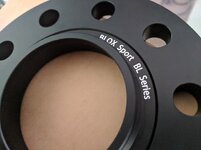
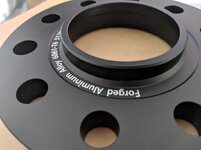
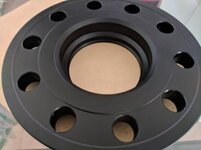
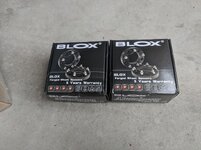
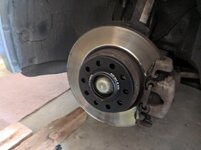
Received my Bloxsport spacers earlier in the week and finally got around to fitting them!

Went for 15mm/20mm set as most on the forum seem to use.

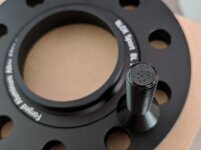
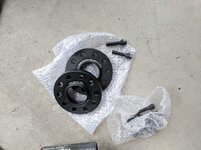
Bloxsport is a chinese brand which may put some people off. Quality of these though look top notch. Came with 12.9 rated bolts as well (I was expecting 10.9) which is cool and they also contacted me before shipping to confirm lug lengths needed. FYI: My standard lugs were 24mm.

Some pics of the hardware:

tdChlfO.jpg

lIn0XYl.jpg

ytj4xBv.jpg

57yrM0I.jpg

Packaging must be old as it says they're 10.9 grade bolts.
Nw5fqoj.jpg

4ugGyDi.jpg

Fitting was pretty straight forward though a set of seized lugs on the last wheel turned this <1 hr job into 3 with multiple trips to the tool shop.... tried to undo with my tyre iron and heard my shoulder crack - figured this wasn't worth it so went and bought an impact wrench (215nm). Impact wrench was too weak. Returned it. Bought a 600mm breaker bar. How did I live without a breaker bar in my garage??!! Rough calculation with my body weight (i think i did it right this time Guidok!) was the lugs needed over 325nm to break the seize.

WgkTvvf.jpg

Before:

aUwhKBY.jpg

+20mm

vs4MKYg.jpg

Before

UQMHcq7g.jpg

+20mm

vY6tLq3.jpg

The fronts look like they might scrub if you go any wider.

VvwkdE8.jpg

6cUabtH.jpg

Very happy with the result. You could say it's a subtle change, that vastly improves the aesthetics of the car. Car drives totally the same - perhaps there would be an impact at the limit on the track - but I think the Z4 is more capable than I am brave so realistically, no change to me!

Also finished up the roof motor relocate with a piece of carpet trim :oops:

6tcAqOR.jpg

Next up is to replace my soft top and the car will be mint :)
 
Back
Top Bottom