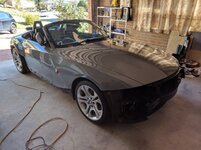
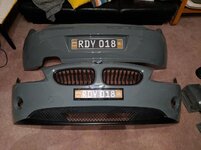
Tomrdy's Nardo grey 3.0i (Thank you and farewell!)

Marlon said:
Well with all the skills you've learned it will be easier when you wrap it a second time :D
Looking good btw :thumbsup:

Ahhhh I don't think my fingers can take a second time for a while lol!

Thanks :D
 
Magicarcher said:
Great writeup. what make of wrap did you use?

He's said in a previous post 'Carbins' from AliExpress. Just search on the website it's easy to find :thumbsup:

Great thread OP, loving your work. I wonder how long those wheels are going to last in their current form?! :lol:
 
Brilliant, honest write up. Personally I think the colour looks good. :thumbsup:

Hope you do still like it when you have finished?
 
JamieZ4C said:
Magicarcher said:
Great writeup. what make of wrap did you use?

He's said in a previous post 'Carbins' from AliExpress. Just search on the website it's easy to find :thumbsup:

Great thread OP, loving your work. I wonder how long those wheels are going to last in their current form?! :lol:

The wheel-photoshopping has already began..... 3 weeks ago :rofl:

RustyZ4 said:
I do have to admit, it clashes with your curtains :D

hahah dammit I thought no one would notice them. Those curtains were put up like 10 years ago as a temporary fix to block out the direct sunlight on my other car.... "temporary" :P

Magicarcher said:
Great writeup. what make of wrap did you use?

Here's the link to the listing I purchased from: https://www.aliexpress.com/item/Carbins-high-glossy-cement-gray-car-vinyl-wraps-film-5-65-6ft-roll-size-best-price/32581039143.html?spm=a2g0s.9042311.0.0.40824c4dpwuJSy

There's a lot of other listings that are cheaper but are probably an identical product. I went with them Carbins though as they seem to be "branded" at least and are the only ones with reviews and 99% feedback (others ranged from 93-96%).

..

Shooting for the passenger door today. I'm hoping it will go a lot faster since I've done the other side already!
 
AveZ4coop said:
Brilliant, honest write up. Personally I think the colour looks good. :thumbsup:

Hope you do still like it when you have finished?
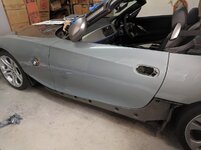
Thanks! I keep finding myself ducking into the garage to ummm & ahhh at the colour lol. I think I'll like it... I think.
 
UPDATE:

So in the last few days finished up the passenger side door (door handle as well but don't have a pic for some reason).

FOvfY2I.jpg

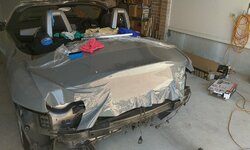
Next I finished the hood.

QYgStu4.jpg

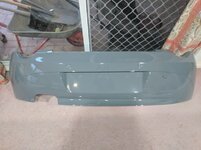
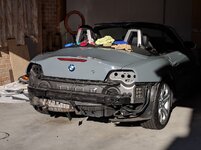
And then... I decided to tackle what I suspected to be the hardest piece - the rear bumper.

I figured it would be hard because of the recess in the licence plate area and spent quite a bit of time umming, and ahhing about how to tackle it.

I tried laying a test piece on and trying to stretch it in but the vinyl tore and also the amount of stretch meant the other areas would be a nightmare.

I tried laying it as 2 pieces and cutting the upper piece along the middle horizontally to fit in and cover the underside. This was OK but it was too hard to cut straight.

In the end, I decided to do it in 3 pieces.

- Piece for where the licence lights go
- Lower piece with knifeless tape cut along the bumper line
- Upper piece cut along the same bumper line

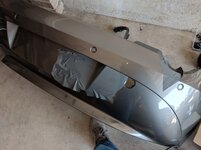
GUUYRT4.jpg

I laid the bottom piece first as having the top bit lip over would make it more invisible due to the way the light would bounce instead of having an exposed edge facing up (thank you Youtube vinyl gods!).

This was actually heaps hard to wrap. I cut a straight edge for the middle and laid it in since it was such a severe angle, if you tried to push anything in there it just looked bad and would also cut but. But then this meant all stretch would shoot towards the sides after the angle change at the end of the licence plate area :headbang:

But got it done in the end! :thumbsup:

r2o7XzH.jpg

Then I laid the under piece where the lights go. Didn't take pics of this because... well you cant really see it.

Then tested out how the seam would look. Unless you get your face right up to it, its not visible so OFF WE GO!

381BntK.jpg

FnSEwdH.jpg

VVkZO6F.jpg

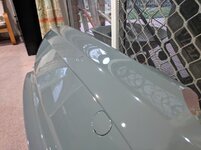
I haven't cut out the parking sensors. I tried laying over and also taking them out to lay separately. The latter was much worse because it meant when you pushed teh sensors back in, you could bubble up some of your tucks in the hole.

So I've just done it over it and just shaped it in. I'll leave them uncut for now as it looks pretty clean :rofl:

Now just have....

- Front bumper
- Boot lid
- Rear taillight frame
- Tail light french tries
- Mirrors x 2
- A pillar
- Sideskirts
- Redo front right quarter as that was my very first one ... and it got real contaminated and has bad cuts :oops:

Seeing the bumper in the colour i am 100% sure ... that i'm going to LOVE IT :D Excited to finish but if I"m honest, pretty over the actual doing part. Gotta.. just.. keep... going.
 
Fantastic work and a credit to your skill, knowledge and patience. Is that colour similar to Porsche's 'Crayon'? If so it will look terrific in daylight.
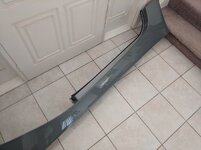
 
Superb 👍🏻 Looking forward to seeing the finished article.
 
Looking good! Others have talked about painting/wrapping a zed this colour but it never happened so well done for actually seeing it through
 
I for one can't wait to see this finished! I love threads like this and seeing the passion and skill that some members are willing to put into their cars.

It's looking great, keep going! :thumbsup:
 
The 'primer grey' finish is not for me but loving the thread and the skill and dedication involved.
 
BeeEmm said:
Fantastic work and a credit to your skill, knowledge and patience. Is that colour similar to Porsche's 'Crayon'? If so it will look terrific in daylight.

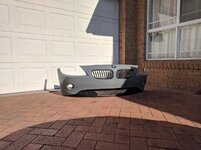
Haven't seen that colour IRL but from pics this is a bit darker!

Thanks guys I WILL see this through!
 
So... close... thumbs... so.... sore... haha.

All panels are done now! And I even redid the front RH quarter which was my first panel (yes its loads better now 8) )

A little bit unfortunate with the boot - though I knew this going in - but the peeled clear coat area still shows up at a certain angle + lighting conditions - tried to get a pic of it but failed... that's how faint it is. I did sand it down till I couldn't feel any lip with my fingers but I think I really needed to fill it over with some primer + sanding. Not going to be super anal about this as you really gotta be looking for it (me) to see it... and I have enough wrap to redo it if it bothers me later... though lets be real here, who can bother (probably future triggered me) :P

Some pics:

y9M5K9v.jpg

aWQYCeA.jpg

uMQai5r.jpg

Be3x284.jpg

vmPeZXX.jpg

Only things left to do now before reassembly (I'll prioritise stuff that will let the car be put back together and drivable first)...

- Rear taillight surround (will knock this out today)
- Install halo light into headlights (will do this today)
- Give the exhaust tips a bit of a clean and polish while bumper is off
- A pillars (and changing the weather strip while I'm at it! Some came off yesterday when I was fiddling with it... looks like it's going to make a mess)
- Side mirrors

___

Side note:

One thing I would like to mention is this Carbins vinyl wrap from what I've read and they claim, is pretty much just 3M wrap - and that's not necessarily a good thing. I read a lot of people have issues with 3M and the glue lines and this wrap I have is no different. Glue lines EVERYWHERE!!! Quite frustrating because it mainly happens when you heat + stretch a certain way. With the last panel I did, I tried to avoid that as much as possible but some areas just really need a bit of heat stretching to get it done and half the time will leave a sexy (not) glue line. Might be installer error but it just shows that it's not that noob-friendly.

I'm ok with this as it was my first go and I figured whatever but if I was to do the car again, I'd definitely look into one of the other brands like Vivvid or Avery.
 
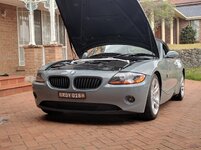
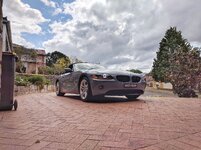
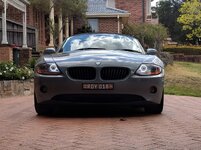
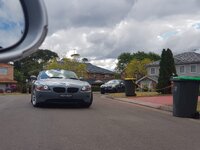
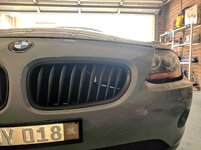
Annnd we're DONE!

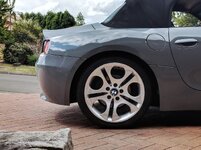
Pulling it back on the drive, absolutely in love with it! Desperately needs a B12 kit now to drop it down a notch now though!

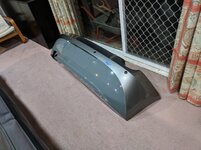
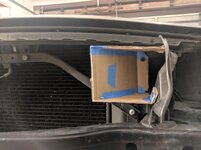
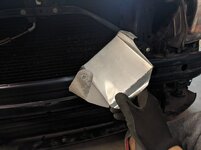
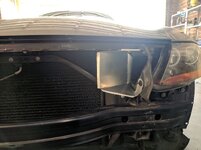
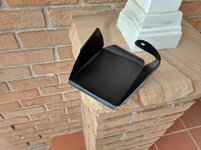
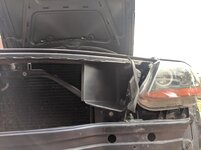
Also made a cheeky intake scoop for kicks (see below).

Some pics of the nardoooo:

9oTRmLK.jpg

zBAjTm4.jpg

Luy7meE.jpg

WHAn3oa.jpg

qfTj7Gs.jpg

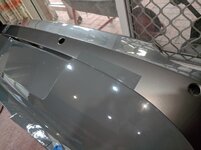
The scoop kind of was just a random evening while I was working on the wrap. Spent about 20-30 mins messing around with some cardboard and wasn't going to actually make it but yesterday, I decided might as well since the bumper was off and access was easy.

I tried to keep everything as flush as possible (which involved a lot of trimming of the aluminium sheet) but left a gap at the bottom incase there was a tonne of water. Main reason I did it is because I plan on switching to a Pod and building a heat shield/box - figured going that route would mean the intake would lose some of the vacuum effect that the OEM box has with the snorkel so a bit of air redirection should hopefully keep fresh air flowing in.

ZIZrrmu.jpg

QBifP80.jpg

f6Wy0CG.jpg

nZwUw6K.jpg

Covered it in plastidip because that was 1) All i had around the garage, 2) rubber/plastic so it's more OEM? :P
MKSgLMZ.jpg

VpYIred.jpg

I literally couldn't say if the scoop makes any difference in power (I personally think not - also not the reason I made it) because I've been driving around in a 120HP automatic Astra for 3 weeks so a push bike probably feels torque too :P

So happy that it's finished now though and I have my life back (lol). Definitely not perfect but looks pretty good in pics so I'm chuffed :rofl:

Thanks for all the encouragement in this thread! I'm glad I did it :D
 
Waaayyyy! Well done mate, cracking job!

Good work with the scoop too. Really looks the part once sprayed.

Yeah, B12 will improve the look. What are your ideas for the wheels?
 
JamieZ4C said:
Waaayyyy! Well done mate, cracking job!

Good work with the scoop too. Really looks the part once sprayed.

Yeah, B12 will improve the look. What are your ideas for the wheels?

Thanks! Not sure yet I think I will lower the car first and see how it looks. My epiloids have sort of grown on me. Originally wanted to go dark wheels with the nardo but the silver feels pretty clean
 
Back
Top Bottom