JamieZ4C said:There is more than one way to take a mold of a part. Either from the outer face or the inner face, also called a male or female. If someone did want them made out of Carbon Fibre the face would be made up of four layers of CF that would only be 1mm thick. So behind the CF you would have additional layers of thicker reinforcement. The tabs could be 3D printed then fixed to the Aero side skirt with a two part industrial epoxy.Ladderman said:Already looked at that. Either I buy a set next time some come up for sale & take molds off them. Or the other alternative is to model out of clay. Iv'e watched a few videos, but thats a skill set on it's own.
If you've got time watch this video https://youtu.be/WlMykXbwOto
[/quote
That clay bumper was impressive, but 670 hrs :-o
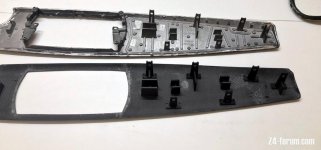
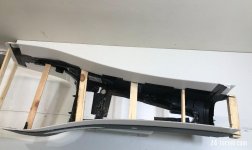
Not sure how successful taking molds would be with all the tabs and so on.
I often wondered if they could be 3d scanned and a mold printed from that, even if it was in parts? (bear in mind my knowledge in these matters is beginner at best!)
There is a process call photogrammetry that I will be trying at some point, that is a form of 3D scanning. An actual hand held 3D scanner can cost thousands & are out of my range.

You are using an out of date browser. It may not display this or other websites correctly.
You should upgrade or use an alternative browser.
You should upgrade or use an alternative browser.
Roadster interior strip out & carbon fibre replacement
- Thread starter Ladderman
- Start date
I hope they turn out great cos I can see how much work you’ve got to do. Are you going to mold the shape, then set in Fibreglass with a gel coat to skin CF on to? Some people use drywall jointing compound to make molds cos it’s easy to sculpt.PDJ said:Or As I am in the process of doing slowly modify some standard ones and carbon skin them
Also are you trying to create the Aero design, or your own interpretation?
Ladderman said:I hope they turn out great cos I can see how much work you’ve got to do. Are you going to mold the shape, then set in Fibreglass with a gel coat to skin CF on to? Some people use drywall jointing compound to make molds cos it’s easy to sculpt.
Also are you trying to create the Aero design, or your own interpretation?
I am using the green easy composites green foam board glued to the original then shaped the shape will be my own as I want to try and add a side splitter type profile and only have ideas in my head and some internet photos to work from then using the easy composite carbon skinning system cover them and then part paint them to blend in
Just hope they turn out ok
As I've Already mentioned to another member, you could try molding with clay to sculpt & modify the form. The clay is air drying. so until you are finished you need to keep it moist.
The advantage of using clay is if you mess up the shape you can always add more or less , until you get it right.
This is the type I mean.
This is just one opposition to consider. Stick with it & I'm sure you'll get there in the end
The advantage of using clay is if you mess up the shape you can always add more or less , until you get it right.
This is the type I mean.
This is just one opposition to consider. Stick with it & I'm sure you'll get there in the end
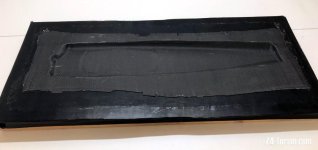
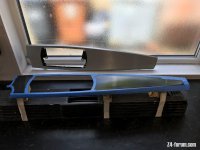
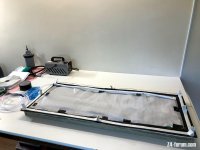
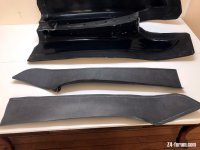
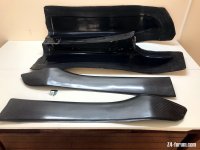
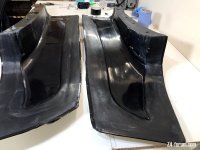
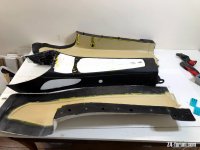
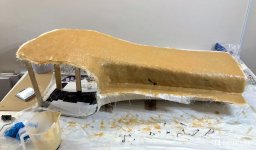
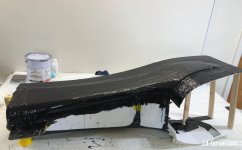
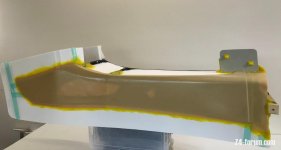
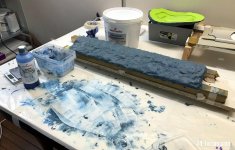
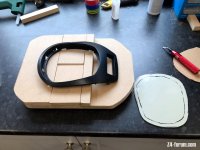
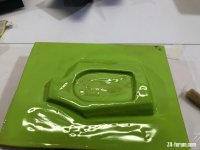
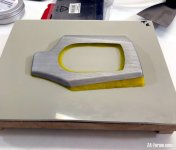
Hi all. I'm going to start by saying sorry for not keeping members up to date with whats been happening. When I started with this projected I never imagined how hard it was going to be. Instead of learning the basics first I thought I'd be making quality parts from the off, but how wrong I was :x Everything takes much longer than I anticipated. There is massive amount unforeseen work that goes in to making the molds for each part. This involves adding flanges, draft angles to help the mold separate from the the part cleanly. Then create a highly polished surface on the mold.
They say "you learn by your mistakes". Well I've done a lot of learning I can't count how many failures I had in the beginning. Then to make matters worse I had a bad allergic reaction to the epoxy resin. My eyes & lips swelled up for about two weeks. It turns out my Hyper sensitive to epoxy resin, so I now have to use a full face respirator & disposable coveralls.
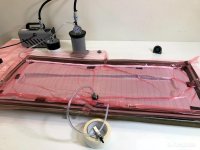
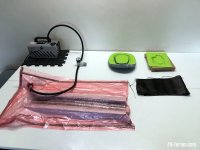
It took me a few attempts to master Resin infusion. The main problem is making sure when you pull a vacuum there is no air leaks. Also you have to make sure that there is no bridging in the corners of the mold because you will end up (resin rich) in those areas. This courses bubbles in the resin due to av exothermic reaction.
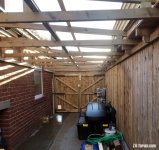
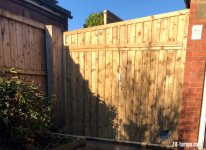
I am still going ahead with all my plans to do carbon fibre parts. But I have to put things on hold til after Christmas, cos I need to finish building an extra workshop. This workshop will be were I do all the dirty work such as sanding the molds & carbon fibre parts. I will also spray the clear coat in this area too.
They say "you learn by your mistakes". Well I've done a lot of learning
I can't count how many failures I had in the beginning. Then to make matters worse I had a bad allergic reaction to the epoxy resin. My eyes & lips swelled up for about two weeks. It turns out my Hyper sensitive to epoxy resin, so I now have to use a full face respirator & disposable coveralls.It took me a few attempts to master Resin infusion. The main problem is making sure when you pull a vacuum there is no air leaks. Also you have to make sure that there is no bridging in the corners of the mold because you will end up (resin rich) in those areas. This courses bubbles in the resin due to av exothermic reaction.
I am still going ahead with all my plans to do carbon fibre parts. But I have to put things on hold til after Christmas, cos I need to finish building an extra workshop. This workshop will be were I do all the dirty work such as sanding the molds & carbon fibre parts. I will also spray the clear coat in this area too.
Attachments
-
 IMG_3935.jpg211.2 KB · Views: 1,010
 -
 IMG_3925.jpg172.3 KB · Views: 1,010
 -
 IMG_3905.jpg189.1 KB · Views: 1,010
 -
 IMG_3901.jpg170.1 KB · Views: 1,010
 -
 IMG_3900.jpg131.6 KB · Views: 1,010
 -
 IMG_3892.jpg81.8 KB · Views: 1,010
 -
 IMG_3883.jpg115.5 KB · Views: 1,010
 -
 IMG_3877.jpg58.8 KB · Views: 1,010
 -
 IMG_3853.jpg96.7 KB · Views: 1,010
 -
 IMG_3851.jpg77.8 KB · Views: 1,010


")
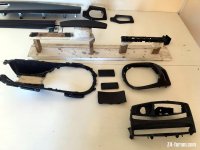
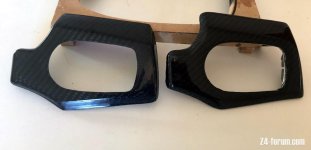
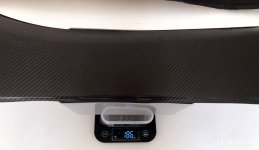
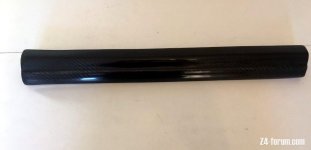
My plan is to offer a variety of different versions of the same part. This could be a skinned original part, a full carbon fibre replacement, or a offset carbon fibre cover. I think the covers will suite a lot of people who want a easy fitment. I can make an offset mold of virtually any part. I'm using my Z4 interior at the moment, but i'll be buying extra trim when the opportunity arises. I also want to have ago making forged carbon fibre parts too. I will be clear coating all my parts with 2K in either gloss or mat finish.
I will be buying a Prepreg oven next year, then hopefully that should limit the contact I have with epoxy resin. Prepreg is defiantly the best way forward for me to guarantee the best finish possible.
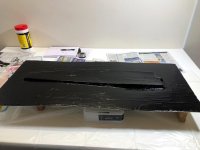
Just want to add. A lot of the skinned parts that are in the photos are not competently finished. The ashtray has just been skinned & needs another four coats of XCR resin. The other parts need their final flat & clear coat. I'll do some better photos when they are finished & back in the car.
I will be buying a Prepreg oven next year, then hopefully that should limit the contact I have with epoxy resin. Prepreg is defiantly the best way forward for me to guarantee the best finish possible.
Just want to add. A lot of the skinned parts that are in the photos are not competently finished. The ashtray has just been skinned & needs another four coats of XCR resin. The other parts need their final flat & clear coat. I'll do some better photos when they are finished & back in the car.
Wow, just read this thread back. Next level devotion right there, awesome
I’d sure be interested in a number of specific parts, so looking forward to the finished products.
Glad to hear you’ve recovered from your epoxy-encounter! I’ve worked with the stuff a number of times back when I was a student, repairing boats at our local rowing club. It can be really nasty :|
I’d sure be interested in a number of specific parts, so looking forward to the finished products.
Glad to hear you’ve recovered from your epoxy-encounter! I’ve worked with the stuff a number of times back when I was a student, repairing boats at our local rowing club. It can be really nasty :|
cheers Barty. I was gutted when it first happened, it’s a pain in the backside having to wear a full face respirator. I might invest in a positive air pressure version that feeds air into the mask. They are not cheap, but they have a major advantage over respirators.Barty said:Wow, just read this thread back. Next level devotion right there, awesome
I’d sure be interested in a number of specific parts, so looking forward to the finished products.
Glad to hear you’ve recovered from your epoxy-encounter! I’ve worked with the stuff a number of times back when I was a student, repairing boats at our local rowing club. It can be really nasty :|
It’s good to know that guys are interested in buying some parts. Any feedback on preferred parts will be much appreciated.
 Loughborough
That looks amazing, I am always in awe of people who can do really clever stuff. just think of the ferrari forums where owners have to pay thousands of pounds for small bits of carbon fibre trim.