My little project Z4 2.0 Sport..

Ok, been busy with work but just a little update.

I've now done around 200 miles in the 2.0, and the abs fault is 100% fixed!

Dentman out on Tuesday, so I'll get some pics, before, during and after.

Got to do something about those front fogs to tidy them up, and managed to bag a bargain mint wind deflector, as the one that came with it is broken in several places so falls out. Gave £40 for one with no brackets as the car already has them, which I think was a bargain.

One the dentman has worked his magic I'll be splitting the 108's after removing the tyres.

So the next decision is, oem colours for the wheels or a darker spider or rim? I really like [ref]bz4kev[/ref]'s finish, BUT I think that may not suit a lighter car, thoughts welcomed?

Mike
 
I'd go OEM colour on the 108's - personalising it with darker shades could narrow the potential market if / when you move it on.
 
I thought I'd got sticky steering but it was cured by Andyfanshawe resetting the steering angle sensor ( I think that's what it's called) give him a PM .
 
Brilliant!! Seriously good work Mike.

Nice to see another 2.0 facelift out and about. But I'm not biased at all.

Good write up. Keep us informed.
Andy.
 
Eddy Matthews said:
Nice post, will follow it with interest...

Been thinking of ditching the CDV on my Z4 2.0 - I'm tired of the kangaroo like take up when trying to pull away quickly in 1st gear, and the notchy change into 2nd. I believe that removing the CDV cures both of these issues?

I only need to figure out how to get the car far enough up of the ground to get at it, as my trolley jack is too high to get under the car and ramps are useless as the car is too low to drive up onto them :thumbsdown:

Regards
Eddy

Bring it down to me in Chesterfield! Up on the lift. 5 mins later and voila! Have a cuppa while you are here.

Andy.
 
bladeowner said:
john-e89 said:
Ducklakeview said:
Cheers John!

Can you remember which way to turn the ring to "loosen" the gears up a little?


Mike

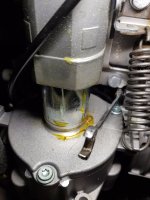
Scratch a marker between the ring and the motor housing Mike, then you’ll know where the ring sits from the factory. It’ll only turn approx 10mm clockwise IIRC, but approx 3/4 way round anti clockwise. Turn it clockwise, you only need approx 3mm, any more it’ll be too loose, but it’s a bit trial and error, I’ve heard people turning them 10-15mm but that’s extreme I think, try 3mm and go for a run. I think it’s the crown and pinion gears tightening as they get warm from the foot heater, mine was very bad, but only after about an hour with the blower on. Let us know how you get on Ok.

I already had tried the drill and grease method but moving the ring is the cure in my book. As John says it's trial and error. I tried 5mm at first on mine but it wasn't enough and so I went a bit more around 8-9mm. You can see which way to move it from the scratches on mine below:

20160605_1302491_zpsg1hi8gf0.jpg

Just for reference, an 8mm flex head ratchet spanner is the PERFECT tool for this job, easily gets to both bolts. Done in 5 mins..

20171022_173436.jpg

Mike
 
Ok,

So nipped up to [ref]Jamie_z4[/ref]'s yesterday to borrow a set of wheels, so I could make a start on the 108's..

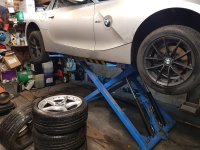
Up on the lift and wheels swapped. I actually think the silver suits the black wheels!

20171021_182907.jpg


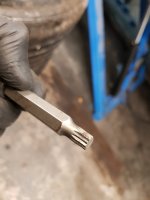
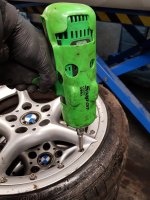
Having a quality 12 point star bit is VITAL to this job if you don't want to wreck bolts.

20171021_183147.jpg


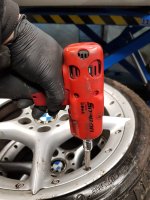
I used my "little" 14.v micro lithium gun to remove most of then easily, breakaway torque on this is about 160 ft lb.

20171021_183220.jpg


And for the couple of stubborn buggers, the "Monster Lithium 18v" came out to play, 650 ft lbs did the job..

20171021_183429.jpg


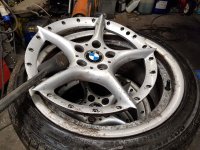
Quick tap with the rubber mallet, and..

20171021_183835.jpg


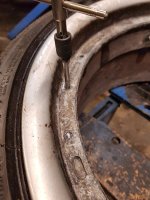
Then the LABORIOUS task of using a 7mm bottoming tap in each of the 80 holes, about 40 mins per wheel, but has to be done..

20171021_190117.jpg

I'll plug the holes tomorrow with 6mm wooden dowel pieces, before dropping them off at the refurbishers. Should have them back Thurs :D


Mike
 
Very cool Mike - I've never seen split rims actually split before.
But why are you tapping new threads? Is it so the new bolts go back in smoothly (ie, the old bolt holes may have been damaged/corroded)?
 
Then as there was sod all on TV, I decided to do the rocker cover gasket, which arrived yesterday from [ref]JINGLE[/ref] many thank Jamie..


20171021_200224.jpg


You can see where it's been leaking, in the usual place, onto the manifold shield, and it stinks..

20171021_200235.jpg

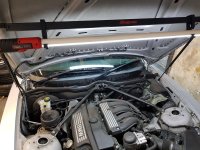
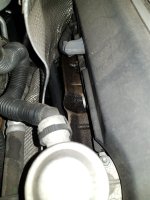
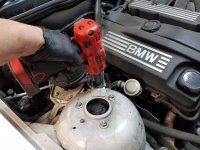
First thing to do is remove the offside strut brace to improve access, it'6 a 16mm bolt on the facelift, and a 16mm nut on the pre..

20171021_200346.jpg


Then remove the oil filler cap and pull the cover upwards to remove it.

20171021_200825.jpg 20171021_200835.jpg


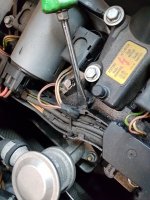
Loosen the wiring harness by popping it out of these clips

20171021_200938.jpg


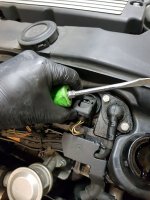
Then lift up the retaining blips on the coil packs, allowing the connectors to be slid out.

20171021_200954.jpg20171021_200958.jpg


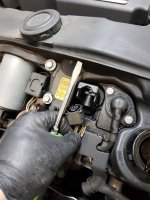
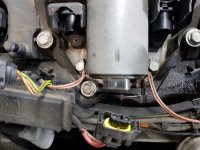
Remove the cam position sensor wiring plug, the valvetronic motor plug and the two earth points (10mm)

20171021_201025.jpg20171021_201331.jpg

Will continue when I get a min...

Mike
 
enzed4 said:
Very cool Mike - I've never seen split rims actually split before.
But why are you tapping new threads? Is it so the new bolts go back in smoothly (ie, the old bolt holes may have been damaged/corroded)?

Yes m8, removing corrosion and correcting any possible damage, as I wanted to know if any needed helicoil inserts BEFORE they wend for powdercoating. Not good finding out there are damaged threads wen you are putting them back together!

Mike
 
Thanks Mike.
I've been meaning to say - those exhaust tips I bought and had sent to you - they're yours for the project car if you want to use them.
I'm not sure I'll ever be able to justify a DLV exhaust system, unless you're planning on a holiday down here and can sneak one into your luggage :lol: .
So if you can use them, I'd be happy for them to go on the 2.0. Think of it as a small thanks for the contributions you make to the forum.
Cheers.
 
enzed4 said:
Thanks Mike.
I've been meaning to say - those exhaust tips I bought and had sent to you - they're yours for the project car if you want to use them.
I'm not sure I'll ever be able to justify a DLV exhaust system, unless you're planning on a holiday down here and can sneak one into your luggage :lol: .
So if you can use them, I'd be happy for them to go on the 2.0. Think of it as a small thanks for the contributions you make to the forum.
Cheers.

Thanks Shayne, I was just looking at them the other day, sitting on the shelf in the back of the shop. Unfortunately, they won't fit the 2.0, ALTHOUGH I may still "upgrade" the box to twin tailpipes..

Mike
 
Ducklakeview said:
Then as there was sod all on TV, I decided to do the rocker cover gasket, which arrived yesterday from [ref]JINGLE[/ref] many thanks Jamie

No worries mate, saved me a job of putting in the for sale forum and it’s gone to a good home :thumbsup:

(Just hope it fits lol)
 
Back
Top Bottom