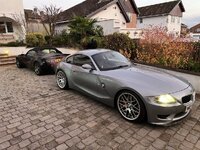
Martyn's Z4M Coupe

Well, the OEM clamps (ignore the split aftermarket clamps for now) have very little adjustment once the bolts are in so I don't think I've lost too much adjustment, infact I've gained a little by being able to push or pull the back boxes in or out, and I can still rotate the boxes slightly if need be.

If once the rest of the exhaust is on I can't get the boxes to sit right I'll try and come up with an alternative.
 
Rear section of the headers are now wrapped and fited.

IMG_1226-768x1024.jpg

Rest of the exhaust fitted up loosely, Lambdas back in and undertrays etc back on.

IMG_1230-1024x768.jpg

All the other little odds and ends, heatshields etc all back on too.

IMG_1231-1024x768.jpg

And finally back out of the garage.

IMG_1232-1024x768.jpg

Alignment of the boxes is good.

IMG_1233-1024x768.jpg

IMG_1234-1024x768.jpg

Next job is to pick the million tools up off the garage floor :D

Will get out in the car over the next few days and get some new datalogs to make sure everything is gravy now the exhaust isn't blowing :)
 
Got out in the garage in my lunch hour and repaired my old set of headers.

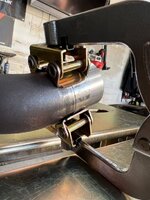
First I chopped off the cracked section, then measured out and cut a new piece of 55mm stainless.

I cleaned up both bits and set them in the clamp ready for tacking.

IMG_1235-768x1024.jpg

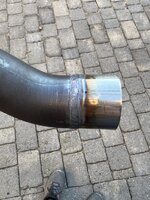
I tacked and then welded the new piece of stainless to the end, I ensured I back purged the header whilst welding to ensure I didn't get any sugaring on the inside of the pipe.

The finished weld isn't pretty due to crap from the old metal contaminating the weld pool and I think my argon flow rate was a little too low. But meh, I'm no welder but the finished item is perfectly fit for purpose.

IMG_1236-768x1024.jpg

IMG_1237-1024x768.jpg
 
One of the best threads in ages this, hats off to you Martyn! So refreshing to see someone rolling their sleeves up and fettling an M instead of banging on about future values and maintaining main dealer service history...!
 
Wow, cant believe i missed this thread completely mate, beaut work.. :thumbsup: car is starting to look tasty, thats for sure. Very keenly interested in the Maxxecu work that your planning. Subbed for more goodness.. :driving:
 
Vanne said:
Wow, cant believe i missed this thread completely mate, beaut work.. :thumbsup: car is starting to look tasty, thats for sure. Very keenly interested in the Maxxecu work that your planning. Subbed for more goodness.. :driving:

Thanks!

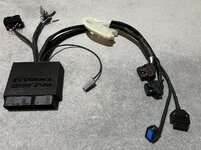
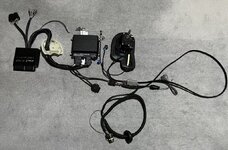
The Maxx is awesome, I remade my plug and play adapter so I could tuck everything neatly away by the GM5 module.

IMG_1289-1024x765.jpg

I also added the provision for plugging in the DCT loom, shifter and drive logic button in case I decide to DCT the car at a later date :thumbsup:

IMG_1290-1024x676.jpg

After re-making the loom I fired it up and checked everything still worked :)

https://www.ecuworx.co.uk/wp-content/uploads/2022/12/IMG_1292.mp4

I've hooked up one of the additional air temp sensors so I can have pre and post charge cooler temps, and I've also hooked up the PWM line to one of the Maxx's outputs so I can control the pump speed via PWM.

I was all ready to start dialling the car in on the Maxx but I noticed the BSD functions werent working meaning no oil temp or alternator control, thankfully MaxxECU have shipped me a new BSD module to try as I'm confident in my wiring.

Other than that I've barely driven the car to be honest.
 
thread of the year for me..... amazing stuff..... i want that ECU :evil: :evil: :evil: :evil: :evil:
 
Beedub said:
thread of the year for me..... amazing stuff..... i want that ECU :evil: :evil: :evil: :evil: :evil:

Seconded, hats off to you Martyn for just getting on with things, really genuinely interesting stuff
 
Thanks :)

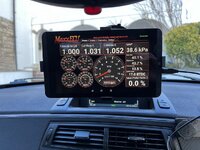
I got my replacement BSD board wired in and started tuning the Maxx for the SC setup. Also got my old Nvidia tablet setup with MDash, which is a dash app from MaxxECU.

IMG_1346-1024x768.jpg

MDash is excellent, you can pick any of the hundreds of parameters to display and it's streamed realtime over bluetooth.
 
Martyn said:
grannyknot said:
Great work Martyn, just a note before you install the heat baffles, that centre bearing on the driveshaft has to be pre-tensioned toward the rear of the car. You'll notice the slots on the mounts of the bearing, it's not a lot but it is suppose to help.

TIS doesn't mention anything about preloading the CSB on the Z4M interestingly enough. I know the preloading was required on older BMWs though.

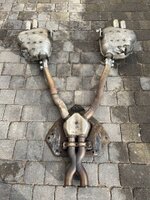
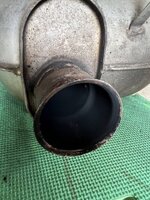
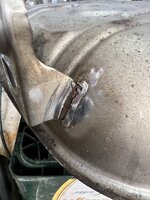
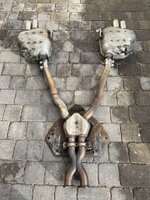
I had an hour or so on the car yesterday so my attention turned to yet more exhaust work. Upon removing the center section I noticed some cracking on the flanges of both the back boxes and the center section.
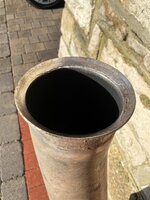
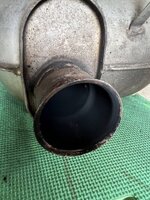
IMG_1213-768x1024.jpg

IMG_1216-768x1024.jpg

I bust out the tig and managed to weld the crack up on the center section, but this wasn't going to work on the back boxes due to how thin the metal was and how close to the edge the crack ran. I'm convinced the aftermarket 2 pieces exhaust clamps are the cause of these cracks.

I pulled off the back boxes and noticed that one of the hangers had cracked at the weld, so I cleaned that up and tig'd it (didn't get a picture as it wasn't particularly pretty, however it'll hold fine).
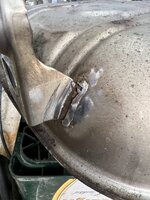
IMG_1223-768x1024.jpg

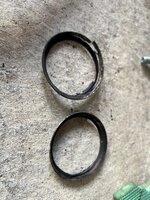
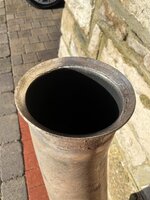
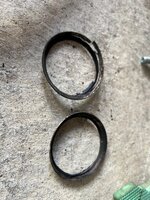
Next I cut off all 4 flanges :o Back box flanges shown below.

IMG_1220-768x1024.jpg

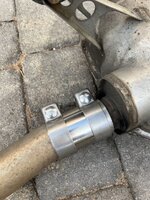
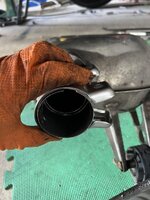
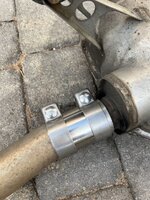
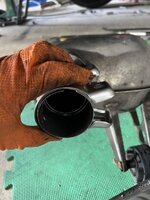
Test fit of a 2.25" / 58mm sleeve clamp.
IMG_1217-768x1024.jpg

Like a glove!

IMG_1222-768x1024.jpg

IMG_1221-768x1024.jpg

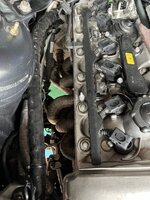
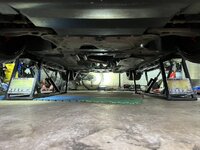
I popped the center section and back boxes back on to the car and called it day

My "brand new" second hand headers turned up this morning so I hope to get those wrapped today and fitted.
What a great idea. One of my exhaust flanges has disintegrated so I'll be doing this. Thanks for sharing.
 
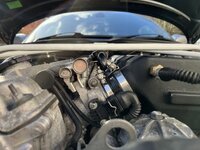
My Ultra Racing brace finally turned up so I chucked that on at lunch time today.

IMG_1408-1024x768.jpg

It's certainly a tight fit around the IACV hose.

IMG_1409-1024x768.jpg
 
Martyn said:
grannyknot said:
Great work Martyn, just a note before you install the heat baffles, that centre bearing on the driveshaft has to be pre-tensioned toward the rear of the car. You'll notice the slots on the mounts of the bearing, it's not a lot but it is suppose to help.

TIS doesn't mention anything about preloading the CSB on the Z4M interestingly enough. I know the preloading was required on older BMWs though.

I had an hour or so on the car yesterday so my attention turned to yet more exhaust work. Upon removing the center section I noticed some cracking on the flanges of both the back boxes and the center section.

IMG_1213-768x1024.jpg

IMG_1216-768x1024.jpg

I bust out the tig and managed to weld the crack up on the center section, but this wasn't going to work on the back boxes due to how thin the metal was and how close to the edge the crack ran. I'm convinced the aftermarket 2 pieces exhaust clamps are the cause of these cracks.

I pulled off the back boxes and noticed that one of the hangers had cracked at the weld, so I cleaned that up and tig'd it (didn't get a picture as it wasn't particularly pretty, however it'll hold fine).

IMG_1223-768x1024.jpg

Next I cut off all 4 flanges :o Back box flanges shown below.

IMG_1220-768x1024.jpg

Test fit of a 2.25" / 58mm sleeve clamp.

IMG_1217-768x1024.jpg

Like a glove!

IMG_1222-768x1024.jpg

IMG_1221-768x1024.jpg

I popped the center section and back boxes back on to the car and called it day

My "brand new" second hand headers turned up this morning so I hope to get those wrapped today and fitted.
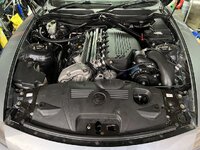
I remember looking this up in TIS too as I was expecting it to be preloaded like in the E46 M3 I did a few years back but no mention of it for the Z4M. From what I understand, the Z4M propshaft doesn't have a separate ACB bearing on the front half of the propshaft so doesn't require preloading.
 
Hey,

No real updates as such, although I do have a few things on my list I need to sort:

- Replace supercharger belt, along with the top idler pulley.
- Replace the alternator which is throwing BSD errors.
- Fix a slow leak with the washer bottle / headlight washers.

Replacing the alternator will be a pain as the bottom alternator bolt (supplied with the SC kit) is too long to remove without tilting the engine or removing the front end of the car :roll:
 
Back
Top Bottom