Martin, I had a quick read of your E46 thread and having had both myself and in the market for either Z4M or E46 M3, how would you compare the two, from your experience?
You are using an out of date browser. It may not display this or other websites correctly.
You should upgrade or use an alternative browser.
You should upgrade or use an alternative browser.
Martyn's Z4M Coupe
- Thread starter Martyn
- Start date
Thanks MartynMartyn said:Tough one.
I've had 3x E46 M3s and 2x Z4Ms (one roadster, one coupe) but I prefer the ride and handling of the M3 to be honest.
Martyn, how would you rate your brake setup? You have brembos only on front, right?
I have a roadster with fresh fluid, fresh discs and pagid pads. I have thought it will do for street, but the brake feel and inconsistency in pedal travel just don't give me confidence. Thinking of throwing in the towel and ordering the kind of setup you have...
I have a roadster with fresh fluid, fresh discs and pagid pads. I have thought it will do for street, but the brake feel and inconsistency in pedal travel just don't give me confidence. Thinking of throwing in the towel and ordering the kind of setup you have...
insider said:Martyn, how would you rate your brake setup? You have brembos only on front, right?
I have a roadster with fresh fluid, fresh discs and pagid pads. I have thought it will do for street, but the brake feel and inconsistency in pedal travel just don't give me confidence. Thinking of throwing in the towel and ordering the kind of setup you have...
Try some uprated pads. I am running Performance Friction 11 compound which works superbly. Available here for £87 posted for a set of fronts: https://www.design911.co.uk/fu/prod130799/PFC-Fast-Road-and-Race-Front-Brake-Pads-BMW-E46-M3--E36-M3/
Not to be confused with the vastly inferior PF Z compound.
insider said:Martyn, how would you rate your brake setup? You have brembos only on front, right?
I have a roadster with fresh fluid, fresh discs and pagid pads. I have thought it will do for street, but the brake feel and inconsistency in pedal travel just don't give me confidence. Thinking of throwing in the towel and ordering the kind of setup you have...
I'd say they're a decent step up from the single pot stock setup, I went for PBS Pro Race pads and they're perfect for fast road without being noisy.
Over the years I'd have had the following aftermarket setups on E46 M3s / Z4Ms:
CS/CSL/Z4M stock setup - Nothing to write home about, even with PFZ pads fitted but then I've never really been a fan of single pot calipers on the front of a car!
Porsche 996 Brembos front and rear - Never really rated this setup, pedal travel felt too long imo!
Yellow Speed 6 pots front and rear - Worked well, finish on the calipers was poor though, but discs and pads were cheap to replace through Malc Buck.
F8x M3/M4 380/370mm front and rear - Fantastic setup, but quite a bit of work to get them on though but easily the best brakes I've had to date. I used DS UNO pads with this setup which were brilliant, but very noisy.
Just for reference in regard to the braking discussion - if you can find a set of the original 135i performance 6pot calipers, they fit the Raybestos ST45 Pad pattern used in the BTCC cars, so pads are cheap through Malc Buck. they also fit the standard Z4M discs if you didn't want to stray too far away from OE, and there are bmw specific adapters to fit the Z4m Hub (they're quite rare 2nd hand, but plenty of aftermarket suppliers for these now).
I had this setup on my old 3.0si, but with DS2500 pads - worked really well on track and on the road
Anyway sorry for going off-topic just thought it might be of use to someone - if you're savvy it can work out as a relatively inexpensive route to upgrade the brakes. Bear in mind the calipers do need 10mm spacers to clear the spokes on OE Front 224M alloys though!
Marty. Would you kindly share the steps needed to update the DME using WinKFP?
Also, any news on the remap tool for the Z4M?
Edit: compounding question. Can a US DME programmed to EU spec? Or would there be issues? My car is US but has not EU headers and Cats in the section 1.
Also, any news on the remap tool for the Z4M?
Edit: compounding question. Can a US DME programmed to EU spec? Or would there be issues? My car is US but has not EU headers and Cats in the section 1.
Sure, I'll put something together.
I wouldn't flash euro software unless you have the full euro exhaust setup.
Couple of updates on the Z4M, I did an oil and filter, no pictures as it's pretty uninteresting.
I also swapped out the OEM inlet boots with some Turner Motorsport silicone ones as the OEM ones were leaking under boost. This lead me to pressure testing the whole inlet, which is easier said than done with everything being so tightly packed together.
I ghetto bunged the main inlet using rubber glove and some thick plastic and a jubilee clip, which worked enough to get some pressure in the inlet, I also gutted an old air temp sensor I had and fitted it with a schrader valve so I could hook up the airline, then used to some leak detection spray to check for leaks.
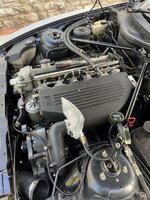
Leak detection spray is dead handy!
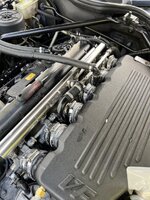
This confirmed the new throttle boots don't leak, however the ghetto glove/plastic bung wasn't holding up so well, after trying to find something to fit I decided to fire up Fusion 360 and throw something together that I could 3d print.
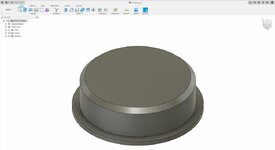
and printed!
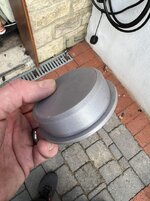
Fits like a glove, and holds boost!
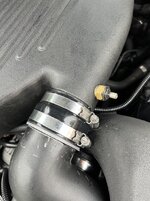
During the pressure test I found that the VF supplied Greddy bypass valve was blowing open at 3+ psi, so I removed that and threw on a Tial Q I had sitting around, my god does it make a racket, but at least it's not bleeding precious boost!
I also rerouted one of the lines from the catch can so that it no longer runs between cylinder 4 and 5, which makes accessing the throttle boot clamps a hell of a lot easier.
The car is feeling great, although even with PS4S on it's struggling for grip in 1st, 2nd and the top end of 3rd at the moment :roll:
Clutch replacement is likely to be on the cards very soon, after 142K miles it's hardly surprising.
I wouldn't flash euro software unless you have the full euro exhaust setup.
Couple of updates on the Z4M, I did an oil and filter, no pictures as it's pretty uninteresting.
I also swapped out the OEM inlet boots with some Turner Motorsport silicone ones as the OEM ones were leaking under boost. This lead me to pressure testing the whole inlet, which is easier said than done with everything being so tightly packed together.
I ghetto bunged the main inlet using rubber glove and some thick plastic and a jubilee clip, which worked enough to get some pressure in the inlet, I also gutted an old air temp sensor I had and fitted it with a schrader valve so I could hook up the airline, then used to some leak detection spray to check for leaks.

Leak detection spray is dead handy!

This confirmed the new throttle boots don't leak, however the ghetto glove/plastic bung wasn't holding up so well, after trying to find something to fit I decided to fire up Fusion 360 and throw something together that I could 3d print.

and printed!

Fits like a glove, and holds boost!

During the pressure test I found that the VF supplied Greddy bypass valve was blowing open at 3+ psi, so I removed that and threw on a Tial Q I had sitting around, my god does it make a racket, but at least it's not bleeding precious boost!
I also rerouted one of the lines from the catch can so that it no longer runs between cylinder 4 and 5, which makes accessing the throttle boot clamps a hell of a lot easier.
The car is feeling great, although even with PS4S on it's struggling for grip in 1st, 2nd and the top end of 3rd at the moment :roll:
Clutch replacement is likely to be on the cards very soon, after 142K miles it's hardly surprising.
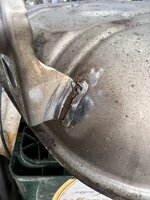
So, I chucked the car up on the quickjacks on Saturday morning ready to tackle the clutch, I unbolted the decats and was met with this mess.
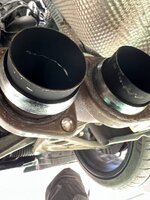
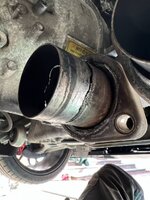
The crack is pretty much all the way round the pipe. I attempted to tig the crack but there was just too much crap embedded in the base material :roll:
After looking into my options for replacement, I shot Wasif aka Wassup a message to see if he had a set of headers from the Z4M he recently broke, thankfully he still had them so a deal was struck!
I removed both the front and rear section of the headers from the car so I could check them over for any other cracks etc. I can't believe how easy they are to remove!
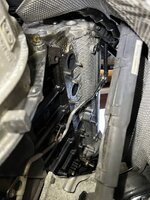
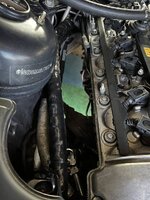
I've ordered a replacement braided vanos line as there's clearly a leak from the hose or the fitting on the accumulator, it'll be a piece of cake to fit whilst the headers are off.
I also ordered a replacement rear main seal, new copper nuts, gaskets and a SAP delete plate to throw on along with a new guibo/flexdisk and center support bearing for the prop. The guibo is showing signs of wear so I might as well throw a replacement on whilst the prop is off the car for the clutch, same with the CSB.
Seeing as the headers will be off the car I also ordered some heat wrap so I can wrap the headers before re-fitting, it'll help keep the charge cooler lines a bit cooler (these can be seen in the last phot above, they're sleeved in insulated wrap). I'm also going to swap out the charge cooler water pump with a higher flow unit to see if it improves cooling at all.
Now I just need to wait for the bits to arrive


The crack is pretty much all the way round the pipe. I attempted to tig the crack but there was just too much crap embedded in the base material :roll:
After looking into my options for replacement, I shot Wasif aka Wassup a message to see if he had a set of headers from the Z4M he recently broke, thankfully he still had them so a deal was struck!
I removed both the front and rear section of the headers from the car so I could check them over for any other cracks etc. I can't believe how easy they are to remove!


I've ordered a replacement braided vanos line as there's clearly a leak from the hose or the fitting on the accumulator, it'll be a piece of cake to fit whilst the headers are off.
I also ordered a replacement rear main seal, new copper nuts, gaskets and a SAP delete plate to throw on along with a new guibo/flexdisk and center support bearing for the prop. The guibo is showing signs of wear so I might as well throw a replacement on whilst the prop is off the car for the clutch, same with the CSB.
Seeing as the headers will be off the car I also ordered some heat wrap so I can wrap the headers before re-fitting, it'll help keep the charge cooler lines a bit cooler (these can be seen in the last phot above, they're sleeved in insulated wrap). I'm also going to swap out the charge cooler water pump with a higher flow unit to see if it improves cooling at all.
Now I just need to wait for the bits to arrive
A few of the bits have arrived so I got stuck in.
I decided to replace the stock VF supplied charge cooler pump with a Pierburg CWA100-3, which is a PWM controlled pump that moves a hell of a lot more water than the Bosch. I'm running it without a PWM signal which means it defaults to 95% flow.
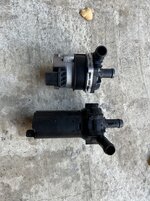
The Pierburg unit is shown above the Bosch unit.
I then got stuck in heat wrapping the headers.
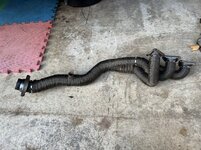
I'll wrap the second branch once the replacement arrives.
Then I dropped the rest of the exhaust and prop. I pulled the flex disc / guibo, which had minor cracking in the rubber.
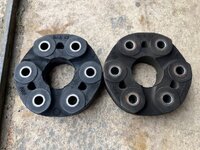
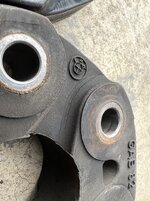
Whilst the prop was off I replaced the center bearing, which wasnt in bad shape but as the prop was off, it made sense to swap it anyway. The old CSB is shown below.
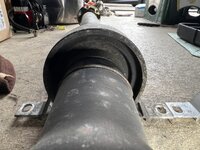
Next was on to dropping the gearbox.
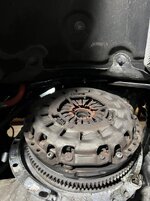
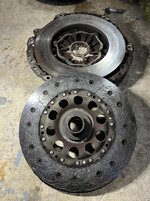
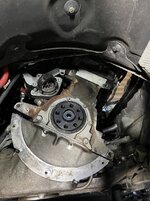
Clutch and pressure plate werent in terrible shape.
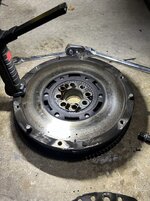
Flywheel
Rear main seal is in good shape with no leaks, so I'll be skipping the replacement of that.
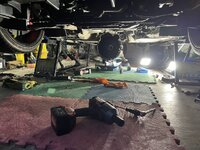
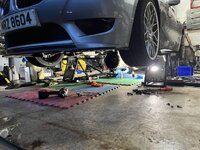
Words cannot describe how much I hate clutch jobs on my QuickJacks. The picture below shows how much room you have to work with.
I hope to get the new clutch, fly and gearbox back on tomorrow depending how motivated I'm feeling.
I decided to replace the stock VF supplied charge cooler pump with a Pierburg CWA100-3, which is a PWM controlled pump that moves a hell of a lot more water than the Bosch. I'm running it without a PWM signal which means it defaults to 95% flow.

The Pierburg unit is shown above the Bosch unit.
I then got stuck in heat wrapping the headers.

I'll wrap the second branch once the replacement arrives.
Then I dropped the rest of the exhaust and prop. I pulled the flex disc / guibo, which had minor cracking in the rubber.


Whilst the prop was off I replaced the center bearing, which wasnt in bad shape but as the prop was off, it made sense to swap it anyway. The old CSB is shown below.

Next was on to dropping the gearbox.


Clutch and pressure plate werent in terrible shape.

Flywheel

Rear main seal is in good shape with no leaks, so I'll be skipping the replacement of that.

Words cannot describe how much I hate clutch jobs on my QuickJacks. The picture below shows how much room you have to work with.

I hope to get the new clutch, fly and gearbox back on tomorrow depending how motivated I'm feeling.
beanie said:Great to see what you’re doing with the car Martyn, will be quite something with a charger strapped to it and all the other tweaks 8)
Do you do work for others or is it just on your own cars for pleasure/as a hobby?
Thanks. It goes pretty well when it has traction lol.
I do a few bits and pieces like fitting CSL airboxes etc for local guys but my own cars keep me busy enough. The Z4M is my (ecuworx) development car so I need to know ever inch of it
Got back on it today and made a bit more progress.
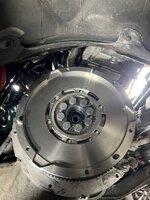
Flywheel on!
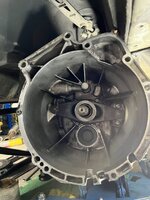
Gearbox cleaned up the best I could, then fitted the new pivot ball and release bearing.
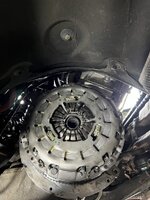
Clutch and pressure plate fitted
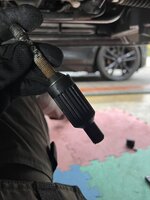
The clutch alignment tool that came with the clutch was useless, so I modified it
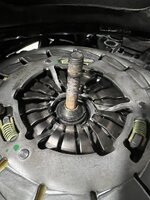
Gearbox back on
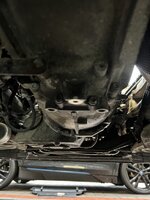
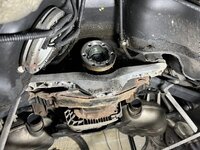
Check the state of the fuel tank, covered in CV grease! The specialist that replaced the gasket on the diff input flange didn't bother to clean up the mess!
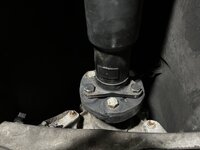
After cleaning up the excess CV grease I bolted on the new guibo and fitted the prop.
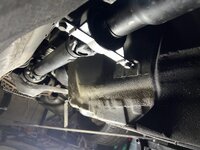
New CSB
By this point I'd had enough rolling around on the floor for one day so I turned my attention to a few job 'up top'.
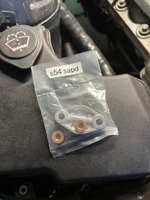
SAP delete plate fitted from Hack Engineering.
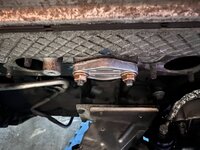
Front section of the headers fitted.
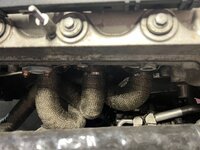
I also refitted the charge cooler as I had to pull it off in order to get the starter motor off, no pictures though.
That was enough for today.
Flywheel on!

Gearbox cleaned up the best I could, then fitted the new pivot ball and release bearing.

Clutch and pressure plate fitted

The clutch alignment tool that came with the clutch was useless, so I modified it


Gearbox back on

Check the state of the fuel tank, covered in CV grease! The specialist that replaced the gasket on the diff input flange didn't bother to clean up the mess!

After cleaning up the excess CV grease I bolted on the new guibo and fitted the prop.

New CSB

By this point I'd had enough rolling around on the floor for one day so I turned my attention to a few job 'up top'.
SAP delete plate fitted from Hack Engineering.


Front section of the headers fitted.

I also refitted the charge cooler as I had to pull it off in order to get the starter motor off, no pictures though.
That was enough for today.
grannyknot
Member
Great work Martyn, just a note before you install the heat baffles, that centre bearing on the driveshaft has to be pre-tensioned toward the rear of the car. You'll notice the slots on the mounts of the bearing, it's not a lot but it is suppose to help.
grannyknot said:Great work Martyn, just a note before you install the heat baffles, that centre bearing on the driveshaft has to be pre-tensioned toward the rear of the car. You'll notice the slots on the mounts of the bearing, it's not a lot but it is suppose to help.
TIS doesn't mention anything about preloading the CSB on the Z4M interestingly enough. I know the preloading was required on older BMWs though.
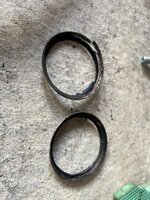
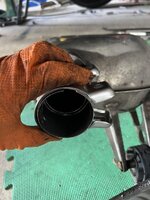
I had an hour or so on the car yesterday so my attention turned to yet more exhaust work. Upon removing the center section I noticed some cracking on the flanges of both the back boxes and the center section.
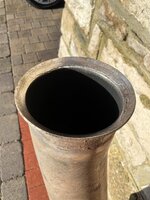
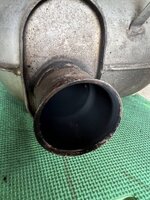
I bust out the tig and managed to weld the crack up on the center section, but this wasn't going to work on the back boxes due to how thin the metal was and how close to the edge the crack ran. I'm convinced the aftermarket 2 pieces exhaust clamps are the cause of these cracks.
I pulled off the back boxes and noticed that one of the hangers had cracked at the weld, so I cleaned that up and tig'd it (didn't get a picture as it wasn't particularly pretty, however it'll hold fine).
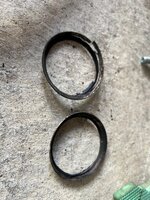
Next I cut off all 4 flanges
Test fit of a 2.25" / 58mm sleeve clamp.
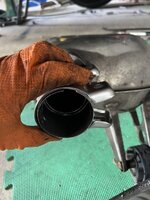
Like a glove!
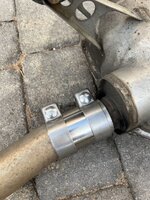
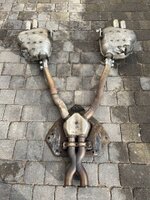
I popped the center section and back boxes back on to the car and called it day
My "brand new" second hand headers turned up this morning so I hope to get those wrapped today and fitted.
flimper said:Excellent work Martyn, I've probably missed but have you replaced/needed to replace the diff seal? Common issue, mine needs doing soon
Thanks!
The diff input seal is bone dry, as are the output seals so I've left those alone. The paper gasket on the lobro joint looks new so I've left that too, I've reused those a few times without issues before providing they havent disintergrated when you pop the joint off the diff.
When the time comes for diff seals I'll get Darragh at EverythingM3s to sort that, he can give the diff a refresh at the same time but I don't see the need yet.
Martyn said:I bust out the tig and managed to weld the crack up on the center section, but this wasn't going to work on the back boxes due to how thin the metal was and how close to the edge the crack ran. I'm convinced the aftermarket 2 pieces exhaust clamps are the cause of these cracks.
...
Next I cut off all 4 flangesBack box flanges shown below.
Test fit of a 2.25" / 58mm sleeve clamp.
Like a glove!
Martyn, with this, shall not you lose the ability to adjust the boxes up/down, the OE flange design is what allows to adjust and center the tips to the bumper. with this, you have a preset position, don-t you?
Similar threads
- Replies
- 1
- Views
- 407
- Replies
- 11
- Views
- 2K
