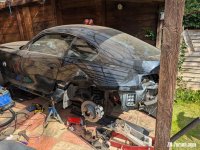
Joe's track car revival

Yes there's a load of drain holes you can spray stuff into the void. I pulled all the plastics out giving better access. What product are you thinking of for that?
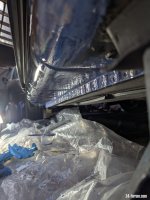
I got a scope inside my bootlid and found some sort of oily yellow/orange stuff, I suspect this is something from the factory to prevent corrosion?
, there's a photo of in my signature link.
 
Meds said:
Yes there's a load of drain holes you can spray stuff into the void. I pulled all the plastics out giving better access. What product are you thinking of for that?
I got a scope inside my bootlid and found some sort of oily yellow/orange stuff, I suspect this is something from the factory to prevent corrosion?
, there's a photo of in my signature link.

Awesome, thanks for the info! There's no plastics on mine yet, so that makes it an easier task, too :) My first thoughts were Dynax S50, but that is more for sills and the like (and it stinks + can drip when runny/hot). I'll probably go for Dynax UB applied with a lance. I've used this on the inside of my R53 boot lid (they are known to rust, and mine is currently totally rust free, so I want to keep it that way!), and the smell goes off quickly and isn't noticeable. It might not be the best product for the job, but I have a few cans already, and it's in an easier environment than it's meant for as there's no road grime etc hitting it/wearing it down, so I think it'll be OK.

I found your post - looks like yours is clean as a whistle, too! That oily yellow/orange stuff is also:
- inside the sills
- in the chassis rails where the rear bumper/crash bar mounts too
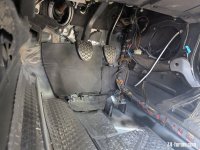
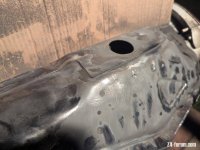
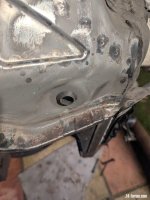
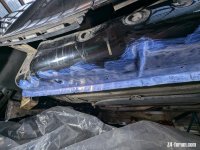
- inside the false floor/double skinned sections of the footwell. Like this example below - see the hole in the top left in line with the clutch pedal - there is that oily stuff all in there too (and on the passenger side)

Like you, I freaked out when I first saw it (inside the footwell) thinking the whole inner skin of the floor was rotten!

ARB3GQT.jpeg


While it's nice that they sprayed it in, given the boot panels can still rust, I wonder what it's life span is...
 
Not much to report on this, the cold weather isn't great for working outside, so progress has mostly been sourcing and cleaning parts ready to refit.

The only thing I'm left needing is a light switch trim (or a complete set of dash trims, as the dash and center console ones I have were free, but are different).

I did brave the cold to do the oil filter gaskets etc, but I'm waiting to borrow some extensions to do the lower wishbones and engine mounts, as I don't have enough to reach down that far from above to undo the bolts. The paints/sealants etc. for the body work need warmer weather ideally... (Not the best time of year to be doing this, I know!)

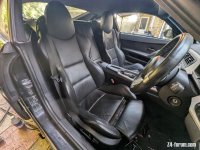
I've taken to giving the seats a bit of love though, as I can do that easily enough indoors.

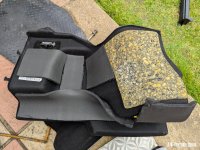
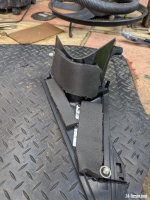
No photos of most of this, but I bought a set of heated, memory E46 leather seats for £40, and stripped them off their underseat support net (https://www.realoem.com/bmw/enUS/part?id=DU52-EUR---E86-BMW-Z4+3.0si&mg=52&sg=10&diagId=52_2970&q=52107053946) to fit to both of my seats, as the driver's was collapsed, and the passenger I did for piece of mind. I'll strip the motors and control panels off the seats for spares, and then have a friend who will use the foam and leather for other projects, so they won't be wasted.

I then took the seats apart, and steamed all the foam. It's meant to rehydrate/puff up the foam, but I don't think it did much (which maybe is a good sign?). Either way, I can rest easy knowing I tried at least! While they were apart, I swapped the backrest over, so the less worn passenger side is now on the driver's.

I also cleaned them with some leather cleaner (never had any before, but can't wait to try it on the cream seats in my wife's 3 series!), and recoloured a little bit of wear on the bolsters. For not much money, and very little effort, it made a big improvement!

Products used:

Furniture Clinic Leather Repair Paint https://www.furnitureclinic.co.uk/leather-care-products/leather-repair-paint

Dr Leather cleaner spray
https://www.cleanyourcar.co.uk/dr-leather-advanced-leather-cleaner

It did a good job - the seats are less shiny,/more matte and feel a lot less slippery to the touch then they did before cleaning.

What you can't see in the photo (cos I forgot to take any before!) is how low the seat base was hanging before that matt was fitted.

M9Vyj1j.jpeg


(Yes I know it changed seat in the before/after, but the back rest is the same one as I swapped it over from passenger to driver's side and vice versa, and the base had much the same transformation on both sides).

ndOQMwW.jpeg


7xlbh9k.jpeg


49W0RKu.jpeg


hiN8hbV.jpeg
 
It's been slow progress (only really working on it on some of my lunch breaks, and the odd hour on the odd evening), but it's getting there.

I'll do a detailed post at some point (mostly for my own record if nothing else), but I've managed to:

- buy/refurbish a sport MFSW (mine came with one, but it was removed and replaced with a one piece plastic thing)
- replace the wishbones (not sure, came with the car)
- replace the inner/outer tie rods (FAG)
(ARB bushes + droplinks are nearly new, so left those)
- purchased Eibach Pro springs - still deciding on shocks
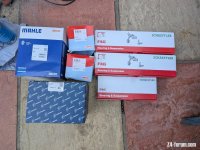
- replace waterpump (Pieberg) /thermostat (Mahle)
- replace gearbox (Febi) + engine mounts (Corteco)
- replace the oil filter/cooler gaskets (can't remember the make, probably Victor Reinz)
- repair/replace the radiator fan
- undersealed (Dynax UB) the inner front arches
- fix the boot lock handle/roundel not firing the boot release - https://z4-forum.com/forum/viewtopic.php?p=2118892#p2118892

- ran speaker wire through the car while the carpet is removed
- ran speaker wire into the door while the interior is removed
- sound deadened the doors/interior
- wired in a second boot light (as mine was missing, and it was cheaper to order two than one as they're the same as the E90 sunvisor lights, so often sold as pairs, so figured I might as well!)

The big bits of work that took the time/needed the good weather though:

- the rear quarters/rear arches, and the part of the chassis they cover is all rust treated, painted and undersealed (Dynax UB again) and protected against water/rust
- the rust holes are cut out/welded up/painted
- just yesterday, I seam sealed it all up, and refitted the rear quarters which also needed seam sealer applying as I removed the factory stuff to check for rust and as it's used to control water flow under the rear quarter, by the looks of it

I didn't want to open the seam sealer until everything was ready, in case it dried out and I had to buy another tube, which is why there was such a delay as I waited for warm weather to get everything prepared. I have bad Raynaud's, so working in the cold can be a real challenge at times.

I'm now in a position where I can refit the interior (should be quite fast), sand back the inner/outer sills to check/treat for rust (there's some bubbles around the holes for the sill clips, for example that I want to head off...), and then drop the rear subframe/fuel tank/prop shaft to check/protect the chassis there, and renew all the bushes.

Slow progress, but steady progress.
 
Time for a bit of a long overdue update... this won't be in chronological order, but I'll try to group it by job/task. My main aim here was to restore/replace the interior of the car, and to do some basic servicing. This has kinda grown in scope, and is basically replacing everything consumable in the drivetrain itself, so is still an ongoing process!

Anyway, let's start with the tasks up front by the engine bay - there might be steps I have missed, but you'll get the jist :)

Mechanical parts replaced:

- oil filter housing + cooler gasket (both Elring)
- oil, oil filter, air filter, cabin filter (Millers, Blueprint, Bosch and Blueprint)
- idler pulley (INA)
- aux belt (Meyle - they have a questionable rep, but it's easy to replace, and won't overheat the engine if it fails...)
- expansion tank (Nissens)
- water pump (Pierburg) + thermostat (Mahle/Behr) (and coolant)
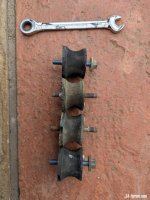
- engine mounts (Corteco)
- gearbox mounts (Febi)
- radiator fan (from an E92 - much cheaper! Just need to swap the plugs)
- wishbones + bushes (I think Meyle HD - not my first choice, but they came with the car, so nothing lost if they're rubbish)
- inner/outer track rods (FAG)
- coolant temperature sensor (Hella)
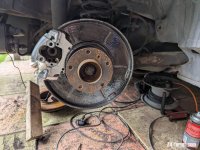
- new handbrake shoes (Mintex)
- new front/rear brake pads (Brembo)
- new front/rear discs (Brembo, BluePrint)

It seems I didn't take too many photos of this (probably as it's not that interesting!), but here's the few I do have - mostly showing the differences in the old/new parts:
PXL_20250514_152605072.RAW-01.MP.COVER.jpg

PXL_20250316_133630078.RAW-01.MP.COVER.jpg

PXL_20250314_170310178.RAW-01.MP.COVER.jpg

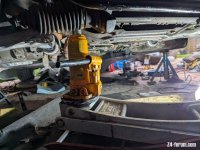
^ This was using a thin, but short bottle jack on top of a trolley jack to lift the engine mount arm high enough to get the old mount out!
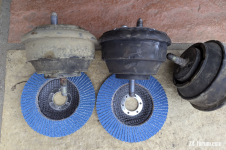
Screenshot 2025-05-14 163839.png

^ Old vs. new mounts - not the worst I've seen, but defo shorter than they should be!

It had new droplinks and ARB bushes a few miles ago, so I left those alone, and it also had recent coils + plugs, rocker cover gaskets and something related to the eccentric shaft motor.

Whilst the brakes were being done, I also cleaned, rust treated (with Hydrate 80) and then painted (Hammerite) the handbrake backing plates. There were in good condition, but were worth protecting given what a nightmarish job they are to replace! I also painted all the callipers too, as they were the typical dirty finish after several years.
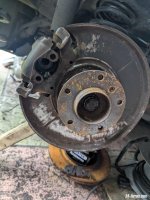
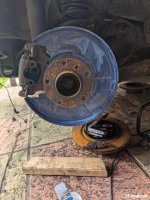
PXL_20250219_130000586.RAW-01.MP.COVER.jpg

PXL_20250219_130512403.RAW-01.MP.COVER.jpg

PXL_20250223_115305247.RAW-01.MP.COVER.jpg
 
Next up, let's talk about the chassis...

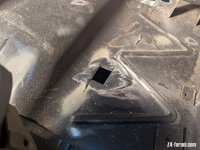
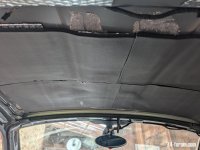
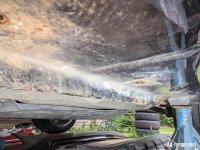
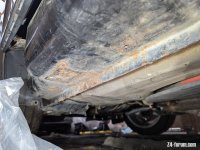
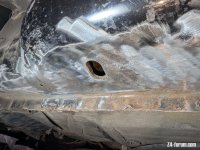
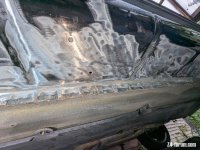
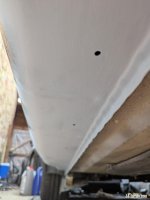
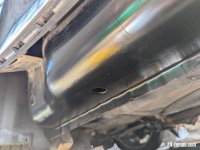
When I got the car, it had seatbelts, door cards, seats and the hazard light. Literally nothing else. No rubber grommet around the gearstick, no DSC control button, no headlining - anything! Sourcing these parts took a while, but I got lucky coming across two E86s being stripped for track use, so got a good chunk of the rare parts that way. However, as the car was stripped, it was good to be able to assess the condition of the floorpan etc, and that's when I found two small holes - one from clear damage to the underseal underneath, and the other - no idea why!

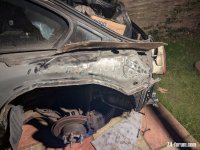
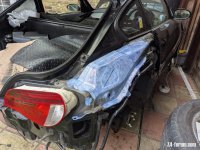
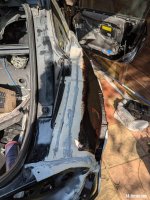
I also took this chance to remove the side skirts/rear quarters, and healthcheck/address anything bad under there. There weren't any outward signs of rust, but I wanted to be sure/stop anything from forming... Here's a selection of photos - not the whole load!

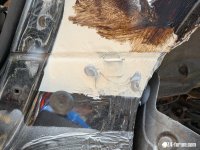
Here are the holes I ended up with in the floorpan in the end (guess who hasn't used an angle grinder for years?!)

PXL_20241230_140926782.RAW-01.MP.COVER.jpg

PXL_20241230_140930677.RAW-01.MP.COVER (1).jpg

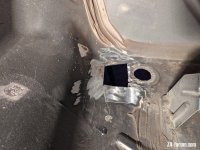
I don't have any in-progress photos of the repair, but my dad cut/welded in some plates. Everything was then protected with Bilt Hamber Etchweld, welded up, primed again, and then given a top coat of paint before going over with 3M seam sealer (this isn't the neatest - I need to tidy this up a bit before I undercoat it)

PXL_20250514_155606362.RAW-01.MP.COVER.jpg

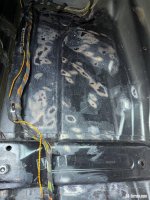
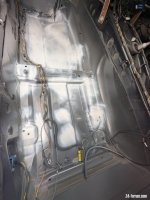
I then went around the rest of the car, looking for any bubbles etc, and ground those down, treated with Hydrate 80 and then painted. There were none of concern, but there were a fair few.

PXL_20250309_150110704.RAW-01.MP.COVER.jpg

PXL_20250310_114331076.RAW-01.MP.COVER.jpg

^ Floor cleaned up and primed. Annoyingly, I didn't take any photos of the level of scuff/damage behind these - most of them were more marks in the paint - possibly from being driven with no carpet in place? They were tiny blisters that didn't break the paint, and were clean underneath - it's almost like a bad paint job, but given it's factory paint, I don't know? Either way, better safe than sorry!

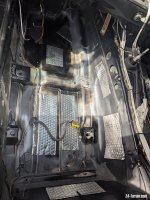
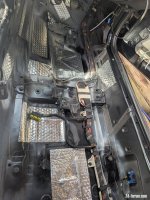
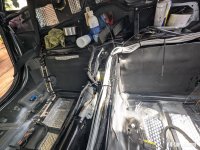
Now that they are all protected, I fitted some sound deadening material, and some sound proofing/reduction foam. No idea if this will make a difference, but at least I know I tried! :D

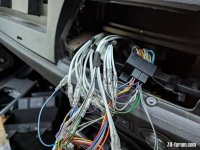
You can see here the white speaker cables I've run down the center tunnel too. I don't have an amp yet, but ran them while I had easy access. You can also see that the black sapphire paint I bought is not the same as the paint BMW used inside the car! I wasn't too worried as it will never be seen - it just needed to be protected, but it was a little annoying! (I gave my R53 the same deep teardown (but because it stank of filthy, disgusting cigarette smoke and needed heavy cleaning (never buy a car with a blocked nose!), and then was the same colour inside and out, oddly...)

Anyway, photos...

PXL_20250416_124241778.RAW-01.MP.COVER.jpg

PXL_20250416_124248732.RAW-01.MP.COVER.jpg

PXL_20250416_125059240.RAW-01.MP.COVER.jpg

PXL_20250415_123030158.RAW-01.MP.COVER.jpg

PXL_20250416_125037258.RAW-01.MP.COVER.jpg
 
Final update for today... the outside of the chassis...

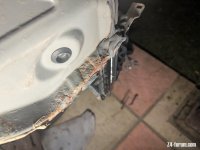
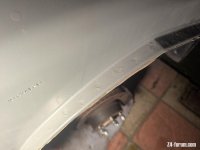
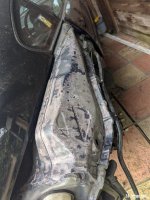
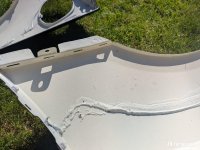
As said, there were no outward signs of rust, but better to be safe... So I removed the rear quarters, and found a load of bubbles in the paint (there are waaaay worse than the ones on the inside of the floor pan). Again - all clean metal underneath, thankfully!

Still... not one to leave a problem unaddressed, out came some grinding tools (paint flap disks are great!) and I removed all the bad paint, covered everything with Hydrate 80, primed and painted it ready to address it further in warmer weather. The same was done on the rear quarters, too.

A sample of what lay underneath:

PXL_20241216_180931371.RAW-01.MP.COVER.jpg

PXL_20241216_180934873.RAW-01.MP.COVER.jpg

PXL_20241216_180928003.RAW-01.MP.COVER.jpg

And all ground/brushed down to clean metal:


PXL_20241216_185012302.RAW-01.MP.COVER.jpg

PXL_20241216_185016662.RAW-01.MP.COVER.jpg

PXL_20241216_185022764.RAW-01.MP.COVER.jpg

All treated with Hydrate 80:

PXL_20241222_140251850.RAW-01.MP.COVER.jpg

PXL_20241223_120016643.RAW-01.MP.COVER.jpg

I forgot to take any of it all primed/painted up, but you can see the finish on the rear quarter here:

PXL_20250407_110535051.RAW-01.MP.COVER.jpg

PXL_20250407_110530508.RAW-01.MP.COVER.jpg
 
After everything was all painted, I applied a liberal covering of Bilt Hambers UB (UnderBody) wax. I applied this with a brush, rather than from a spray can.

If it still rusts, I applaud its tenacity!

Screenshot 2025-05-14 172534.png

PXL_20250413_082513895.RAW-01.MP.COVER.jpg

PXL_20250413_082400483.RAW-01.MP.COVER.jpg

(^ Yes, spot the overspray/bad masking! Luckily it is coming off easily with a clay bar)

Once that had 'dried', I applied seam sealer over all the places the factory had applied it, added it places where the factory stuff had shrunk, and then refitted the rear quarters.
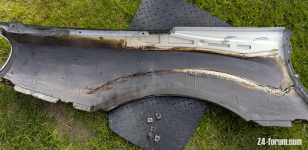
PXL_20250413_085547945.RAW-01.MP.COVER.jpg

PXL_20250413_085645435.RAW-01.MP.COVER.jpg

PXL_20250413_093950272.RAW-01.MP.COVER.jpg

I really can't urge people to check this sort of thing themselves enough - it would only have got worse - and been hidden - if left untreated. A simple intervention now stopped the need for costly bodywork down the line. The sills were worse (see below), and were really easy to access/check!

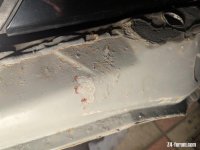
I did the same to the sills, too. These had surface rust around the holes for the sill cover retaining clips, and the jacking points. Structurally solid, but worth protecting. I've shown the worst bits here:
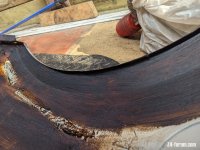
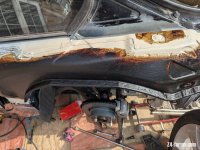
PXL_20250503_174939556.RAW-01.COVER.jpg

PXL_20250503_175002112.RAW-01.COVER.jpg

Mostly cleaned up:

PXL_20250503_181208828.RAW-01.COVER.jpg

PXL_20250503_181220871.RAW-01.COVER.jpg
 
All Hydrate 80'd:

PXL_20250503_190444072.RAW-01.MP.COVER.jpg

PXL_20250503_190502404.RAW-01.MP.COVER.jpg

Primed and painted:

PXL_20250512_131733448.RAW-01.MP.COVER.jpg

PXL_20250513_093340415.RAW-01.MP.COVER.jpg

I am waiting on new jacking points to arrive (they have a rubber gasket in them - mine were old and perished, so not worth reusing). I have gone around the jack front pad area with Bilt Hamber UB, and once that is dry/the jack pads arrive, I will repeat on the rear jacking point, before treating the whole length of the sill with some UB (if I do it now, all the paint dust from the rear will stick in the wax and look awful)

PXL_20250513_094436662.RAW-01.MP.COVER.jpg

That's it for the bodywork/mechanical stuff so far! The rest is interior, but I'll type that up another day
 
Nice work...!
Pretty much exactly what I did with my drivers rear arch last summer. Apart I didn't treat the middle arch with anything other than Hydrate 80.
I plan to remove the other side rear panel and inspect, this summer..
 
Meds said:
Nice work...!
Pretty much exactly what I did with my drivers rear arch last summer. Apart I didn't treat the middle arch with anything other than Hydrate 80.
I plan to remove the other side rear panel and inspect, this summer..

Thanks! I saw yours on your thread too, I think? Hopefully the other side is solid when you get it off, and there's nothing lurking underneath! Hydrate 80 is pretty effective in my experience on it's own, I just didn't want to have it niggling in the back of my mind, as the coupe quarters seem harder to find.
 
On to the interior next...

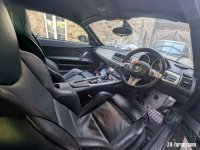
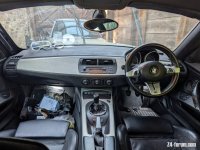
As said before, I got the car with basically nothing, so had to source every little trim (door speaker covers, the surrounds to the heater controls, the air vents, the cover for the rear view mirror wiring etc - literally everything!), so it was a good chance to clean everything up, and add any missing options. I've since got the car's interior spec up to the following:

- heated/memory seats (factory, and present when purchased)
- cup holders (I think factory, but removed)
- cruise control (retrofitted)
- support in place for a 10 speaker audio system (rear subs/amp waiting to be purchased still)
- MSport MFSW (factory, but removed)
- twin USB-C chargers from more recent BMW
- BlueMusik bluetooth audio streaming
- I didn't bother replacing the CD changer, and there is a bluetooth module fitted, but I don't know if it works, or if I can pair to it without the button (which is too expensive to be worth buying on its own)

I gave the existing seats a bit of love (on a previous page), and they turned out well. Fitting the seat base support from the E46 seats really made a massive difference, but no photos of this. It's simple enough to do, once the seat is out of the car though.

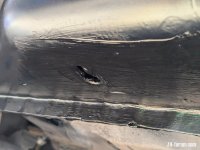
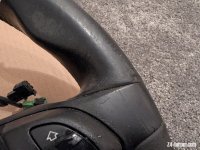
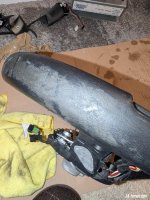
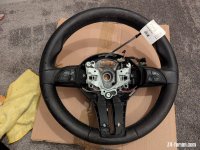
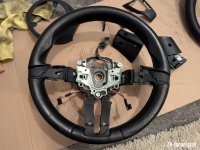
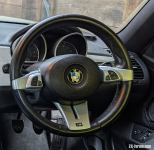
Next up, over the cold winter, I worked on the steering wheel. I got this for a song on eBay in awful condition, so set about giving it some love. As you can see, it was in awful condition, but a lot of the gunk came off with some IPA, and then a load of leather cleaner got it to a 'I don't feel sick touching this!' level, and then some dye brought back all of the colour nicely! There's still a few marks in the leather, but for the price, I can't complain. And it's better than the plastic wheel that was in the car before...

PXL_20250121_185324578.RAW-01.MP.COVER.jpg

PXL_20250121_190604392.RAW-01.COVER.jpg

PXL_20250121_185309345.RAW-01.MP.COVER.jpg

And after (I forgot to take any better/close up photos, but you can see it's a uniform colour, and not covered in hand-goo

PXL_20250122_181832301.RAW-01.MP.COVER.jpg

I also had to refurbish the buttons too, but didn't want to do them in black (the cabin is basically all black otherwise, it needed some colour). I choose BMW titanium silver, and some lacquer - it isn't the _best_ finish in the world, but it isn't awful either? It'll do for now, and is a massive improvement on what I started with.

Screenshot 2025-05-20 210242.png

 
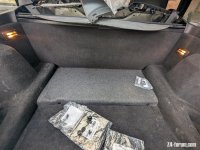
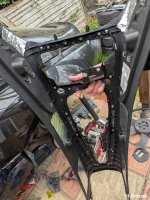
As for the rest of the interior, that just sort of went back together as-is from the factory. The only things of any real note were adding another rear boot light (somehow, I told my wife the wrong measurements for cutting out the hole!)

PXL_20250423_181038994.RAW-01.MP.COVER.jpg

It also turns out that the boot carpet is different in the E86 to the E85, so I need to trim that grey bit down, and dye it black, not grey.

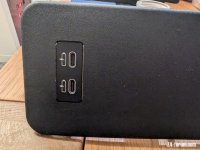
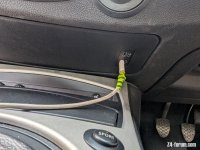
Adding in a BMW OEM USB-C charger to the existing aux-port hole:

PXL_20250426_203153984.RAW-01.MP.COVER.jpg

PXL_20250429_091738167.RAW-01.MP.COVER.jpg

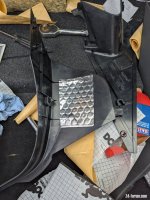
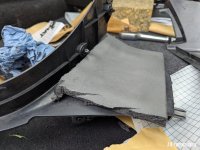
and adding some sound deadening to everything I could, and some foam to some of the perimeter spaces/trims:

PXL_20250421_144257145.RAW-01.MP.COVER.jpg

PXL_20250423_165136176.RAW-01.MP.COVER.jpg

PXL_20250423_165212575.RAW-01.MP.COVER.jpg

PXL_20250423_171213694.RAW-01.MP.COVER.jpg

PXL_20250423_172137235.RAW-01.MP.COVER.jpg


Will this foam do anything? No idea, but again, at least I know I tried!

I also prewired the car for an amp too, making use of a spare head unit adaptor I had (it used to provide iPod integration in the R53 in the background of some of these shots), so I didn't have to cut the car's wiring, but instead, but have this inline with the standard head unit:

PXL_20250424_181157971.RAW-01.MP.COVER.jpg
 
I have a set of Focal 165AS3s waiting to go in (just waiting on a 3d printer to arrive, so I can print some adapters - cos it's obviously cheaper to buy a new printer than pay someone for them! :? ). But other than removing the door cards/kick panels to fit those, that's pretty much it! All finished:

PXL_20250514_151915173.RAW-01.MP.COVER.jpg

PXL_20250514_151945987.RAW-01.MP.COVER.jpg

PXL_20250514_152052543.RAW-01.MP.COVER.jpg

Next up, is to drop the rear subframe, and replace:

- exhaust hangers
- anything rubber on the rear subframe/axles/driveline
- prop guibo
- prop CSB
- gearshift linkages
- replace brake fluid
- oil and diff oil.

Then refit the bumpers/sills, polish the headlights, and then... then it'll finally be mostly finished!

If you made it this far - thanks for reading! This forum has been incredibly helpful to get to this stage. Most questions are out there already, so you hardly even need to ask anything, which is testament to the knowledge here
 
Back
Top Bottom