Excellent work!

You are using an out of date browser. It may not display this or other websites correctly.
You should upgrade or use an alternative browser.
You should upgrade or use an alternative browser.
Double Din Fasica Progress [UPDATED: 1st September 2017]
- Thread starter IAmOrion
- Start date

IAmOrion said:Dr-Jon said:Hi, does it sit like that because the 2 din stereo hits the bottom? if so, as you have already cut out the air vents behind and it wont be standard any more, why not make the fascia larger and increase the hole in the dash panel a little at the top.
Or is that not possible.
Then wrap the hole trim panel as one to hide the joints.
Just a suggestion,
Yes, the problem, is that if you cut out that bottom, then there's nothing what so ever to support the unit and I don't think you could realistically make something to replace it that would be able to maintain the desired strength (Also, that part forms part of a larger supporting frame behind the dash. Also, whilst I'm happy chopping bits that are hidden away such as the vent (which was easy) I don't fancy messing with the metal trim that is visible if that makes sense. My fabrication skills aren't the best haha. Maybe someone with better 3d design skills could pick up where I leave off... I don't get on with fusion360 so am also limited by the software I use (123D Design) ... but also, I'm happy enough with it set back a fraction - it works for me, but I will supply the finished files so others can edit and amend etc if they want to build on it.
And yes, the idea behind the main fascia panel IS that it would be epoxied together, and then wrapped as one piece.
Killiestu said:A top cover might not be a bad idea!
Might help with the glare the screen will catch at the angle, loving the progress
You can buy high grip/strength adhesive that will have enough "flex" to allow the natural vibrations of the car so having to print it in 3 or more sections shouldn't be a problem at all.
Your clearing the design hurdles no bother bud keep it up and you'll be selling these in no time.
Yeah a slightly flexible epoxy would be the most ideal as it allows for some very slight movement. The Pioneer SPH-DA120 is pretty good for glare - however for my particular case I actually like it set back a fraction... all to do with interaction with the unit, as daft as it sounds, If there's some random need to do something whilst moving or quickly at red lights (tut tut whilst moving I know!) I kinda like having a very small ridge on which I could rest my palm edge on as I rapidly finger stab the screen haha
Did you manage to get a finished version of this installed?!

adam1985 said:Did you manage to get a finished version of this installed?!
My printer broke down for a week or so got had of period of not being able to do anything. Fortunately I have no fixed the printer and will start making some progress again very soon
 It's still a WIP but I believe I'm almost there.
JINGLE said:Looking forward to the finished article
I actually sorted my printer now and printed out another vent test today BUT I need to make some changes then reprint. Will hopefully have some update details to bring this thread back some life

Bit of an interim update, having finally fixed my printer, I've had a few prints in a queue I needed to get done before I got back to the double din. Have adjusted the main vent, I now need to rework the vent arms. I've made but of a boo boo as they say however I've already siliconed the first part of the vent in so going to adjust my vent arm design to work around it for now (as I CBA to waste the vent print and pull it out etc)
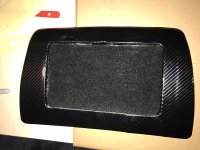
In the mean time, I vinyl wrapped my oddments tray / dash tray which will sit in place where the sat nav screen was. I even got a little bit of car interior carpet trim for it
Will update again once I've sussed the best vent arm design for my situation
In the mean time, I vinyl wrapped my oddments tray / dash tray which will sit in place where the sat nav screen was. I even got a little bit of car interior carpet trim for it
Will update again once I've sussed the best vent arm design for my situation
thanatu55 said:I'm liking this idea and will be watching your progress with interest.
I wanted a double din myself and couldn't believe there was nothing on the market already to make it so. You could make a little business for yourself if you get this right
Thanks
I'm getting there slowly but surely as they say.
Finally - a nice update ...
So, I had to adjust the vent arm heights as after printing I realised I was 30mm out (I'll blame it on being tired) but after modding the vent arm I got round to fixing them in place:
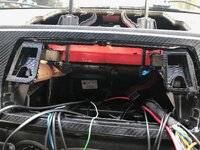
I used silicone to glue and seal, and held over night with mini clamps:
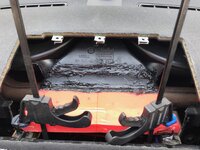
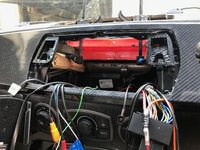
It was then time to put the fascia on, and get the cage in place:
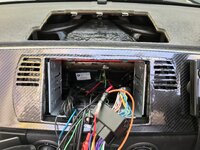
Once in place, I bent the security tabs over, into the gaps of the 3D Printed fascia:
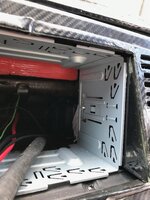
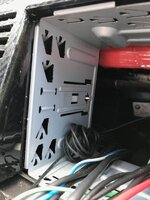
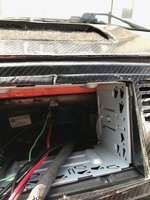
Once the cage was pinned in place, I then had to use a bit of delicacy and get to the screw holes each side of the fasica and screw the fasica in place using the OEM screws. NOTE: I intend to change these to some sort of Torx Security screw asap since you're average radio thief doesn't carry those (they might after reading this )
)
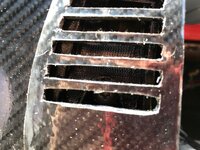
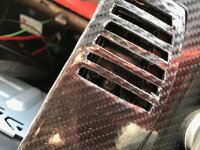
Once the fascia was screwed in place, I then inserted the stereo, and with a little bit of elbow grease and A LOT of swearing I got the stereo clipped into the cage, and put the stereo surround in place (As well as putting my oddments tray in place) :
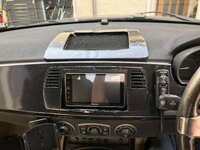
My final 3D printing task for this, is to print out a little "cover" to neaten this bottom edge/gap up:
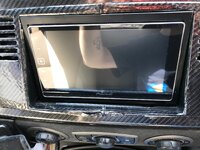
For now though, it's all in place and secured:
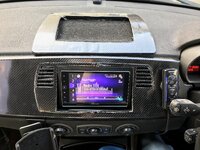
Happy Days 8)
Things left to do:
- Smooth out and re apply vinyl to the oddments tray so it has a much better finish.
- Use vinyl cutter perhaps to cut the vinyl for the fascia so that it's a much neater, better trimmed result.
- Print bottom "cover" to neaten the final finish
Those are trivial tasks which will I'll get around to eventually but as they're small, I have still have other larger projects on the go I want to get finished up first such as my custom headlights I'm doing So this is technically finished now - as it's basically just aesthetics regarding the smoothing and final vinyl layer, but it's in place, held securely and works amazingly
Here are screenshots of my final* designs
(* I may tweak the eventually but for now, this is my most up-to-date designs)
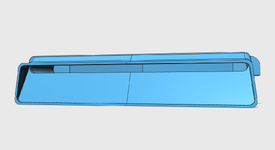
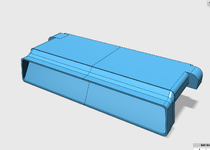
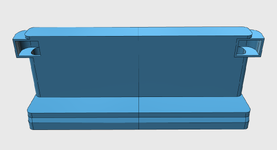
1) The Vent Cover / Replacement
Front:
Front Angled:
Underside:
2) The Vent Arms
Front:
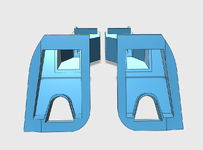
Side angled:
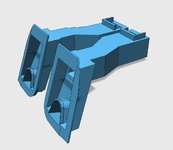
3a) Fascia WITH VENTS
Front:
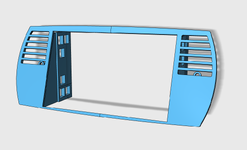
Side:
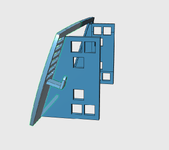
Side / Rear:
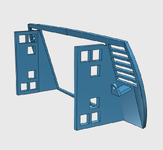
3b) Fascia WITHOUT VENTS
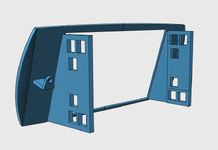
Front:
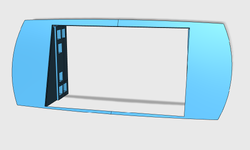
Rear:
4) Tray
Front:
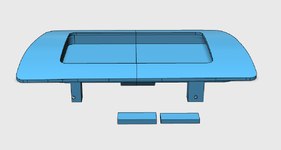
Top:
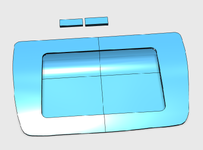
Side/Underside:
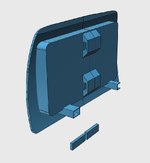
Please do let me know what you guys think!
...So, I had to adjust the vent arm heights as after printing I realised I was 30mm out (I'll blame it on being tired) but after modding the vent arm I got round to fixing them in place:
I used silicone to glue and seal, and held over night with mini clamps:
It was then time to put the fascia on, and get the cage in place:
Once in place, I bent the security tabs over, into the gaps of the 3D Printed fascia:
Once the cage was pinned in place, I then had to use a bit of delicacy and get to the screw holes each side of the fasica and screw the fasica in place using the OEM screws. NOTE: I intend to change these to some sort of Torx Security screw asap since you're average radio thief doesn't carry those (they might after reading this
)Once the fascia was screwed in place, I then inserted the stereo, and with a little bit of elbow grease and A LOT of swearing I got the stereo clipped into the cage, and put the stereo surround in place (As well as putting my oddments tray in place) :
My final 3D printing task for this, is to print out a little "cover" to neaten this bottom edge/gap up:
For now though, it's all in place and secured:
Happy Days 8)
Things left to do:
- Smooth out and re apply vinyl to the oddments tray so it has a much better finish.
- Use vinyl cutter perhaps to cut the vinyl for the fascia so that it's a much neater, better trimmed result.
- Print bottom "cover" to neaten the final finish
Those are trivial tasks which will I'll get around to eventually but as they're small, I have still have other larger projects on the go I want to get finished up first such as my custom headlights I'm doing
So this is technically finished now - as it's basically just aesthetics regarding the smoothing and final vinyl layer, but it's in place, held securely and works amazingly Here are screenshots of my final* designs
(* I may tweak the eventually but for now, this is my most up-to-date designs)
1) The Vent Cover / Replacement
Front:
Front Angled:
Underside:
2) The Vent Arms
Front:
Side angled:
3a) Fascia WITH VENTS
Front:
Side:
Side / Rear:
3b) Fascia WITHOUT VENTS
Front:
Rear:
4) Tray
Front:
Top:
Side/Underside:
Please do let me know what you guys think!
Buckz said:haha, it's in! well donelooks terrible tho, no offence!
None taken. Each to their own. I did mention in my post above though that the "finish" eg the vinyl layer - of both the tray and the fascia need sorting as it's not the best finish, but that's trivial compared to actually making and designing / printing everything

IAmOrion said:Buckz said:haha, it's in! well done
None taken. Each to their own. I did mention in my post above though that the "finish" eg the vinyl layer - of both the tray and the fascia need sorting as it's not the best finish, but that's trivial compared to actually making and designing / printing everything
yeah it's not the shape of the facia its the wrapping on top that makes it look terrible.
if it was me I'd probably go a full 3d print, thick coat of paint and then wet sand and another 3-4 coats of plastidip/rubber tip on top..
it would look flat/black and would blend in well with the carbon wrap on the dash
Buckz said:yeah it's not the shape of the facia its the wrapping on top that makes it look terrible.
if it was me I'd probably go a full 3d print, thick coat of paint and then wet sand and another 3-4 coats of plastidip/rubber tip on top..
it would look flat/black and would blend in well with the carbon wrap on the dash
Yeah, I agree, the finish needs to be changed, but I have other jobs (eg, my headlights) on the go atm, so will come back to the post processing at a later date.
It IS a full 3D Print, It's just I covered in vinyl instead of doing a proper post process on it (It was coating in XTC3D ready to be sanded, painted, re sanded, re painted) but I was concentrating more on the actual design and getting it all to fit and design finished :roll: . I will probably do as you say though, I was planning on using plasti-dip to finish it anyways - I already have the plasti-dip ready.
IAmOrion said:
I will come back to the 'finish' of it at a later date, but the actual design and fitment is all finished.
I will get the files uploaded to thingiverse.com this week so others can freely download
Just a thought, if you want to go down the carbon fiber route for your facia and interior, maybe this page may interest you http://www.z4-forum.com/forum/viewtopic.php?f=2&t=99807&p=1469243#p1469243
I'm doing this with my side mirrors, it cost me £35 to send (would have been cheaper with a smaller box) then €100 (£88) to laminate and €25 (£22) to return. I think it would finish your work perfectly and yours would cost nothing to send, possibly nothing to return either.
Kit Kat said:Hi did you ever complete your project for double din facia. I have made one out of mdf which I think looks fine but would be very interested in one that’s a perfect fit. Fitted a cheap Chinese head unit but it sounds fantastic with updated speaker system.
If you give me your email I will send you the files. Worth noting I did the design in 123D Design
edit: Unless you were asking, to then follow up asking if I could print one for you - in which case currently my printers aren't large enough to print this in once piece. Printing in 2 pieces just wasn't working for me so I did a temp solution out of a plastic sheet until I can eventually but myself a larger printer.