I did something similar a year or so back - but on a very small scale as just a short section of rim on one wheel got lightly grazed, and it seemed too small a blemish to justify a full refurb. As Pondrew says, I decided a DIY approach was a risk worth taking as if anything went wrong, i'd just splash the cash and get the full refurb instead.
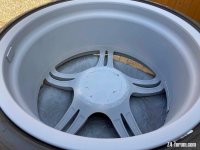
One trick I picked up (from somewhere online no doubt) was to deflate the tyre and tuck old playing cards between tyre and rim for masking purposes if you need to spray very close to the rim . Even deflated its quite difficult to jam them in but worth taking time to do.
One trick I picked up (from somewhere online no doubt) was to deflate the tyre and tuck old playing cards between tyre and rim for masking purposes if you need to spray very close to the rim . Even deflated its quite difficult to jam them in but worth taking time to do.
 , no scrapes or scratches - touch wood :wink:
  At the summit of the picturesque fens


 )
)
")
 Devon
Devon