Well, the job is done, and my Dinan Ram Air Intake Duct is installed. Yahoo !!!

The install took place just this past weekend early Saturday morning.
At about 8:00 a.m. my son arrives at the house, dressed in fatigue pants and with a gray t-shirt that read “ARMY”… He tells me…C’mon Dad, let’s do it, let’s get this thing done…As for me, I was a little out of it, and joked with the way he was dressed, since I had not yet had the chance for my early consumption of caffeine, not too mention that I was somewhat aching from my morning workout.
First, we remove and examine all of the parts included with the kit. I then go into the kitchen and quickly take a picture of the main part, the Ram Air Duct, and so that some of you can see the comparable size of this part, I placed it next to my cell phone….
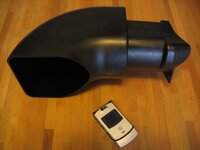
If I may say so, the construction of this particular piece is quite impressive, and its fitment is a comparable to OEM, and is much larger than what I expected.
Once my son and I finished reviewing the instructions, we were off on a mission…
We first removed the bumper cover, which is, and as you all know, not a big deal. With the exception that my son was laughing at me, because I was somewhat hesitant to firmly pull and unsnap the bumper corners. He kept telling me, “you’re not going to break it dad, so pull”, it’s a BMW…. I replied “yeah right, it can still break”…. After the bumper was successfully removed, I had noticed that each of the lower left and right corner plastic covers looked really dirty and were cracked. I was bummed, and since the bumper was removed, I told my son that this is the best time for me to have these parts replaced. His advice to me was to first go through the whole install procedure and see what else are we going to replace/ or need.
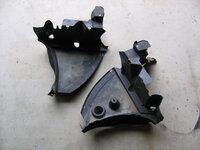
As it turned out, he was right. Amongst my bunch of tools, I did not have the proper size Torque Head to remove the two longest bolts that were set vertically to fasten the metal bumper carrier in place. First, we went to the BMW Dealership and I bought new plastic covers, along with some extra stuff. Then we had stopped at Sears Essentials to buy a No. 45 Torque Screw Head, and on the way back home it was important to pick up some Mexican Food. Oh yeah, Carne Asada Fries, with Guacamole, Sour Cream & Shredded Cheese, and Beef Rolled Tacos with green sauce, along with lighted salted chips and salsa. You all know exactly what I am talking about…LOL
Anyways, back to the install….
The mounting of the Air Duct was a piece of cake. The fitment was exceptional. However, I had slightly deviated from the instructions. I did not secure the edge of the Ram Air Duct to the center brace that was provided by Dinan. I decided to placed Heavy Duty All–Weather double-sided 3M tape on the top part of the Duct and secured it to the underside of the front engine bay frame with a metal clip.
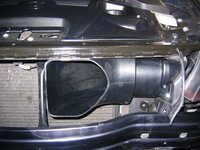
The second part of the installation that I had revised was the method to which the Dinan center brace was installed to the existing metal bumper carrier. Dinan provided an aluminum nut insert and bolt, and the instructions were to drill a hole on the inside of the bumper carrier to fasten the nut insert, then bolt on the brace. I decided to alter this procedure, because I never have liked nut inserts. LOL …Anyways, I drilled through the “entire” bumper carrier, front & back with a ½” drill bit. Then I mounted the Dinan brace onto the back of the bumper carrier with a high grade steel bolt and washer nut, and used the drilled hole in the front to hold the bolt in place while tightening the brace.
Once the Ram Air Duct was in place, I cleaned and dusted everything off (hate them latex gloves)…we then reattached the bumper, and the installation was complete….
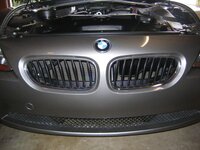
Total install time, including going to the BMW Dealer, Sears Essentials, picking up Mexican food & eating lunch, and debating about the 135i, Z4M Coupe & the new M3, it was a good 5-1/2 hours.
The other thing that I admire about this entire kit is that you can't really visually notice it at all, unless you look up close into the grill, and there it is… :lol:
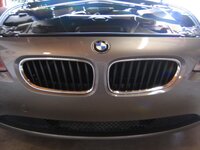
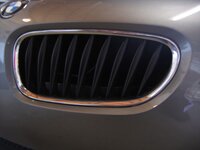
After the install, my son and I took the car for a drive. I can honestly admit that I can personally feel the difference in torque from stock performance. In addition, there is a deeper growl as the vehicle is at WOT.
Once again, I was not in pursuit of the monstrous HP gains, and hey, I only have a 2.5i. LOL.. I just wanted a reliable and well-engineered and built CARB Exempt Intake System that suited my personal preferences….
If it is of any consolation, for anyone planning to purchase a CAI System for their Z4 and especially for those who live in California? Just to let you know, I briefly researched and have visually compared the other Ram Air Scoop to the Dinan Ram Air Duct, and I have to admit, and this is based on my personal opinion. Overall, and between the two, if one were to ask me, the Dinan is a much better part, both in engineering design and function. Also, and with regards to setup, in comparing the “air scoop” vs. “ram air duct” the locations of both units independently, you will find that the Dinan version has a much better placement for capturing the maximum amount of airflow. As well as having a larger cross sectional area for the containment of a greater volume of air mass.
The Dinan design did attract my engineering curiosity in that I was able to discover a few articles from various Automotive Engineering Journals and Technical Publications regarding the design of this very specific Z4 Air Duct. I was very impressed with the comprehensive analysis that was accumulated into the final design. I also found it quite interesting in reviewing the various computer models that illustrated various scenarios to divert water retention by 90% within the Air Duct. Once again, the final design solution was very ingenious at best.
The bottom line is, I know some may say that these parts may be excessively expensive, but one can be assured that much research and development, engineering and manufacturing has gone into there products, and they do work, regardless.


 ..the Stage 2 Performance Engine Software was only 49 State CARB Legal, and obviously the missing state is CA. I must have missed this myself on there website too (getting old)... However, the Ram Air Intake Duct is 50 State Legal. I also went on the California Air Resources Board website to confirm this information accurate.
 I even had paid for “3-Day Select”. Oh well, there goes my whole early Saturday morning car modding schedule. I guess for now I can do some yard work instead :| ….LOL …


