You are using an out of date browser. It may not display this or other websites correctly.
You should upgrade or use an alternative browser.
You should upgrade or use an alternative browser.
Completly knackered 18 wheel home refurb NEW painted pics p3
- Thread starter Sim_Simma
- Start date
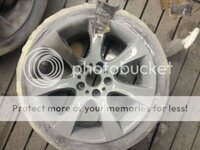
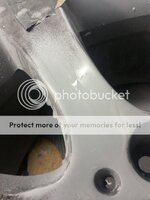
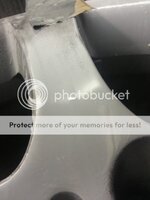
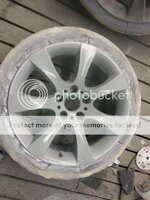
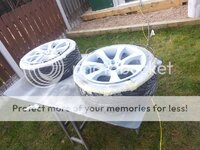
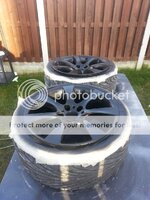
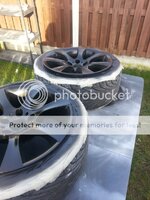
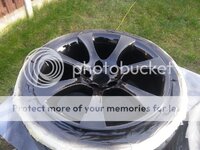
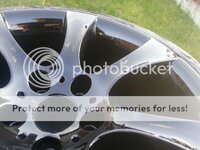
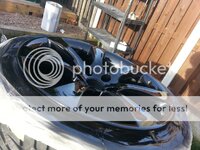
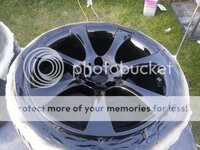
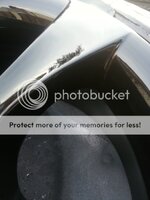
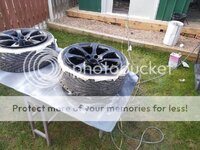
Got the wheels all rubbed down and atm 2 are painted. Pics include primer being rubbed down, flat black basecoat being applied then 2 coats of max meyer 2k clear. Some pics are after one coat.


Attachments
-
 20140223_135158_zps2bf17a6c.jpg84.7 KB · Views: 0
 -
 20140223_135207_zpsd0605f09.jpg71.2 KB · Views: 0
 -
 20140223_135217_zps6b87d127.jpg47.5 KB · Views: 0
 -
 20140223_140249_zpsd7a4c73d.jpg90.9 KB · Views: 0
 -
 20140224_150053_zps716719ab.jpg161.9 KB · Views: 0
 -
 20140224_150100_zps21ec3d1b.jpg102.6 KB · Views: 0
 -
 20140224_153510_zps45edc8e4.jpg109.8 KB · Views: 0
 -
 20140224_153514_zpse59979aa.jpg113.1 KB · Views: 0
 -
 20140224_154031_zps168ea4da.jpg135.4 KB · Views: 0
 -
 20140224_154037_zpse2efaea4.jpg84.8 KB · Views: 0
 -
 20140224_154043_zps75fc77ff.jpg88.4 KB · Views: 0
 -
 20140224_154309_zpsbbcb9b62.jpg93.5 KB · Views: 0
 -
 20140224_154321_zps769f2672.jpg130.2 KB · Views: 0
 -
 20140224_154325_zps93b4eb93.jpg136.3 KB · Views: 0
 -
 20140224_154459_zpsa3bc944f.jpg73.1 KB · Views: 0
 -
 20140224_154945_zpsc3975a8d.jpg177 KB · Views: 0
Well I used less than one roll of 2 inch 3m masking tape which cost 2 quid. I actually used my dads jag paint he had left from his bumper (he doesn't know I robbed it yet) probably used 100ml of paint and 100ml of thinner for the 2 wheels inside and out. Sanding discs I have boxes of 100 that cost 15 quid each and have probably used about 10. Only used one sheet of wet n dry on all 4 wheels. used about 350ml of primer which costs about 15 - 20 for a 5 litre kit. Used about 250 ml of 2k clear which i buy in 7.5 litre kits for 66.mr wilks said:Looking good mate but how much much are you at on paint,s/sand papers & masking tape ? Not to mention the time spent
All in all I've probably spent 8 hours working on them if you tally it all together. Being dragging my heals tbh and doing bits here and there but for one gloss black powder coat looks crap really as the finish is poor unless they paint them after but if they did they'd charge a lot more. And also i can't afford to be paying other people to do something I can do myself and will probably do a better job lol.
It's another thread on here about wheel refurb, where you can see the whole process with the tires on.. why do you do it like this? It would be easier and the result would be better if you would remove the tire and fit it again afterwards - the wheel will need balancing either way..
Looks good btw")
TapaTalking
Looks good btw
TapaTalking
Why do they need removing? What benefit will I see? The beads are broken so I can paint round the edge which is all that is necessary. The main reason I leave them on is so they don't get scratched putting the tyres back on lolMcKoval said:It's another thread on here about wheel refurb, where you can see the whole process with the tires on.. why do you do it like this? It would be easier and the result would be better if you would remove the tire and fit it again afterwards - the wheel will need balancing either way..
Looks good btw
TapaTalking
Amazing Sim_Simma,
Like your maths and reasoning about diy - makes it even more impressive.
Great result - having to wait a full day whilst my wheels were re-furbed when tyres were swopped and damage done then just breaking the bead makes sense. Like the colour as well.


Like your maths and reasoning about diy - makes it even more impressive.
Great result - having to wait a full day whilst my wheels were re-furbed when tyres were swopped and damage done then just breaking the bead makes sense. Like the colour as well.
paulgs1000 said:Amazing Sim_Simma,
Like your maths and reasoning about diy - makes it even more impressive.
Great result - having to wait a full day whilst my wheels were re-furbed when tyres were swopped and damage done then just breaking the bead makes sense. Like the colour as well.
Thanks, I always break the beads though but I have access to a bead breaker so not much trouble.
I'm always painting bits and bobs so end up saving a lot buying the big primer and lacquer kits then each little project doesn't cost much at all.
I mean with this lacquer kit I've sprayed the front wing, door and rear quarter on my zed. I've sprayed some interior bits for a ford ka and a vaux astra. A wheel for a mate. Some engine bay bits for someone else. A front bumper for a corsa, these wheels and there's still loads left.