Hello you all,
Thanks for your comments, and compliments, it really made my weekend! http://www.z4-forum.com/forum/posting.php?mode=reply&f=2&t=74520#
I did start this project with no intention to make more of them, not least to take it into production. Sure I made a number of molds, mainly from the original hardtop, but it’s not enough to start production. , however I can do some inquiries for reproduction, I have a few company`s in my network who are perfectly equipped to make these parts and could ask them what the parts would going to cost if they are going to produce them. It would all depends on how many of them are needed. And if you want light weight and Carbon fibers to be used keep in mind that it`s 10 times more expensive than glass fibers.
Here a description of my build steps.
The hard top consist of three composite parts, outside shell, inside shell which are bonded to each other, and the part with the fabric trim on it to make it look nice and dampen the noise, just like the original hardtop. I started to dismantle the original hard top and made a mold from the inside shell, and the composite frame that holds the rubber insert that seals the door window, another 4 small molds then I made a model from the outside shell that looked the same as the original Coupe roof from cheap polyester. Next was the construction of the underside of the extensions to the rear attachment points on the car, and the part forward to the door window (after I carefully protected the paint with a layer of tape and put this under a coat of release wax and PVA (Polyvinyl Alcohol) witch dissolves in water to be sure I could get it off when cured. On top of this I placed a piece of thick honeycomb sandwich panel where the rear window would be placed.
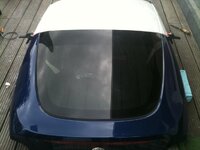
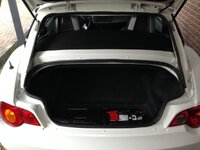
Then came the most difficult part of the build which is the top cross member where the boot lid hinges are bolted on. I found a used boot lid on eBay and made a set-up on the ground to take several measurements.
 http://i300.photobucket.com/albums/nn6/shadow19544/dakenkofferbakdekselprefit_zps99051d76.jpg
I first had the idea to buy a original steel part from a damaged car, to use this as a model but after a long surge where not able to find one. A new part costs 1200 Euro so I decided to build it on the car, using foam, very thin plywood, (aircraft grade), after I was pretty sure it was ok, I covered it with a couple of carbon,/epoxy layers. Next step was the side parts where the rear window rest, I bought an amount of that brown clay that car designers are often use to build a 3D shape of their drawings. I never used this material and after while working with it I really liked the stuff, you must heat it up to approx 55 – 65 degrees C and it become very soft and you can get it on very easily, so I put a thick layer of the stuff onto the honeycomb base. When the clay is cold it`s hard and then you start to scrape and chafe it into the desired shape and contour. Nice thing is if you scrape to much away or don’t like the shape, simply heat up some clay extra and applying a new layer of plaster on it.
I Found it particularly difficult to get the contours en shape exactly the same on both sides, and it took a lot of time to get it to my liking, I put a layer of bondo on it to make it a smooth and covered it with 2 components paint, and prep it to draw a mold of it, inside this mold I later laminate a thick male mold in it to use them for the thermo forming of the acrylic small rear windows. Then laminated carbon side panels around the door window and the rear window, removed all the clay cleans the surface and bonded the side panels on it , after curing poured a small amount of liquid foam into it to fill the cavities and make it ”solid” Brings a total of 7 molds altogether, then I temporally put the polyester dummy roof on the inside shell and prepped it for making a mold of it and after curing laminated the roof Outside shell in it, which did not went well, it always takes more time than you think for such a laminate because I always vacuum it, but it was leaking and I could not find the leak, anyway it was already past midnight before I got everything in the oven and I went to bed, during the rest of the night the temp control failed and the temp become too high and went above the Tg (the temp where the mold material gets soft), luckily it happened short before the timer switched the power off. Otherwise I think the whole workplace would have catch fire. The mold is not completely ruined but needs to be worked upon the get it back in shape. I started this project in 2011 but I didn’t worked on it constantly, for example when the temperature dropped below 5 degrees C I had to stop, My workshop is only 160 f2 a Z4 don`t fit, and I had to plan the big jobs carefully because I had to bring it back in the original state to drive to work.
 http://i300.photobucket.com/albums/nn6/shadow19544/metkofferklepopen2_zps705590d7.jpg


