Looking well and will be even better after all the work!
You are using an out of date browser. It may not display this or other websites correctly.
You should upgrade or use an alternative browser.
You should upgrade or use an alternative browser.
Axel's Coupé - Trying to to ruin it...
- Thread starter axelleveau
- Start date
axelleveau
Member
Good progress this weekend:
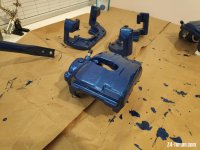
- Wire wheeled the caliper brackets and pad springs but will need more work ahead of painting: I need to order a die grinder and scuff pad wheels to do a proper job. I want the pad spings polished so I can just lacquer them.
- While angle grinder was out I modified my ball joint extractor and finally managed to get the uprights out of the car. They then got a quick blast of compressed air to remove all the loose dirt/rust (cannot be bothered to properly clean them and paint them as they are beefy), wire wheel the hubs disc face and all mounting surfaces. Made some "shims" to prolonge life of dust shields that were loose and greased all mounting surfaces and ABS sensors holes.
- Managed to replace the drop links. Had to bust one out using the angle grinder as the small flat slipped in the flat wrench. I am happy to see the Febi replacements have much beefier flats AND an HEX shapped at the tip of the screw
- Replaced ARB bushes to get familiar with poly bush install
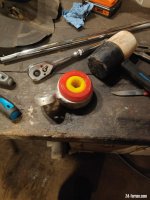
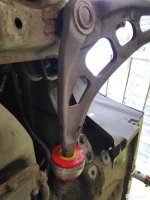
- Replaced the LCAB/Lollipop bushing. Those took a bit of effort to remove the old bushes, some heating helps a LOT, and some figuring out as there were no instructions telling you in which way they go. I am 99% sure I put them in right but a bit curous as to why on one side the centre yellow piece rotates in the red one wen the arm goes up/down but the other side it is the arm hex shape that rotate in the yelow piece. I chatted Strongffex about this. From some online reading it seems normal but I am afraid that will "quickly" deteriorate the bushing as HEX/HEX rotation is not great.
- Overall I cleaned and greased all screws on the way
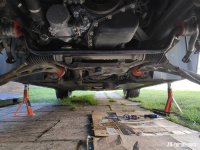
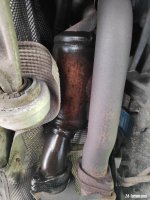
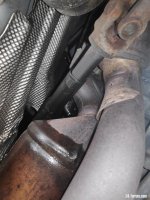
- I also confirmed valve cover is due shortly after I am done with all that suspension/brake work... yes all that wetness is oil coming from the valve cover, onto the manifold, onto the steering and then the cat... that explains the bad barbecue smell :evil:
axelleveau
Member
And done!
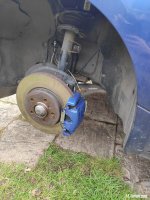
All back together. Brakes are working good, might need some more purging but I will look into it when I get around doing the rears, right now pedal feel is good enough. Obviously I have no more caliper stiction and even re-discovered the hill start assist function as the car now rolls on its own after 3-5s if I don't press the brakes at lights and stops.
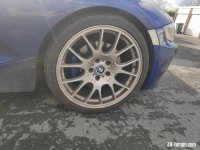
Looks are exactly what I was aiming for with the calipers peeking through the wheels and the spring and hoses keeping the overall scheme in the Blue and Silver/Stainless colours. Hopefully the radiator brace will hold on over time, I am hoping the fact the paint is slightly soft/rubbery to the touch means it will not flake like the OEM black one...
Steering feel is great with the new lollipop bushes. There is more feedback at low steering angles, the wheel does not wander around the neutral at high speeds. Only slight downside is there seems to be a touch more tramlining or at least more force from it but I guess it is the rule and I am happy this way. I should ideally get an alignment but I think I will wait a touch as that leads us to next steps:


All back together. Brakes are working good, might need some more purging but I will look into it when I get around doing the rears, right now pedal feel is good enough. Obviously I have no more caliper stiction and even re-discovered the hill start assist function as the car now rolls on its own after 3-5s if I don't press the brakes at lights and stops.
Looks are exactly what I was aiming for with the calipers peeking through the wheels and the spring and hoses keeping the overall scheme in the Blue and Silver/Stainless colours. Hopefully the radiator brace will hold on over time, I am hoping the fact the paint is slightly soft/rubbery to the touch means it will not flake like the OEM black one...


Steering feel is great with the new lollipop bushes. There is more feedback at low steering angles, the wheel does not wander around the neutral at high speeds. Only slight downside is there seems to be a touch more tramlining or at least more force from it but I guess it is the rule and I am happy this way. I should ideally get an alignment but I think I will wait a touch as that leads us to next steps:
- Valve cover: really needs done, oil is vanishing...
- Refresh rear brake calipers, check the parking brakes as I have a squeaking noise if I don't "clear" them regularly, and do the RTABs while at it (and keep the overall subframe/suspension/bushes refresh for much later) and then do an alignment
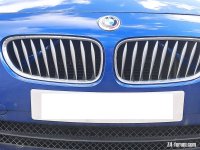
- Thinking of doing a front face refresh: Replace lower grill, fully delete the headlight washers system, replace fog lights with blanking plates (probably 3D print) and maybe add aftermarket solution to still have fog lights and an intake scoop (also 3D print)
axelleveau
Member
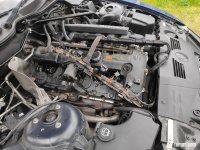
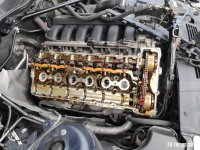
Completed the scary job that is the valve cover as well as eccentric shaft sensor. Obviously while in there I cleaned up the coils, their connectors as well as injector connectors. All is looking good under there, no strong signs of wear on the intake cam lobs 
Seems like I put everything back together correctly as the car runs great
Also did more purging on the front brakes, this time using a syringe as vacuum and ho boy was I wrong last time, the pedal feel is so much better now :driving:
Seems like I put everything back together correctly as the car runs great
Also did more purging on the front brakes, this time using a syringe as vacuum and ho boy was I wrong last time, the pedal feel is so much better now :driving:


axelleveau
Member
Thanks Joycey, will have a look when I get in this area again 
axelleveau
Member
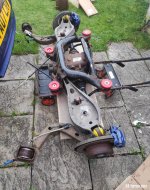
Woaw, pretty much a year of silcence on this thread but it was not without work on the car, I just wanted to finish the chapter started last summer with the rear end refurb which unexpectedly turned into a wheel and tyres refresh that took ages as I could not get a bloody wheel anywhere in Europe, until the importer realised that had one all along in their wharehouse...
So long story short as I detailed most of the work on the "what have you done today" thread:
And due to getting my rear wheels stolen:
To be honest the rear end bushing change is not night and day though I feel less flex and "sausaging when loaded". What has been much more noticeable is the change of brake hoses with a firmer pedal and more bite .And of course the change of tyres, main benefit being a much quieter car, lot less sketchy on damp and cold roads and also less input in the steering on every bump and holes and less foggy neutral though I still want a narrower dead zone around the neutral.
That leads us to the next steps I have in mind:

So long story short as I detailed most of the work on the "what have you done today" thread:
- All rear end bushing changed for poly
- Diff input flange greased
- Rear calipers refurbed and painted
- Handbrake shoes changed
- Brake hoses changed for braided hoses
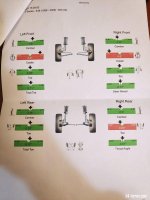
- Alignment

And due to getting my rear wheels stolen:
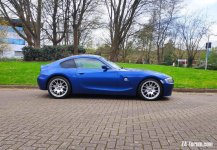
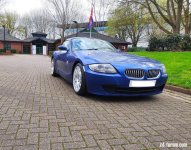
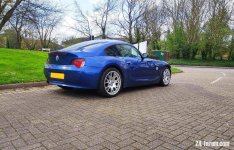
- Changing from 19" wheels with dry Pilot SuperSport to 18" Pilot Sport 5, 225 front on 8J and 255 rear on 9J, ET35 all round

To be honest the rear end bushing change is not night and day though I feel less flex and "sausaging when loaded". What has been much more noticeable is the change of brake hoses with a firmer pedal and more bite .And of course the change of tyres, main benefit being a much quieter car, lot less sketchy on damp and cold roads and also less input in the steering on every bump and holes and less foggy neutral though I still want a narrower dead zone around the neutral.

That leads us to the next steps I have in mind:
- Windsreen surround refresh, it is rotten and as some here seems to have succeded in changing it on Coupe's without taking off the screen I will have a go
- Playing with the EPS motor ring and chasing plays in the streering system, maybe changing tie rods and control arms
- If necessary playing with front toe
- A steering wheel refurb has been on the list for a while but I had to prioritise other jobs... maybe for my birthday

- Some front end aesthetics: new lower grill, refresh fog lights, implementing brake cooling and a front splitter

Some great progress there OP and your 18" wheels look superb. 
Like you I didn't get on with the MPSS tyres my car had when I bought it in colder wetter weather, and I also had an alignment to M3 CSL spec which transformed how the car drove.
Good luck with the next steps.
Like you I didn't get on with the MPSS tyres my car had when I bought it in colder wetter weather, and I also had an alignment to M3 CSL spec which transformed how the car drove.
Good luck with the next steps.
Windsreen surround refresh, it is rotten and as some here seems to have succeded in changing it on Coupe's without taking off the screen I will have a go
Please take care with this as I have recently responded to another forum member about this as they decided to try and change the seal and broke the windscreen . It really is pot luck as to how well your windscreen was put in on an E86 . It will either not be a problem or an absolute nightmare . Mine was a nightmare and I ended up having to get a professional to get it sorted .
A steering wheel refurb has been on the list for a while but I had to prioritise other jobs... maybe for my birthday
Some front end aesthetics: new lower grill, refresh fog lights, implementing brake cooling and a front splitter
In my opinion don`t bother refreshing fog lights just get the blanks or as you say you are going to implement brake cooling use the space for the fog lights to get air to the brakes .
axelleveau
Member
Thanks all for the good feedback 
[Ref]Meds[/Ref], the colour looks great thanks to the phone. Being a daily the car is mega dirty when close... Paint correction and protection is also in the plan at some point thought I could be less lazy and give it a wash now
I have been thinking about how to go on that one. I currently have painted the fog lights black to hide the crusty interior. I am 50/50 between doing an OEM+ job and keeping shiny fog lights with the ducts below or as you said use the fog light hole as the duct itself. In any case this will just be for looks and the fun-gineering, maybe I could offer the 3D print files for the ducts if I succeed :driving:
[Ref]Meds[/Ref], the colour looks great thanks to the phone. Being a daily the car is mega dirty when close... Paint correction and protection is also in the plan at some point thought I could be less lazy and give it a wash now
1536Z4 said:In my opinion don`t bother refreshing fog lights just get the blanks or as you say you are going to implement brake cooling use the space for the fog lights to get air to the brakes .
I have been thinking about how to go on that one. I currently have painted the fog lights black to hide the crusty interior. I am 50/50 between doing an OEM+ job and keeping shiny fog lights with the ducts below or as you said use the fog light hole as the duct itself. In any case this will just be for looks and the fun-gineering, maybe I could offer the 3D print files for the ducts if I succeed :driving:
axelleveau said:maybe I could offer the 3D print files for the ducts if I succeed
.
axelleveau
Member
Weekend started great until it turned to bad with family issues leading to my better half (or should I say safer, see pictures below) urgently going abroad for at least a week, the positive on that is I will have more time to work on my front end refresh, the negative is that I did bite a lot there so will NEED the time and Z out of commission for at lest two weeks:
- To start with car is now stuck without front wheels on the jack. I did what I have done a few times now which is jack on the front central position, remove wheels, do whatever work needs doing and if car as to be left overnight I lower it down on the jack as my driveway paving is narrow so being able to put jackstands under the sides mean taking all the space with the car. Well the key difference this time is my jack seal have totally gone and it does not go up anymore... Had to order a replacement from Halfraud (after wasting a trip there as their website stocks are off), it is OK as I was eyeing a new one for a while and I pray I'll be able to pick up from the side and recover.
- Fully removed the headlight washers and hoses - Made my own fix to reuse the washer covers for free
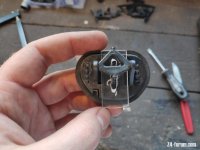
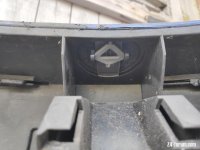
- Cleaned the side markers, including opening one as algae got inside and reglued it
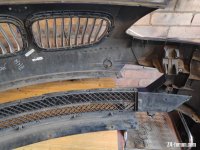
- Had to fight to remove the lower grill, and then fog lights
- Now the fun part: I will replace the lower grill with a honey comb one and while at it making my own fog lights blanking plates out of black ABS sheets which in the future could become brake ducts
- The even funier part: an enabler for all of that is to be able to bend the styrene sheets... Here comes the brillant idea of digging out some resistive wire from an old project, doing some tests to figure out voltage/current to get red hot but not fry, grabbing a PC power supply, a bungee cord and a 6mm aluminium rod and voila a hot wire bender. See small test sample!
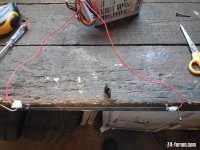
.
axelleveau
Member
Fred Smith said:I did similar earlier in the week. I did not have the plastic top part of the washer, just a brand new cap that I did not want to glue to the bumper. I used a cork from a wine bottle with a bit removed to act in the same role as your clear perspex is doing. I held the cork in place with wire that ran between the two cap fixings, through the cork, and then all around, then down and tied it lower down on the bonnet. Your job look much neater and better... but mine has the advantage that the wire is a plan B and in theory if the cork somehow failed and the cap came loose it would still be hanging off the front of the bumper on the wire to be refixed later!
As a frenchy I approve the use of cork :roll: And good point about the wire being an additional safety in case the cap was to come off. I have some fishing line securing my bonnet badge as I have lost two already due to using the wrong size as I wanted the 50th anniversary badges
axelleveau said:family issues
Hope all goes well with the family issue . Good to see the updates
axelleveau
Member
Alright, it has been a long time coming but finally the write up and result of that front end chaving and some more 
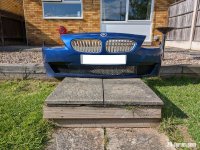
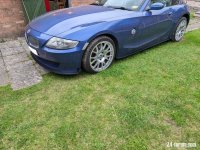
I basically replaced the lower bumper grill with a honeycomb mesh, blanked the sides as per the OEM one and made my own fog light blanking plates until a potential brake cooling duct version. While I was loosing the piece which links the bumper to the undertray I figured I can make a splitter which does the same function, happy how it came out with the only regret that it only survived 10 minutes until it sheared on the motorway... Conclusion is to not use thin foamed PVC sheet in a an attemp to make work easier and go straight to a beefy ABS solution
While I had the material I made matching lower skirts which are holding up just fine, affixed with VHB and just a screw at the front and back
Finally as I had a week of holidays I also did a good service: oil change, oil filter, vanos check filters, air filter, cabin filter (was filthy), gearbox and diff oil. Oh and new front plate to tidy up :driving:
Bumper in progress:
Complete look:
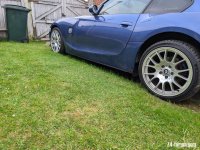
Messed up splitter...
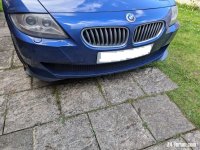
But she rips after a wash
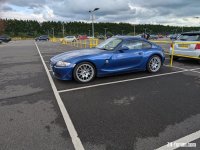
I basically replaced the lower bumper grill with a honeycomb mesh, blanked the sides as per the OEM one and made my own fog light blanking plates until a potential brake cooling duct version. While I was loosing the piece which links the bumper to the undertray I figured I can make a splitter which does the same function, happy how it came out with the only regret that it only survived 10 minutes until it sheared on the motorway... Conclusion is to not use thin foamed PVC sheet in a an attemp to make work easier and go straight to a beefy ABS solution
While I had the material I made matching lower skirts which are holding up just fine, affixed with VHB and just a screw at the front and back
Finally as I had a week of holidays I also did a good service: oil change, oil filter, vanos check filters, air filter, cabin filter (was filthy), gearbox and diff oil. Oh and new front plate to tidy up :driving:
Bumper in progress:

Complete look:


Messed up splitter...

But she rips after a wash

Similar threads
- Replies
- 13
- Views
- 947
- Replies
- 3
- Views
- 3K
- Replies
- 19
- Views
- 956