Axel's Coupé - Trying to to ruin it...

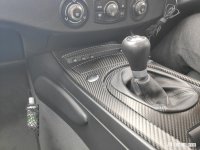
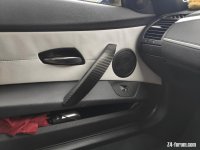
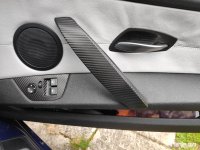
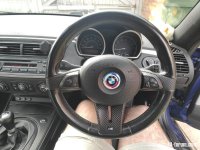
After weeks of staring at the roll of vinyl I got round to doing the interior carbon covering. I took me four days without rushing and working on it full time. As a summary I would say that taking appart the interior is pretty easy excepted for some parts that drive you mad because you do not know if you are doing things right or going to break something (yes, I am thinking of the knee pads...) but luckily there is a useful Pelican guide which only lacks details specific to the Coupe rear storage compartment but I figured it out. I had a bit of a fight to clear an airbag error light (I had to reconnect the battery to move the seats while the steering wheel was off) and realised I had not connected the airbag properly :headbang:

Anyway, here are some pictures, I am in love with the result! It tidies up the interior and gives it a more modern look :wub:
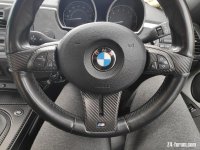
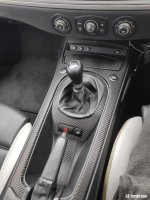
IMG_20220414_144004.jpg
IMG_20220414_144008_1.jpg
IMG_20220414_144020.jpg
IMG_20220414_144027_1.jpg
IMG_20220414_144044.jpg

I am now wondering about sending the wheel to Royal for some perforated leather with a white stripe :roll:
 
Barty said:
Very nice, love that result! The trim on the buttons especially, well done :thumbsup:

Thanks! I am not sure of which of the buttons you are talking about, but in anycase every part which hosts buttons has been a pain: steering wheel has rounded parts which forces you to play around with stretching and cutting excess, the windows buttons required to use small pieces in the hole around the buttons and the piece around the heated seat/traction control also required small pieces in the corners as that was too much strech for the vinyl.

I am patiently waiting for updates on your interior swap as I expect that will be lovely as well 8)
 
[ref]axelleveau[/ref], I meant the ones on the steering wheel. Can imagine they’re quite tricky. Top job by the looks of it :thumbsup:

As for your anticipation on my interior: won’t be much longer! I’ve taken next week off to put it all together. Stage one will be complete by Thursday, with stage two (different seats, custom parts, small items) to be completed somewhere this summer.
 
axelleveau said:
Anyway, here are some pictures, I am in love with the result! It tidies up the interior and gives it a more modern look

That's a real quality job. :thumbsup:

Did you manage to get your wheel repaired?
 
Mr Tidy said:
That's a real quality job. :thumbsup:

Did you manage to get your wheel repaired?

Cheers :D

I have not even looked into getting the wheel repaired... The car drives fine and has no vibration so I am worried of taking the risk of having the wheel totaled. If I find a reliable shop I'll try to get it straigthened and refurbed as it is the wheel I curbed on my first day of ownership so I have 4 perfect wheels. Fun fact, the pot hole has since been repaired :?
 
axelleveau said:
Fun fact, the pot hole has since been repaired

I know it doesn't help you, but at least it may have saved others from having similar problems.
 
It's been a while since I last updated this thread but I did a bunch of small job not worth mentionnig individually:
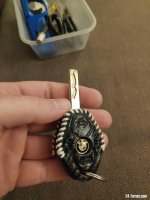
  • Put some cheap covers on my keys to cover the not so good looking marks from a battery replacement. I even replaced the thread and put a white one ot match the car interior.
    279853085_957785341566599_8008243044343997396_n.jpg
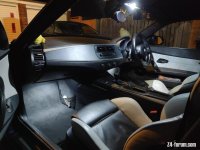
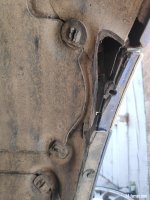
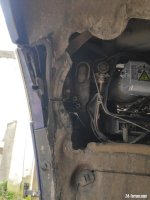
  • Replaced all interior lighting with LEDs, makes it smart, welcoming and it is handy to have more light especially in the boot. It made me realised the storage compartment light was always on as the switch lever was gone. I managed to make a new mechanism out of plastic strips that I glued on the switch.
    IMG_20220522_225520.jpg
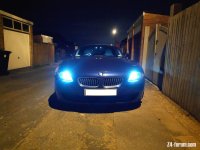
  • Carried on and replaced all external lighting with LEDs, including some of the sketchy ones like the angel eyes that require some cutting. It was a bit of a treasure hunt to get specific formats/colors but I managed to get everything done. I did also replace the xenon bulbs while at it as the 15 year old ones where starting to discolor and loose brightness, this has been a great improvement. Here again it makes the car look more modern with a blue tint to the angel eyes nicely matching the paintwork. I also benefit from having brighter reverse lights and a tiny improvement in fuel economy (not measurable though :P ) :driving:
    IMG_20220522_225729.jpg
  • While working on front headlamp I tried to improve the situation with some rubbing, wheel liner and panels holding and the front bumper alignment. Basically front tire is rubbing a bit (235/35R19) and the bumper brackets are not doing their job well so I tried to give all of that some help with some zip ties... futur will tell if it holds and I might try to source new brackets whenever I have to take the bumper off.

    IMG_20220603_125116.jpg
    Right side liner had split so I did a drifter fix with ties and then added a ties as on left side (not on this picture, see below).

    IMG_20220603_152302.jpg
    Left side just needed an additional zip tie to keep the liner further away from the tire, help the trap door stay tight and it also has the benefit of making the liner pull the bumper up a bit.
 
The car has been faultless lately and my dad visited us which was great as I could show him and make him experience the car :D
As I teased a bit on the forum, I spent some time doing more minor cosmetic upgrades that once again make the car that little bit smarter and younger looking.
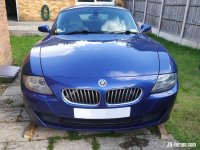
  • I removed the front license plate holder and went with a direct to bumper tape solution. That was fairly straightforward with just some rivet drilling and a quick cleanup of the paint as the holder rubbed and left mark on the edges while protecting the paint underneath it which shows how bad the overall bumper is after 15 years.
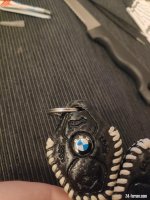
  • I refreshed the badges on the keys for OEM ones:
    IMG_20220915_193022.jpg
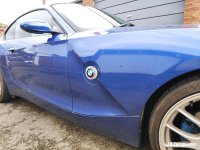
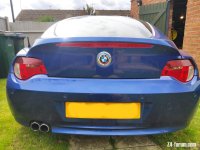
  • And last but not least, the marmite improvement: I fitted 50 years anniverdary badges on all external badges and on the steering wheel. Long story short, I got a full set for M2/M4 of ebay as well as an additional pair of 82mm ones for the side indicators (non are genuine, cannot justify the price). All of them have needed some level of tinkering but I got there in the end. IMO it looks great, clearly better than the faded original ones but I guess some might not like the use of those on an older model :evil:
IMG_20220925_115523.jpg
IMG_20220919_122242.jpg
IMG_20220925_124505.jpg
IMG_20221002_113308.jpg
 

Attachments

  • IMG_20220925_133421.jpg
    IMG_20220925_133421.jpg
    209.5 KB · Views: 1,393
Your car looks so much better with the licence plate holder removed. :thumbsup:

I think I need to add that to my list!

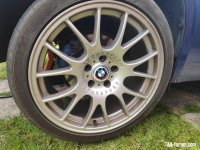
And I really like your wheels.
 
Mr Tidy said:
Your car looks so much better with the licence plate holder removed. :thumbsup:

I think I need to add that to my list!

And I really like your wheels.

Thank you very much. License plate would be perfect if it had been done from the factory to avoid marks due to the holder rubbing and such but you have to get close to see it.
As for the wheels, they came with the car and I really like them too but I have to do a better job of keepign them clean :D
 
Over the weekend I commited to spend a LOT on the car:
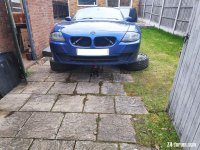
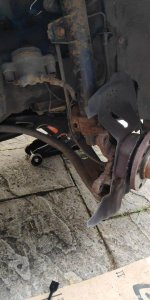
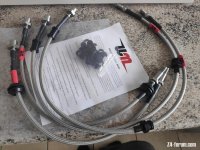
  • So started taking appart the entire front suspension to replace brake calipers and hoses
  • While in there I will do bushes (so ordered a full kit of Stronglfex polybushes, will do the rear later once I recover :D )
  • Messed up and damaged the boot from a drop link so ordered a set of two (funny how you can manage to not have a 16mm spanner despite have a total of 3 sets of them...)
  • Managed to get the steering links out of the uprights but not the upright off from the controls arms, seems like I need to modify my tool with the angle grinder a bit though might take out the uprights with the control arms and separate them offboard
  • Realised the brake shields are pretty crusty so will try to do a fix with shims
  • Removed all undertray in preparation of taking out control arms
  • Removed front grills to fix my lost front badge and while in there will remove the strut to paint it with the same paint as the calipers
  • As all that was not enough and I was stuck while waiting for additional tools to show up for the rest of dissassembly I took out my hood latches off to clean and grease them

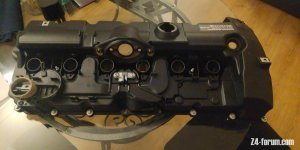
I also have a new valve cover and eccentric sensor ready to go but obviously calipers replacement took priority. I cannot thank enough the trusty 1/2" air impact :thumbsup:
I am pretty much £800 in right now including all parts and some tools and stuff scattered all across the garage :o :?

336788607_9125932797479326_1253456986855121579_n.jpg
336955318_483005723918780_4791892209962693059_n.jpg
331243320_5739188099543650_1709466643221055087_n.jpg
334749859_757026862348466_8182367654641781625_n.jpg
 
Impressive day of work there, OP. What colour are you going to do the callipers and strut in?
 
inkey$ said:
Impressive day of work there, OP. What colour are you going to do the callipers and strut in?

Well there still is a LOT to do, I am more like 50% into disassembly, then have to do lots of cleaning, painting and then re-install :cry:

I will paint them in Foliatec 2196 - performance blue, it is pretty close the Montego Blue or what color BMW uses on sport/M calipers. I was thinking of doing the struts in white but it saves me from buying multiple paints and the goal for me is not to have the struts or calipers clash with the bodywork but I think they will pop through the silver wheels and grills and contract with the silver/stainless brake hoses too :thumbsup:
 
Back
Top Bottom