Atacama Yellow 35is build thread

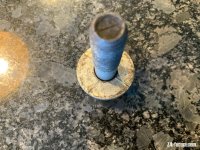
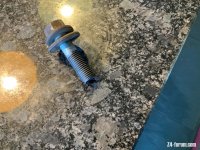
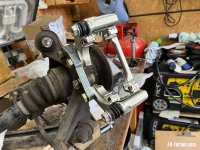
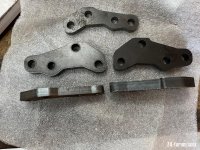
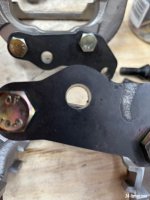
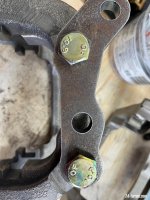
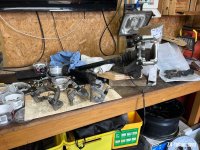
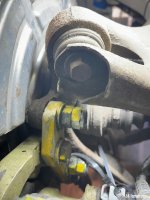
I had an issue with one of my brake carrier bolts backing out…maybe caused by the stress of the uprated rear brake, maybe cause I didn’t use the old caliper cradle bmw bolt which has some primitive antilock washer fitted..maybe because I’d remounted the caliper cradle several times the loctite had worn off..

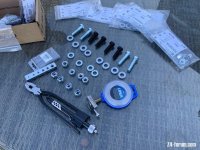
So using these fancy nord lock washers in super harden steel..arguably the best anti vibration washer…

Fresh 10.9 high tensile bolts…double locked the through bolts..

Did try the wire lock strategy but close to impossible to drill the bolt heads to allow the wire to be threaded..

Lots of medium strength loctite this time..
 

Attachments

  • IMG_3448.jpeg
    IMG_3448.jpeg
    180.2 KB · Views: 1,008
  • IMG_3449.jpeg
    IMG_3449.jpeg
    135.9 KB · Views: 1,008
  • IMG_3443.jpeg
    IMG_3443.jpeg
    188.3 KB · Views: 1,008
  • IMG_3444.jpeg
    IMG_3444.jpeg
    203.1 KB · Views: 1,008
Version 3 of the rear brake caliper adaptor for the 370mm rear disc conversion using a standard F series 5 caliper…

After discussions with a brake caliper bracket guru thickened the bracket from 12mm to 15mm in S355 steel…..

This will allow me to machine a mm or so off this bracket to allow it to bolt the caliper cradle up without having to use any spacer washers..plus..

This version allow for the 370mm version to machine the caliper cradle without having to machine out the entire gap between the front and rear mounts
 

Attachments

  • IMG_0891.jpeg
    IMG_0891.jpeg
    182 KB · Views: 968
  • IMG_0892.jpeg
    IMG_0892.jpeg
    330.1 KB · Views: 968
  • IMG_0893.jpeg
    IMG_0893.jpeg
    191.6 KB · Views: 968
  • IMG_0896.jpeg
    IMG_0896.jpeg
    218.3 KB · Views: 968
  • IMG_0895.jpeg
    IMG_0895.jpeg
    163.5 KB · Views: 968
  • IMG_0894.jpeg
    IMG_0894.jpeg
    88.6 KB · Views: 968
So treated myself to a couple of digital torque wrenches

Checked all my brake nuts and bolts ..after my ‘incident’

One knuckle to adapter bolt would turn at 95 nm against a torque request of 108nm so took it apart and rebolted up with fresh blue loctite

Apart from that all bolts were at the set torque figure with no signs of movement / fretting etc

Interesting using those wrenches as they provide various audible and visual clues to what’s going on…you can literally hear what’s going on with the beeps etc..very impressive..

Everyday is a school day
 

Attachments

  • IMG_3455.jpeg
    IMG_3455.jpeg
    119 KB · Views: 924
  • IMG_3456.jpeg
    IMG_3456.jpeg
    114.9 KB · Views: 924
  • IMG_3457.jpeg
    IMG_3457.jpeg
    118.6 KB · Views: 924
  • IMG_0909.jpeg
    IMG_0909.jpeg
    122.1 KB · Views: 924
  • IMG_3458.jpeg
    IMG_3458.jpeg
    144 KB · Views: 924
Taken the strategic decision NOT to install an Android head unit in lieu of the current idrive screen…

Given the sexy and shiny ID4Motion digital cluster I felt an equally shiny Android screen would match it well.

So I bought a Hi-Fi Max 10.3” unit (as well as trying their 12” monster)..

However the reality is that I use CarPlay extensively and/or the CIC core functions such as the Nav..

CarPlay doesn’t need / benefit from any increases in resolution or screen size…so I’ve abandoned it..

I was forced to buy a CIC head unit when my original died…but I’ve now had that repaired.

I saw a CIC screen from a 2015 car on eBay and made a cheeky offer which was accepted.

So I’ve got two screens and two head units…

The 2015 screen had some blotches which contrary to thoughts were not stains but holes in the anti reflective top layer.

So bitten the bullet and tried to fix that issue…

I used silver polish initially then bought some premium specfic fine plastic polish.

Very pleased with the result.

Maybe you could use a further finer polish to get a more glossy finish but not sure that’s a benefit with roof down in sunlight..

I’ll confirm it works well when it’s fitted…probably next winter..

Food for thought
 

Attachments

  • IMG_0940.jpeg
    IMG_0940.jpeg
    173.4 KB · Views: 729
  • IMG_0942.jpeg
    IMG_0942.jpeg
    164.1 KB · Views: 729
  • IMG_0943.jpeg
    IMG_0943.jpeg
    169.4 KB · Views: 729
  • IMG_0941.jpeg
    IMG_0941.jpeg
    152.4 KB · Views: 729
  • IMG_0927.jpeg
    IMG_0927.jpeg
    195 KB · Views: 729
  • IMG_0924.jpeg
    IMG_0924.jpeg
    172.3 KB · Views: 729
Audi MMI screens used to suffer from this. I’ve had success with an anti glare overlay. It hides the marks and provides a OE look.

I took the surrounding fascia off to have an edge less finish.
 
Reamesy said:
Audi MMI screens used to suffer from this. I’ve had success with an anti glare overlay. It hides the marks and provides a OE look.

I took the surrounding fascia off to have an edge less finish.


Good to know I’ll see how it performs as is.. :thumbsup:
 
So with the apparent cessation of manufacturing of id4 motion clusters and the less than impossible prospect of no more support I saw this unit come up for sale..never installed (can’t think why👀🧐😂🙈
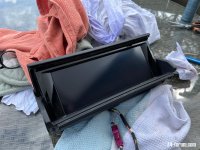
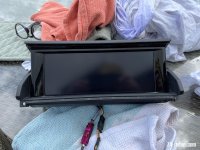
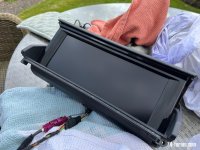
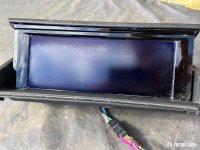
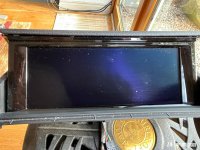
)….ive bought it and the helpful staff at id4motion sold me a virginise s/w patch AND gave me FOC a patch to allow all my existing purchases..themes, blind spot, boost etc to be transferable to this new cluster if I ever need it..

Building my spares pool for an end of the world apocalypse…
 

Attachments

  • IMG_3490.jpeg
    IMG_3490.jpeg
    139.6 KB · Views: 572
  • IMG_3492.jpeg
    IMG_3492.jpeg
    135.1 KB · Views: 572
  • IMG_3489.jpeg
    IMG_3489.jpeg
    122 KB · Views: 572
  • IMG_3491.jpeg
    IMG_3491.jpeg
    146.3 KB · Views: 572
Decided to revisit the tuning of my Match 10 DSP having climbed yet more of a long learning curve on car audio..

The problem with DSP based tuning is its as much an art as a science…with each channel having literally thousands of permutations you start from some basics but after that it becomes more art than science…

I’ve implemented ‘differential fill’..that is the technique of stripping out the common information of a stereo image and feeding just the unique parts to the two rear shoulder mounted speakers..this with an extra time delay (normally you adjust time delays from each speaker so that the sounds arrive coincident..) of about 12ms for those two channels..

This gives the impression of more ambiance to the music whilst not simply replicating a copy of the front channels which ruins the stereo image and/ sound stage..

I bought an optional device called ‘Director’ and amongst other things you can store upto 10 different audio set ups and call them up on the fly..

So I had a happy afternoon adjusting the system for differing levels of centre channel attenuation, more boost on the woofers and the subs, plus the various bass enhancement techniques this DSP offers..

The reality is that some of the changes aren’t obvious on some music but then really are noticeable on other tracks..

One more thing to twiddle with as I boogie along..
 

Attachments

  • IMG_3516.jpeg
    IMG_3516.jpeg
    174.9 KB · Views: 461
  • IMG_3515.jpeg
    IMG_3515.jpeg
    155.2 KB · Views: 461
  • IMG_3514.jpeg
    IMG_3514.jpeg
    188.3 KB · Views: 461
  • IMG_3513.jpeg
    IMG_3513.jpeg
    91 KB · Views: 461
  • IMG_3512.jpeg
    IMG_3512.jpeg
    175.2 KB · Views: 461
  • IMG_3511.jpeg
    IMG_3511.jpeg
    156.8 KB · Views: 461
  • IMG_3510.jpeg
    IMG_3510.jpeg
    188.8 KB · Views: 461
Back
Top Bottom