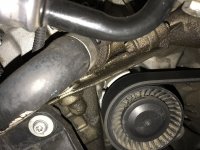
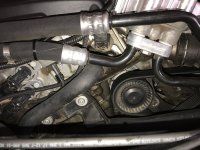
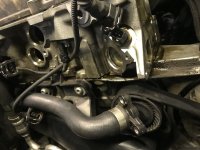
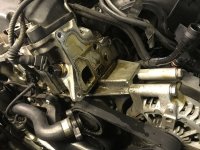
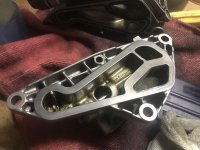
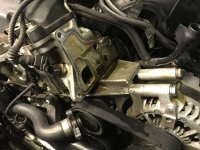
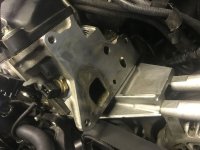
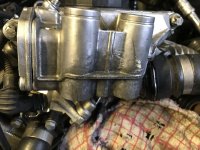
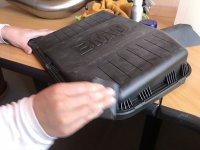
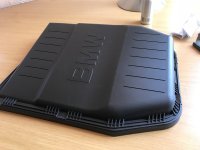
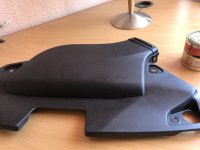
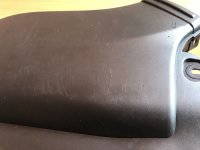
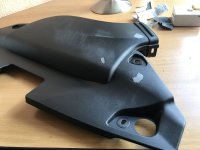
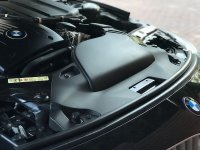
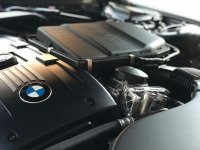
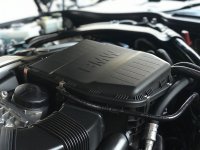
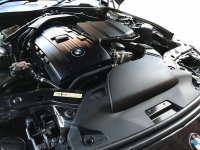
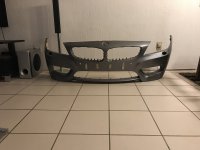
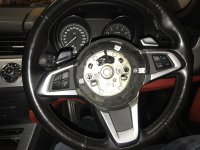
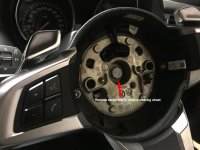
2009 Z4 35i Let the DIY and slight cosmetic modding begin.

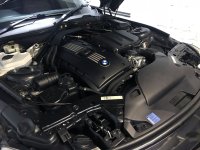
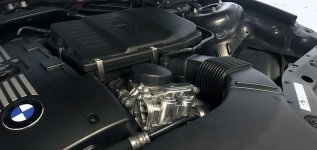
and its on and fits perfectly!
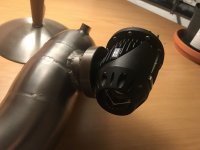
img_4776_4683789163.jpg

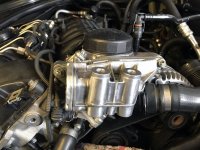
Now all I need to do is prime the pipe and spray it matt black, I bought a rustoleum textured black spray paint which will look great.
Want this thing to look stealth under the bonnet. Big shiny pipe with the old pink BOV didn't do it for me lol.

Now since I bought the car it had a bit of a radiator leak, it wasn't massive although if the car got hot enough in hot weather driving or pushing it, it would leak a bit more. So I finally managed to take the radiator out and send it to a radiator place to get it pressure tested to show my warranty people that it is in fact leaking and that they must pay.

So the radiator place wanted to remove the radiator for me at first and when they told me they need to remove my front bumper to remove my radiator I lost all confidence in them and told them ill remove it myself and bring it to them.

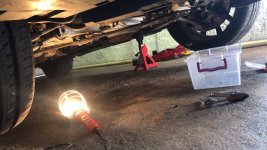
Jacking the car up and getting it on my new jack stands!
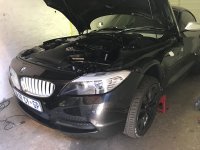
car jacked up_7242603711.jpg

Making sure nothing gets scratched or damaged while removing this thing!
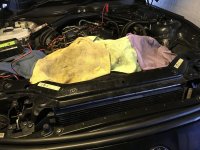
protecting my engine_3084357562.jpg

Metal brace removed to expose the radiator to make it nice and easy to slide it out from the top.
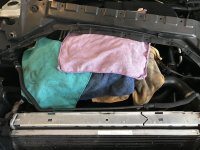
exposing radiator_5242444579.jpg

let there be light!
img_5239_725613450.jpg

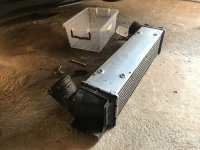
Intercooler out.
intercooler out_324650998.jpg

Radiator bleed screw exposed and you can see coolant leaking.
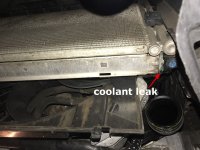
coolant leak_694954902.jpg
img_5240_4217969225.jpg

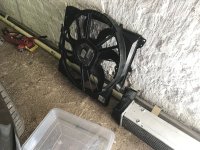
Electric fan removed as well.
cooling fan out_2432884545.jpg

And its out! after many hours of fighting with a bottom big hose that was being blocked by a metal bar in front of the engine that I didn't see in my frustrated state!
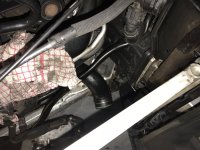
messy pipes and shit_7511552874.jpg

To be continued shortly! (BTW this image uploader having a limit is highly annoying....Just saying)
 
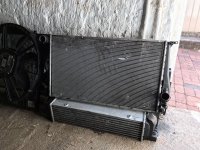
Out and good to go, To get pressure tested.
old radiator finally out_2200436261.jpg

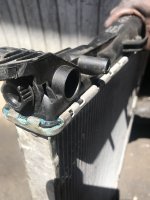
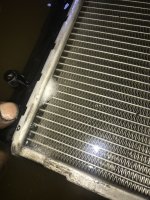
Coolant residue showing clearly that its leaking.
radiator leak 2_5363402748.jpg

And here is the actual leak:
radiator leak_4304932923.jpg

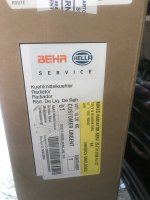
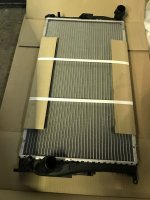
Warranty approved the claim and here is my new radiator in its box!
behr radiator_2987566753.jpg
new radiator_7147738360.jpg

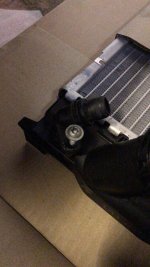
Problem number one! OEM screw does not fit BEHR radiator! Maybe it does and I just need bigger balls to screw it in and not worry about cracking the plastic but I wasn't willing to take that chance so I went out on saturday morning and found some screws that fit a bit more comfortably.
problematic situation with screw_4737661476.jpg

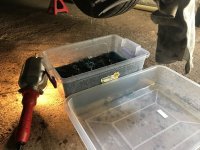
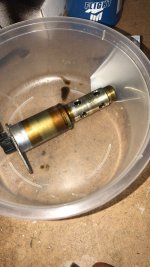
So While the radiator was out I decided to remove my vanos solenoids and give them a good clean as they have thrown an error once or twice.

Before
img_5262_8539134850.jpg

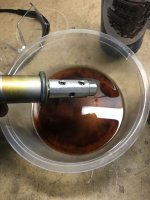
After
Check all the gunk that came out of these things!
img_5267_8440726068.jpg

Also I saw that my oil filter housing had a oil leak, although I had no idea what scale this oil leak was on. It was VERY bad!
oil filter housing leak_253591714.jpg
oil filter housing leak2_8717401567.jpg
 
Checked my belts and they seem fine.
So I ordered some new gaskets for this oil filter housing. Damn for two gaskets comes to over a grand! Thumbdown

I also got a torque wrench from my buddy so that I could do this job the right way!

housing removed_5752577725.jpg

Over tightened bolts causing the gasket to pinch and caused this terrible leak. I am lucky this didn't leak onto the belt and cause a catastrophic failure where the belt gets sucked into the engine!
over tightned bolts causing leak_8538245768.jpg

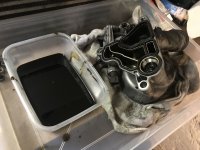
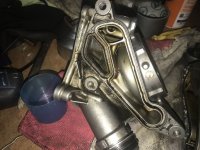
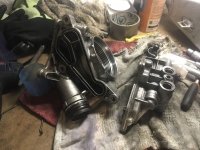
oil filter housing off and stripped and ready for cleaning:
oil filter housing main part gasket removal_9431419302.jpg
how bad the leak was_1155122788.jpg

Can see how badly its leaking here as well
stuffed gaskets_9026385853.jpg
disgusting dirty thing_2358349119.jpg


After some elbow grease and then used the dremel with a polishing fitting to clean where the oil cooler housing gasket seats.
dremeling the gasket base_5822092066.jpg

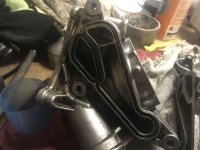
Over here you can see that the front top bolt was massively over tightened causing the gasket to pinch and even caused slight damage to the metal where the gasket seats on the engine!
over tightned bolts causing leak_8538245768.jpg


Anyways I got some 2000grit sandpaper and a sanding block to very lightly remove what I could of the coolant build up around that hole and then I used my dremel again to polish this whole thing so that it felt like glass it was so smooth.
oil filter housing base polished_6123586501.jpg

Now the gasket seals correctly!
 
Anyways after fitting the new gaskets and refitting the oil filter housing to the car and torquing it to the correct spec I decided it was disgustingly dirty so I decided to do something about this:

This is actually after cleaning and polishing it around a month ago, however I couldn't do it properly because when the oil pipes are back on you cannot get to this thing properly.

Before:
img_5396_4126023091.jpg

After:
Nice and shiny clean:
img_5397_3146692863.jpg

Right Radiator is now all fitted unfortunately I didnt have photos of me putting it back in as it turned out to be a grueling task with my injured shoulder so I just fitted it and then carried on.

Everything back together and cleaned properly:
I also took the car to the car wash where I put the car on a lift and cleaned all the oil that was caused by the oil filter housing to the front of the engine that actually dripped all the way down and dirtied everything under the engine bay too.

Another pic of how nice the oil filter housing is looking.
img_5414_7070144759.jpg
img_5415_6431874460.jpg

So that takes care of all the gaskets, tappet cover gasket was done recently. then sump gasket was done and now oil filter housing gasket has been done.

Next up is an oil flush and change, I am not happy with the state of this so called "New oil that BMW put in my car when they fitted the new turbos!"

Once that is done, I will be fitting my after market big intercooler and charge pipe.

Stay tuned for more updates!
 
Update time again. I know its engine related again but I am on a role here to get this thing to look mint! Besides I just think the N54 engine is such a beautiful piece of machinery to look at!

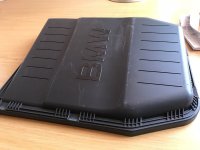
So the plastics in the engine bay were driving me completely nuts, the airbox cover in particular was a bad one for me. and when I got a quote for a new one I almost fell over! +-R5700 then the ram air intake cover was around 2k or something. So obviously another plan needed to be made.

So here are the before and after shots.

So this is the state it was in.
img_5475_2292410032.jpg

some sanding with 1200grit sand paper. (got a helper to sand for me :D )
img_5478_3622428686.jpg

after the sanding, didn't want to sand it to a point of where I loose the texture of the plastic, just to the point of where you can no longer feel the scratches.
img_5479_3136516357.jpg

Before
img_5464_6876167729.jpg
img_5465_5277723283.jpg

used pratly putty steel as a filler for the very deep scratches and then sanded it down.
img_5481_4260224727.jpg


After all of this I sprayed with medical alcohol and wiped it down and then sprayed it with Dupli-color Vinyl (American spelling)
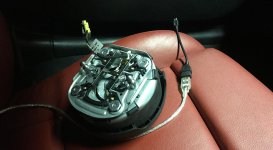
once sprayed I was left with a bit of a rough surface due to bad spray painting skills probably.
I then used a dishwashing sponge rough side to get rid of that rough finish and then wiped down with a microfiber towel which left me with a very smooth surface that looked OEM!

After the Z run I got back home and took a trip to builders warehouse and bought some meguiars plastic and rubber trim restorer and wiped the parts down and that really brought them to life.

And this is the finished product.

img_e5607_9404200301.jpg
img_e5606_589966378.jpg
img_e5604_2723209843.jpg
img_5599_2599471095.jpg

Engine bay is almost there now. Few more little things I want to take care of.
 
Oh and here is something I will be fitting to the car soon. Probably early in the new year.
img_2305_2868156144.jpg

As for more updates, I had this terrible knock sound and feeling in the steering and the steering was pulling all over the place no matter how many times I got the wheel alignment done. So today I went through to a scrap yard to buy a part (More on this later) and asked the guys there to look in my engine bay when I swing my steering wheel to tell me where the hell this knocking sound is coming from. At first glance they thought it was the universal joint and then upon further inspection they saw that my steering rack was loose.
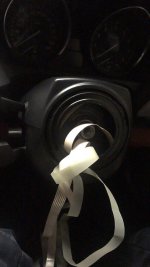
So when BMW fitted the new turbos and dropped the subframe and steering rack they forgot to tighten the steering rack bolts leaving me with a very ugly feeling Z4. I cant even put into words how s**t it felt to drive and I could never figure out why and I got under the car many times to inspect control arm bushes and all that jazz.

Needless to say they fixed it for me and OMG the car feels amazing to drive now. awesome precise solid steering with no vibrations and knocks! its amazing how different something so seemingly small can make a car feel to drive!
 
That is some dedication on a different level mate !! Well done !

The work you have done on the plastics is truly amazing, What a result !! :thumbsup:
 
You have put a great deal of effort into this post and it is of interest to all no matter what model in so far as the dash work etc is concerned. Many thanks for that.

Not meaning to be critical but I think you should have got rid of the car a lot earlier on, took the loss which considering the time, effort and cash you have invested would have been a lot more economical, then gone and found a decent car.

More worryingly in pic img_2686_2517450973.jpg I noted you have 'take my breath away' from Top Gun playing on your iDrive :poke:

Lets hope (and pray) you are finally there.
 
Dear god, how much did they pay you to take this car away?

brings a new meaning to the term lemon :thumbsdown:

Good work on rectifying everything thus far :thumbsup:
 
Some amount of work.
The plastic surround on your car around the stereo is completely different from ours.
Our stereo doesnt have a surround, its all in one piece, and the only extra part is underneath the stereo.
I wonder if its because ours doesnt have idrive.
 
A) very badly cared for car by the prior owner
B) glad to see man maths in action where passion for the car is concerned
 
Thanks for all the kind words guys. Its been one hell of a learning experience, if I didn't have such a deep love for the E89 Z4 35i this car would have been given away for anything else LONG time ago.

Anyways so last night I decided to try tackle a problem that has been bugging me for a while, my steering wheel makes a weird buzzing/squealing sound when I turn it when the car is stationary or I'm turning into a parking etc.
I tried spraying WD40 in behind the steering wheel before to no avail so last night I unplugged the battery and decided to see how this steering wheel comes off and see if I can find the problem.

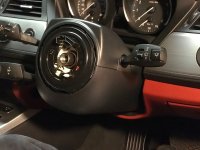
So after struggling for around half an hour to 45 mins I finally figured out the trick to releasing the air bag! :headbang:
airbag off.jpg
airbag mechanisim.jpg

center bolt removal.jpg

And its off!
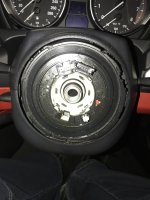
steering wheel off.jpg

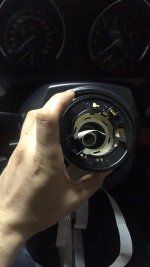
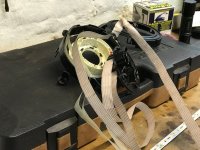
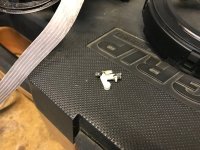
So I was fiddling around and then this happened :thumbsdown: :headbang: :cry:
FML.jpg
FMLx2.jpg

So I had no idea WTF this was or how the hell to put this alien puzzle back together and after hours and hours and hours of fiddling I ended up doing some damage. I think I actually shed a tear or two! as I had no idea what this was or how to fix it and more importantly how expensive it is going to be to fix and how the hell I'm even going to get my car to someone who can fix this! I really started to panic!
So I left the garage and went into my house and tried to relax and calm down and think! I finally came to the conclusion that this is just a carrier signal wire for the controls on the steering wheel and the air bag. This helped me relax. I initially thought it was the mechanism that controls the tension of the steering wheel when you flip the car into sports mode. :headbang:

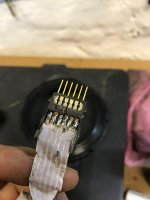
Apon figuring this out I ripped out the clear ribbon that I just couldn't get back inside which left me with just two actual ribbon wires that I tried for another couple of hours to wrap around this wheel mechanism to no avail, I started to panic again but kept calming myself down to try and do it slowly and carefully till I finally got it right and put it all back inside.

Now keep in mind that I had no idea that this thing had a special certain amount of rotations in each direction, plus it was very late the sun was coming out and I needed a car for work so I put it all back together and switched the car on being very wary of the air bag popping on me from doing something incorrectly!

Everything seemed fine! I then turned the steering wheel all the way to the left and that was fine! And then I turned it to the right.....FML is all I have to say.....there were actually no words to describe the pain and suffering I was feeling at that point in time, honestly I really just wanted a magical time machine to manifest itself into my garage and port me back to yesterday lol! FFS

So yea I broke the plastic locking pin that keeps this unit in place and manage to twist the one ribbon infront of the other and flip it. Needless to say it was a catastrophic failure.

Anyways I tried to fix it and when I pulled the thing apart it didn't look good. Anyways long story short I managed to twist the cables back the right way round and I managed to break the front plastic retaining bracket and and and.
But I did put it all back together and started the car and the air bag didnt explode in my face and crack my face in half. so that was the silver lining. Have to always be positive haha :lol:

Anyways nothing on the steering wheel worked after that, no paddle shift, no multifunction controls, no nothing, how I didn't get an air bag light is still a mystery to me I wont lie.

So I woke up and phoned BMW and that was just funny so I left that idea to rest and phoned a scrap yard that I know had a z4 they were stripping and sent the guy some photos and to my surprise he had this part for me! so I went to fetch it and here is my repair process that I will post on the next post.
 
Wow some great DIY work in here OP!

Really liking the exhaust tips! Did you weld these on? Do you have any more pics of these and a link? They look ace :)
 
Before I continue I need to state why this thing came apart and was making a noise.
It was apparent that it had been taken apart before and all the ribbon was just stuffed inside incorrectly, the wire ones were correct but the clear ribbon that holds everything in place correctly was stuffed in and crinkled to the max and full of some dirty grease and you could see repair work was done to it which I will show you guys shortly.

Here is the new Unit that I bought this morning!
new Unit2.jpg

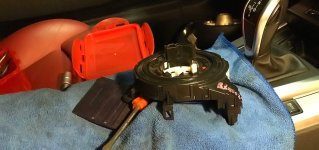
steering wheel removed and you can clearly see the cracked front retainer bracket that I managed to break!
unit that I cracked.jpg

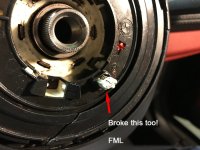
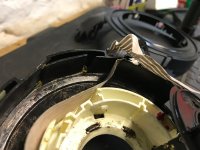
The locking mechanism that I broke...FML
broke this too FML.jpg

Make sure you pull the steering column all the way forward using the adjusting lever so that you can get to the back to unclip the plastic steering column surround.

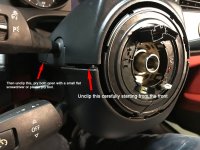
Start unclipping the steering column surround.
unclip front to back.jpg

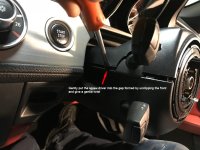
place screwdriver in the back now and gently twist, it doesn't take much force at all, be careful not to damage the plastic.
gentle twist.jpg

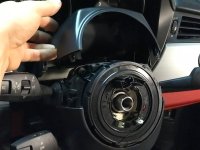
And the top part is off!
top is off.jpg

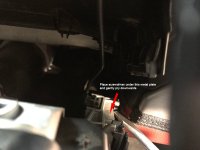
Place a screwdriver under the metal plate in the diagram to pry the bottom cover loose.
screwdriver under metal plate and pry.jpg
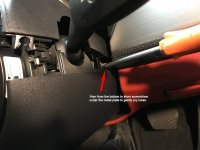
View from the bottom.
view from bottom metal plate pry.jpg

And bam its off, easy as that!
and its off.jpg

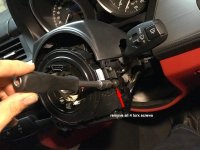
Start removing all 4 Torx screws as per the pics.
remove all 4 torx screws.jpg
 
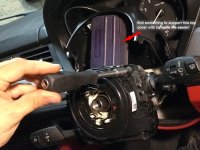
Get something to support the top cover to make accessing these torx screws and clips easier
support top cover.jpg

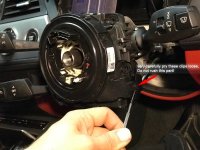
Start prying all the clips loose after removal of the torx screws.
removing tiny clips 1.jpg

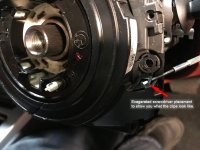
Here is an exaggerated example of where the clips are, I didn't care to brake this clip as im removing this piece of junk anyways.
exagerated clip placement diagram.jpg
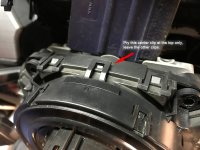
pry center clip only.jpg
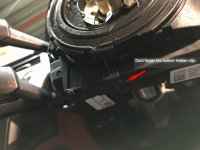
bottom hidden clip.jpg

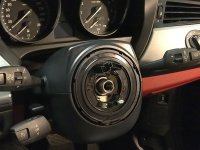
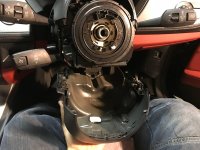
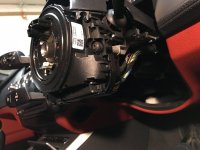
A view of the mechanism without the covers.
free at last.jpg

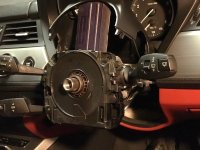
Removal complete, there was a wire plug that needed to be removed I forgot to photograph that, its very east to see and you will know which one it is upon removal.
Removal complete.jpg

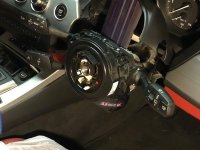
And the new part is on.
new part fitted.jpg

Right assembly is the reverse of the assembly but here is the unit fitted and covers all back on
back together.jpg

I will show what the old unit looked like inside in the next post.
 
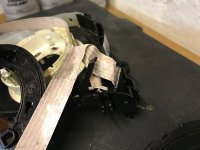
Offending part that made me question life! :headbang:
offending part.jpg
how I managed to break it 2.jpg
how I managed to break it.jpg

The locking pin rocker that I broke...FML again.
clip that I broke and tried to fix.jpg

And here you can see the previous repair work that was done to this thing.
previous shit repair job.jpg

Anyways its all back together and working great. However the sound is still there when I turn so I need to ask BMW what that is when I take it to them next week.


On other news, while at the scrap yard fetching this new part I asked the guys to look in my bonet and listen to where the knocking sound was coming from that I hear and feel when I move my steering wheel left or right. They checked and upon first views they thought it was the universal joint, the next guy came and looked and noticed that the steering rack was loose.

It appeared that when BMW fitted my new turbos they forgot to tighten the steering rack! the one bolt was almost completely out, a few more drives and it would have fallen out completely.
Anyways they tightened everything up and all I can say is WOW. In all the time I have had this car its never felt so incredibly stable to drive and sold. It no longer pulls left and right and I no longer have to fight with it to go straight!

Furthermore it no longer makes knocking sounds when I go over speed bumps or hit small bumps in the road or driveways etc. its just PERFECT!
 
sunnydays said:
Wow some great DIY work in here OP!

Really liking the exhaust tips! Did you weld these on? Do you have any more pics of these and a link? They look ace :)

Thanks :)

Yes I had them welded on, I will try find some pics tomorrow and post them up and give you a link. I actually bought them from a local supplier here in south africa but I have seen them online elsewhere.
 
mcbutler said:
You have put a great deal of effort into this post and it is of interest to all no matter what model in so far as the dash work etc is concerned. Many thanks for that.

Not meaning to be critical but I think you should have got rid of the car a lot earlier on, took the loss which considering the time, effort and cash you have invested would have been a lot more economical, then gone and found a decent car.

More worryingly in pic img_2686_2517450973.jpg I noted you have 'take my breath away' from Top Gun playing on your iDrive :poke:

Lets hope (and pray) you are finally there.

I did try get rid of the car at one stage but the mechanic working on it had my car for almost 2 months so another z4 that I wanted to try trade mine on was gone by the time I got my car back and besides my turbos then went two weeks later! was a stuff up from hell.

haha I like that song! I was born in the 80's dammit! :rofl: its strange how I used to hate all that music when I was a kid and my parents used to play it and now I enjoy some of it lol.

Im getting there slowly with this car its starting to become a very clean example of a E89 Z4, few more things here and there.


I would like to colour code the mirror covers to the same black as my car. Not sure what BMW were thinking when they decided that they should make them silver on a black car but whatever.
 
Back
Top Bottom