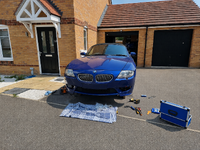
Reviving a Neglected Z4MR

0l0dom0l0

Member
I've been around on the forum for a while but never properly introduced myself - so here I go - complete with my story of how I became the owner of a very neglected 2006 interlargos blue Z4M...

Back in April 2025, I took a punt on what was, and still has been, the cheapest non category/ write off Z4MR that I've seen to date. Naturally, the car had heaps of interest, despite the awful eBay photos and the several declared issues in the advert. I was in Oxfordshire at the time, the car was in Southampton, so not too far away. A phone call to the seller later, I sent a holding deposit (without seeing the car) to secure my interest and headed down the next day to view the car with the intention of bringing it back with me.

Upon arrival, I was greeted by a nice chap called Paul, who had been the owner of the car for several years and done about 2k miles per year in it. Paul referred to himself as an "enthusiast" and I could tell was a genuine guy. I got the feeling he had spent a lot of money on the car over the years and had simply got to the point where he'd decided that the car had started to become more hassle than it was worth.

The car was filthy and had not been cleaned, it looked tired and tatty and the dash was lit up like a Christmas tree.... Perfect!.... Just my kind of project.

Several things stuck out at me:

Cosmetics
  1. The front bumper bracket was broken
  2. Bumper was scratched and a bit of a mess
  3. Missing headlight washer cover and washer insides
  4. Headlight was cloudy
  5. Roof mouldy
  6. Wheels lightly kurbed
  7. All badges faded
The car had a fairly complete set of history for it's 112k miles, no rod bearing or vanos work had been done (we'll get to that later), but a recent inspection 2 service had been completed along with a replacement front tie rod, complimented by a long list of "recommended" additional work.
  1. TC/ abs/ brake lights on the dash
  2. AC not working
  3. Diff input seal leaking
  4. Exhaust hardware failing
  5. Front left brake caliper bleed nipple broken
After a quick test drive with Paul at the helm, I reluctantly handed over the money and headed back in the car.

IQRRzODf8w1qTKt-EQo1j6_XATiSks2wX6bmFjN4YE81PoY
 
Last edited:
On the drive home I was immediately disappointed, the car was handling like a bag of s***. The steering wheel was at about 2 oclock and the throttle had this weird delay where it continued to accelerate for about 0.5 second after I'd lifted off. It was strangely off putting and distracting and took all the enjoyment out the car. It seemed very odd to me as everyone raved about the sharp and precise throttle control on the S54, something was off.

Instantly regretting my purchase, I set out to try and tackle the various issues on the car....

A/C

The first thing I decided to try and rescue was the A/C. When diagnosing any A/C issue, the best thing to do is try and get the system recharged - you get a free diagnosis. If there is a hole in the system, they can't charge it with gas and will turn you away (usually FOC). If the system passes the pressure test then you can normally get an indication on the system health by the remaining gas level in the system - gas left usually means it it just low, no gas but it passes the pressure test means it may still have a small leak. In my case, it was just low on gas, so an hour later and the A/C was working, result!

IQRS1ecyAIT9R5S5UuK30lVVAbhBVRq0bY2rHgPGRqdiCDI
 
Last edited:
Cleaning...

Inspired by my success with the AC, but equally embarrassed by the state of the car, I couldn't stand looking at it anymore and decided to clean it next. The photos make it look better than it was, and hide the full thickness layer of grime on the steering wheel that became sticky when it was touched :sick::sick:.

IQQZ6r2LTTDQSpCi4p3e5peKAaZ26xiReyY_RoV843ISb64


IQRJmzX7iaCgQ54TF19bKx18AYoc_-olAPQOOQowvIe2Mwc


IQT4zjBHibaETaly2qaPtiGBARfZY3kheKy_F8YhVmM2oGg


IQRnV1skTmd9QKZeoreJSUifAW89cBDYHzxAhGjdwefKKl8


IQTTeagMV78NQZXfJ2atOE-tAZmP2t4vPX9uUe69P9plC2Q


IQSiFxoiwJAJT4_IjHDe2QBUAZKN-mO8VSJoXVxiYw2rK2k


IQQph_ydhSDhRJuqpCKJC3IRAVKgzV73HFzBfemy_nJHItE
 
Last edited:
The roof....

The roof was actually working which was a nice touch, but it was imbedded with algae and let the car down. Most people say that you need to re-colour the roof when they get old. I had my reservations and was concerned that any re dye attempt would leave the roof looking patchy.

I employed some autoglym soft top cleaner with a soft brush on a drill and was disappointed. Despite cleaning the roof several times, I was unable to shift the algae. At this point, it was clear something more industrial was required.

So next attempt was to use the soft top cleaner and brush and rather than rinse, I decided to carefully pressure wash off the roof (against recommendation). I could instantly see the algae disappearing and knew that this was way more effective. I left the roof to airdry and was pleasantly surprised by how much fresher it looked. I continued and applied the re waterproofing liquid. That was the roof sorted.

IQRWDXrALDN7RJ-c8U8W7PpzAU8Tp6olmUcRCTKx77quW7A


IQTj0uV7duECQb_ZXNNd7l-gAVV7r86IluK6EcM4Idc5rXU


IQS5Jqc_raUjS5nsC_HhBumzASRYC3r4dRU2Bzz30mr4YY4


IQR3XeRU3yUlS7sWv5Ob3H_QATrkscaUtws9xnaLqYs-x9w
 
Last edited:
Christmas came early.....

So with the cleaning out the way, the next thing I wanted to address was the christmas tree dash.

When buying the car, I had scanned the car using Carly and noticed that the ABS module was complaining about the steering angle offset. The car had had a replacement track rod with the recent inspection 2 service, given that the work had been done at a well regarded specialist, I was a bit confused with a couple of things.... why had only one track rod been replaced, and why had the tracking not been completed after this work?

Clearly the alignment hadn't been done as the steering wheel was off centre at about 2 o'clock to go straight, confirmed with no mention of wheel alignment on the invoice.

Anyway, at this point I took the car to have the front toe adjusted. Before sinking £100 on a new track rod so that both were new, I wanted to see if the wheel alignment was indeed the cause of the christmas tree dash. After an hour or so at the garage, I had confirmation that the front toe had been adjusted and the steering wheel was now straight. They had been unable to adjust the one that hadn't been replaced, which was to be expected but the alignment was good enough that the wheel was dead on centre.

A fault code clear with Carly, and an ignition cycle later, the christmas tree lights had gone out! Winner!

More importantly, the weird throttle delay that was absolutely killing the car had also gone away which must have been part of the limp mode the car was in when the dash was lit up. Double winner!

I felt like the car was now safe enough for me to have a proper drive through the Oxfordshire countryside and see what it was all the fuss was about - and this was the point that changed everything for me. The engine, the noise, the roof down - I just had this moment where I said "why didn't I get one of these years ago??".

IQQOGtZ1XE5lRphGX6-Q2ddJARBpOdlZtZQMzr7yZ4-u2uM
 
Last edited:
I wish I'd never started...

With the cosmetics now in reasonable order, my eyes were continually drawn to the poor state of the wheels. While the curbing wasn't too bad, the paint was flaking with visible corrosion underneath. Up on axle stands to get the wheels off, which would also give me a chance to tackle the other track rod while I was waiting for the wheels to come back...

IQQ9jG6kfEtiTrYQH16ukEQYAc0wm4GLbQU6-AAWHidR_YY


IQQXjqh35nxXSZzHKHfuELH6ASQPHBbpToig2fPpdWxAu4A


With the wheels removed, I'd noticed all 4 bump stops had been completely destroyed. I also noticed that paint on both the front and rear springs had started to fail. A quick google revealed no cheap replacement parts for the Z4M suspension, springs/ dampers etc were not available OE and BMW were eye wateringly expensive. I therefore decided to remove the springs and take them to be powder coated with the wheels while I waited for the new bump stops and top mount bearings to arrive from BMW.

I'd also placed an order for several other parts:

  1. Rear trailing arm bushes
  2. Brake caliper bleed nipples
  3. Replacement headlight washer and cover
  4. Complete tie rod and dust cover
  5. New centre caps
  6. Wheel bolts
  7. Rear top mounts
  8. Replacement ashtray
  9. Rear diff seal
  10. Replacement gearstick
  11. Exhaust hangers
  12. Rear brake lines
  13. Gearbox mounts
  14. Prop doughnut
  15. Engine mounts
RTAB

These had been advised by the specialist, despite in the end being there being nothing wrong with them. Fitting them was straightforward using the tool. Remember to follow the BMW instructions for tightening them to the cup so you get them set to ride height.

IQT36hc8m79yQa-9X3gNgrKMAUSXBibuCrqbpi7b_EJtX64


IQSA2NrByvfERp3JaK5f_0vJAT1wsAMPXWSDi0ys_m-TeW4


I'd noticed that the rear antiroll bar drop links were split, I tried replacing the drop link in situ but it was impossible so I decided to remove the rear antiroll bar. This meant I needed to drop the exhaust - not a big deal as this was going to be needed for me to replace the leaky diff input seal.

IQQdhguintr3QZN81gczOUDcAezna8orwbD6iJlr9QQ9f8U


Removing the exhaust had had an unexpected side affect, the front flange that bolts to the downpipes fell off! Another thing to add to the list....

IQTXktuCKsA5TKLXhbX0QBolAT7AxBh10XMb1UxkGnUC7sk


Removing the exhaust had also revealed some other issues, my front downpipe was unfortunately cracked. This needed to come off to be repaired.

IQTWagSx74zdR4UE8T0FORCuAQVCa8-IOQIcLuMlQLXY0ts


With the propshaft removed, I decided to replace the centre shaft bearing while in there. The original was okay, but just more of "do it while you're there".

IQQdBZqjT7LUTI7j1O2fuk9MAV5MaysmBDBf6_4DoObcPKU


IQRyGysLxH4kSZyoTS_8xS_1ARlzY9BXnYE4T4BkImcg7G0
 
Last edited:
Light at the end of the exhaust...

At this point I was starting to become a little overwhelmed, the exhaust was something that I knew was not going to be an easy fix and everything I touched seemed to direct me to another issue. This post and the previous one spanned over about 6 weeks... it was also the middle of May and the car being off the road was missing prime driving time! Additionally, my brother was getting married and I was about to start a new job, I needed to start getting things back together. Photos are unfortunately a little light here, patience was running out.

I'd collected my freshly refurbished wheels that were looking fantastic, along with the springs.

IQQynheE7p8xQZHoPBxBAnmQAXh2Gu_D4D_hcNAGb1S0pQA


IQTvrGRd3UX_SK5GLapHu4oBAY8Gw7MyQbRvcdvzIZocnAQ


I'd also set about restoring the front headlight that was foggy, a light sand and then a 2k clearcoat had brought it back to life:

IQT90argKgLzRp7wGDjR2uUKAXLaRPavh19ozG8uHbO_-yA


IQTjrHigzduEQqPkJY8QhJpXAbUt8KBu5pCWZkluEvzZ8Es


I spent a bit of time refitting the bumper and adjusting the light position. Paul had told me he had previously had to replace one of the headlights and so it seemed the best time to recheck all the front panel gaps. This was the perfect time to replace the front bumper brackets so that the bumper clipped in properly. I'd also fitted the new headlight washer and painted the headlight washer cover (although not shown here):

ChatGPT Image Jul 24, 2026, 12_33_13 PM.png

IQTdVstQcovvSJSEphKXQXyOATqqUt8sT6Qq4N4AUhsVZuo


So back onto more mechanical work across the car, the various parts had turned up and so I'd started reassembling things. Unfortunately I don't seem to have pictures of everything, but at this point I had replaced the diff seal which was quite straightforward, re assembled the front shocks with the new hardware. Replaced the rear damper top mounts. Extracted the broken bleed nipple and replaced the rear brake pipes.

IQTdo2viEPb7Qr6fqVmRHeAAAQ8PyE2bmjTLPvtrV1UkB1c


IQR1rEQibwZ7QYdCWEV9V94BAbRF379irvxDZBxN2jPDGTY


IQQJCbcqJ5TBQaRtJupgGN5_AX3mESXx6Hj_jZJWDKZFArQ


New tools to get the track rod off, it had been giving me lots of grief:

IQQBZhpMkRfuQ6OgKQS7wT1FAdkE3_KdWDKz-4Gz3PprOKE


IQR1ChnVLFgKTJPbJxvup3ZFAcxBNSMpE6C_oY_-2Uys69c


Engine mounts, new vs old....

IQTaEKE-Uh2iQIAKn9cNoBzUARxPnqk0UQNl40evr2aiOzQ


I'd also cleaned off the rear undertray which was covered in oil:

IQRAjN9_V_LeSaOlxK4CJnByAeyHtyN8PK0zKKZLj6t6pP8


And freshened up the exhaust with some oven cleaner:

IQQkJIlMTKRlR53olynS-uXaAVWdvIOMxJpxjZ1RcRHxjD4


So with the long list of stuff done, I turned my attention to the exhaust....

IQRA3KrNQh8kRJZe543v65wiAbOxyqPnpu1Gz_chIxbmFhA


Removing the manifolds and cleaning up with situation with a wire wheel had revealed that the downpipe was cracked nearly all the way round. I looked up the cost of a new exhaust which at the time was surprisingly reasonable from BMW at £600 odd each side.

Anyway, I couldn't bring myself to chuck a new set of headers on it when I felt like it was quite a simple repair.... except this opened a can of worms :rolleyes:.

I ordered some 55mm OD stainless tube off ebay with 1.2mm wall thickness. The standard wall thickness on the Z4M/ CSL headers is 1mm. 1.2mm wasn't ideal but it was all that was available. So that arrived, and it turns out that 55mm OD actually equals about 55.2mm - 55.4mm in real money, which meant that the doughnut gasket wouldn't fit over the tube...

I rang round a few places and a helpful chap in Bicester told me to head up there and he'd swage me up a piece to match - upon arrival he cut me a short length of 2" od stainless with 1.2mm wall thickness, stretched it up to 55mm using the gasket to make sure it ended up a snug fit, perfect! Now I just needed it welded on.

Unfortunately he wasn't able to do it as he was too busy.

Now, I do have a tig welder but welding two sections of 1mm stainless together was not something that I fancied. I asked a good friend of mine if he could give me a hand, but being the impatient individual I am, I couldn't wait for him to come and do it. Many hours later of practise, I decided to give it a go...

So taking me time cut off the old piece and tacked on the new piece:

IQTGgCS5_543Sr1-B95qJThZAXwgX5X6Q7cyx0DEBRRX59o


and then back purged the pipe to get a nice clean weld:

IQQ7Yz1AwPJxSoBphgdt9-WlAeLeRYfJDN8V75X8K9H0-GM


IQRidC27GR0yTZN0QJAujYYuAdoDyCf1rueQ9x9FA4cYyw8


IQQQo219_q3FQIfy9hdf36fkAT-AFsPd9Hy9Cp7dqGVJe_c


Now onto the cats...

I'd picked up a set of E46 M3 decats. Making them fit was going to be a bit of a hassle and I couldn't be bothered with the MOT hassle either. However, getting hold of any kind of flanges to do a reasonable repair on the mid section seemed impssible. I purchased the decats so I could cut the flanges off to weld them onto my midpipes.

IQTc0wblqWZsSoPCH262pXCZAZrZ1nDW3ZVXwc_WHkJVU9Y


In the end I decided not to use them, there were some differences in pipe diameters that I didn't really have time to mess about with. I was also having issues with the floating flange on the downpipe being cracked, as well as the other flange on the cat section being cracked. This is where it becomes incredibly tricky, as either you need to make a jig so that everything lines up again when it goes back together, or weld it up on the car otherwise you'll lose the critical alignment. Realistically I knew everything needed addressing at once, but I was at this point running out of time to get everything back together.

I decided to just proceed and weld as best I could the original flange back on to the midpipe which came out okay. At least I could get the car back together and come up with a strategy to attempt another repair at a later date.

IQQIWvDkbGRFTJq6Qg4QjCOpAWicXnDYZPG5hrKaHE8kAHY


After a completed clean and degrease of the underside, I had now successfully reassembled everything. What had started on the 6th May, had finally finished on the 20th June....

IQTj0DRm3wx2SpoFbR81Os84AV-L_9ATS1X545X_CRoMpDU


IQRn_eDwJyW3SIBCUudQ8VIJAZiaqbXEYVZVEUvOzXQIZPQ


An MOT with a clean bill of health later (less an advisory for the inner edges of the front tyres, caused by the s*** tracking :mad:) I was back to blasting through the Oxfordshire countryside once again!
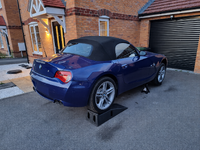
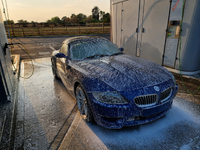
IQSW5u7cnd1jRbehb0MAsHOCATAiBtNjkDCyFJf3qlHTCY4


IQSvWSTGe3UITLZdQjsEiQQXAZzsxeMYM6MnH7Say3eoVJI


IQQPvdE-QYFUQIu_ojsIuHVZAZjk1u704QcvPCgg74IQP8w
 
Last edited:
Feeling a bit flat today....

IQTq3rFhZvz1R7RCkBi-Ayx2ATuH0Bj1Ou-ZXMWG_byLnL8


So I'd picked up a puncture - and realised on the morning my friend had turned up to go for a Sunday morning stroll in the cars which was frustrating.

As my wheels had just been freshly refurbished, I didn't want to risk taking them to any old tyre shop to get the tyres changed. I am yet to find anywhere that is able to change tyres without damaging the wheels.

Anyway, front wheels off and new tyres sourced. I went for Michelin PS5 to replace the PS4's which was a mistake as they just do not have the grip. In hindsight I would go for the Conti SC7 or maybe the PS4s next time.

My quest to find someone to replace the tyres without damaging the wheels was unfortunately unsuccessful...

IQRc7q0Y5UQjQoRWI0p3SNrKATM7yNTokutsqGJ2SEwSEEg


IQQw37rsa424Tb3xSxo3HJhOAd3Ajebk344shoWykoGnQ2g


No worries they said, we will take care of it.. they were an alloy wheel refurb shop afterall... well they didn't....

A botched repair later, I took the wheels back off them knowing that my OCD was not going to be happy until they were redone properly. The scratches on the wheel where the wheel weights had been removed were a complete mess and right in my line of sight, plus the scratch from the tyre machine had been repaired so badly I just took it on the chin and moved on.

I also took the opportunity to for a bluemusic in place of my CD changer which was a terrible mistake. Getting to the cables you need on a car with the CD changer fitted is an absolute nightmare. You have to take the entire centre console apart!! For anyone that reads this, do it via the headunit instead! It is so much simpler and easier.

IQQNqBKyDOqrQ5Akk34Cimh2AVzdiZxHWLeWnKna3aEMQl8


The car had also drawn some unwanted attention while parked on my driveway which was a little disconcerting.

IQS89sNGFk-qRZdvzg1usLM7AdFV0PbDJWRaoESqc-co5VQ


Anyway, new tyres on and now able to play music that I don't even play when driving... I was back to driving around and enjoying the soundtrack of the S54 instead.

IQTuUfyzH5e4S7JNQ1L4lKEeARWkiJKnDzWO0vl4ppv-j28


IQSg0Us8jGolSKG3CbE-UmZHAaqQkIvRiUlYKQsY1MG2YWw


IQRf-pTuUa__QJvKuzn_XCqkARhdoAZF1ADkGgafBXLpxqs


IQRrwj-SMx6JR6_huIRmxF1hATjP-UkRkb4e70IsQznq0Bs


IQTRLFwkrfAORZr924LUrcTmAQJVjHzdi5f2ApWVR0ElMrs


IQSVrWcffDFkRY1AeD8FoS-zAWNaYilYzvbrMhCcxc0by_0
 
Last edited:
Knock knock....

I, like most S54 owners, was aware of the potential rod bearing issues. I was really enjoying the car but at about 113k miles, I couldn't help but have this nagging feeling in the back of my mind that I had no idea of their condition. Paul had reassured me he'd warmed the car up gently, but what about the owners before that? Researching online gave me nothing other than it was a case of when, not if...

Reading on the forums had also led me down a confusing path of which bearing and bolt combination to use. Being the OEM kind of guy that I am, I always stick to OEM where possible. However, in this case, I wasn't sure if that was the best option. After a lot of research, I concluded to go for the ACL bearings and OEM bolts. There have been no reports of rod bolt failure on the S54, so using the factory bolts seemed sensible. I think most people are put off using them due to the awkward 3 step torque procedure, vs the ARP's which are a must more straightforward torque to spec. This was also reinforced by people reporting a slight distortion on the rod cap with the ARP's as the clamping force was different.

Bearing wise lots of people were using the ACL with no issues. Given the OEM ones have failures, it didn't seem to be too much of a risk to change direction with them.

I'd also settled on installing a new oil pump. I had read reports of the pressure relief pistons getting scored. There are aftermarket solutions for this, but for something as critical as the oil pump I wasn't really too keen on going down that road either.

At this point I knew what combination of parts I was going to use so I'd started ringing around to get prices. Localish to me I had Redish and absolute M3's. I'd also added up the cost of the tools to do the job myself and done a lot of research on what was involved.

Quotes for the oil pump, the ACL bearings and standard bolts were coming in at £2k+. It was quite a bit, but then you get the peace of mind, the guarantee etc. I was really 50/50 on whether to have a go myself or not. I initially had wanted to wait until winter to get them done but just couldn't let it go.

Anyway long story short I decided to have a go myself.

New bearings:

IQShihpmvekqS7PUBH-azrTUAf7925noaosw6JNrhmRJPII


Engine support beam:

IQTUO3J2zGrQSZfrwouYhHM5AbrE0ZdNlj2byGVcyJNk_Oo


Digital torque wrench to the angles:

IQRufEm-EommTqmRsoVEbg9GAUDywKGQNu9gaqVR8W5desE


So back up on axle stands it is...

ChatGPT Image Jul 24, 2026, 11_52_01 AM.png

Front subframe removed:

IQSeHUx5OPupSpssSVeFAY31AXKVCAVAkksLUQ2m2djO3eY


Sump off:

IQRYZG8rFQdrToWUHiYgEjlGAeIP5QS7L7TyX5w1A0HTM3o


Moment of truth, first bearing removed:

IQTFfcdcD6KbQ6vZUVu2sOHfAU9q9aQ5Mfyvq9nufayuogM


And it was absolutely fine...

So lets continue and check the ACL bearing clearances are good:

IQRlkncJYZ_4QZ-M-2r6wds5ATFUXTstRKI4v14K53Tz62w


And they were bang on the middle of spec...

Time to get them all done:

IQT_4dDp8ZxTT7_K4NP_dz5GAaLtW2z-VsuMMT64I0E0f5c


IQR-4R5eM1UfRKET3rLRtJATAYGtbQKik_4-gXVbEDciN90


And they were fine. This was a weird feeling because essentially you have done all the work for nothing other than peace of mind.

I wanted to check the condition of the oil pump relief piston which was indeed in a sorry state:

IQTXFJ1UjszGRLI-nxLGnjhsAWCGRdC3zEEiymt39zQCOWs


IQRnCaZaUiuXSLykHMjcPF7zAbfkGBMWRGbSrWJ9wxt51Qk


This is caused by a bur that is left from the machining process at the factory. Pierburg should know better....

Anyway new pump in and everything reconnected:

IQTk0fKa1B_SQJj3BFJuBSLPAUh8k-nZi_hthFu_areSvhc


At this point I had a little bit of a niggle that was bugging me. With the sump back on, the oil pickup pipe seemed incredibly close to the pickup plate on the bottom of the sump. I measured the clearance to be around 5mm I think. After much reading around, others had reported the same concern. In the end I rang up Redish and spoke to James, who told me that they'd never even measured one! He said if everything has gone back together as it came apart then to send it.

This is one of those things where you send yourself down a rabbit hole.

I'd also got my wheels back from being redone:

IQRVkpu7UV09TKwojUjtkT4ZAbzbOOoUnaocvrd_64iUCMk


So with everything back together and with the peace of mind, back out driving again!

ChatGPT Image Jul 24, 2026, 12_08_56 PM.png

IQRfxSIUm9zVRrw2LDvF3HuZASaGjFj9waBB-ss3zSj9p5c
 
Last edited:
I'd completed the rod bearing work at the end of July which left me August, September and October to enjoy the car. Everything was running well.

Come December, I'd cleared out the garage to get the car in it over winter, which would also give me a change to address some of the other things on the list.

I wanted to spend some time addressing the paintwork, which I felt was letting the car down. Many years of poor washing and some repainted areas meant the car was covered in swirls and sanding marks.

I'd never done any machine polishing before and after some research I decided to order myself a DAS-6 PRO PLUS V2 kit with different pads and Menzurna polishes.

In the end I did a full 3 stage paint correction across the entire car over a period of about a month. I will let the photos speak for themselves - I was thrilled with the results. I'd also removed and completely stripped down the front bumper and dropped this off for a respray as no amount of polishing was going to restore it.

Bumper at the paintshop:

IQSp0iTHjsjwRoAYPUwgNx1EAal0NNB839KehBUQu0utmNg


IQQSMFYPqAe8SJCBLWqRX-maARGuiF5_eRS7tvTKdCZISxQ


And some photos of the paintwork:

IQTFx3FPOuX-QKbku3oHL2L0AaFgtOihsv-zD9XStFzJlKg


IQTz8Ff-xKytQ6Hlo73ajfV1AZ98cu_Zsc8LW5O_EQF21co


IQREUYqdA5SZRbiOwIFlkuABAUC2t18S4Me1vQnJDLkmydU


Which came out very nice indeed:

IQTJSScFYJXgR4FPB-vafS_MAVoOCh_-Je9XnSlRlNcW0XE


IQQPIK3l3dJzQIAWyUw5sgJgAVahK41eHkyM6fuO5njLUh4


IQRHKwajQZ_qT5-e60nsmTIzAV94qp3nPMV_kMcT1Dr-BYg


IQSG1ZtWV5r1T7c3sj8a_cX0ASxhksPnK-uyqmLrC2fId2s


IQTDYrCu_jY7TqK9KPhILtfoAVFy8T_zt3tvMY2V-ITZQbk


IQRfgBjOgzIRSLhSV2EwqZSDAS3PiTBhdF_3y842ejVLi1E


IQTa8rhe5yEzRZtH9CizoUtcAd_5zTEXGo49G_P96BqbHds


IQSC9WyI6-0qTbTkfV5fGrYFAd7hOIHl2-qU0n7tWncedLc


IQTHeWdN9UKMSaoiD1JVrt53ASbiAVWcDx9Rv6HWfXFn0JI


IQQiwSUX0CgJT5quobuA4jsUAUTqO3nDDtj6Sxwskkz8gpY


IQRV271CfY0TQbRt_CBc0xY2AUwu0fajc2STPJ8NW4FNHOA


IQQFobXCI4kDT6ZPnW4qH-11AR1I3dFNDuInI036TydGW0I


IQSuVqyrK2b-SKqSkoMFIRYhAVZcFBs09K4SueCCVpaLSEc


IQQowVsdaCqST7ddwcOq3yw5AVYOj90c9_9pqvSmKcSG6rw


IQQq5DwXEA5sSLSah2HZ2rAdAT3Rjyc5E5qDGDUyHaXKkC4


IQSkkCQP1BETRrQlXfx5_D02AV_TbY-GkeheB9DzdhNUvLE


IQSi4ld8wHhTSKpP5qrkgZwOAW-ABAtCmQHGoLvKQQ4BIcg


Freshly painted bumper:

IQToFPnWMpY8QqJoC0r1Uw1AASdw5wW398Nx2t5Ev9AQbVQ


IQQazcdiVDqASq-vZ8HIKuCwAfurshPkdPnWvyE36kDKUlI


Roof cleaned and re waterproofed again:

IQRDBXRPtDc_Qb4ZTpMaKV63AfCmNBer7F-2oEHxsQH6KZw
 
Last edited:
So with the paintwork now as good as it was going to get, I turned my attention to some of the other cosmetic niggles that were now sticking out like a sore thumb.

I'd already replaced the front bonnet badge, but the rear boot BMW badge was looking tired so that was replaced.

As is very common with these cars, the ///M badges were looking a little sorry for themselves. I didn't fancy the £100 each that BMW wanted to replace them. Although the chrome was not as fresh as it once was, the main issue with the badges was the faded stickers.

IQQIDI-jhGwMTpWDFT6iqhfXAUkFssMS-hc5f7nf5s9bnew


I'd looked around for replacement stickers with no luck and had seen others were in a similar predicament.

I decided I was going to try and make my own....

The stickers went through several iterations with different suppliers - colours and textures were a little different at each attempt. In the end I had gone through 5 designs with 4 different suppliers to get them to a place where I was happy that they were an almost exact replica of the originals in terms of size and colour. Through this development phase, there were minimum order quantities/ amounts to navigate through, supplier visits to do and costs had started to rack up as well. I'd probably spent a total of 3 or 4 days on the design to get them how I wanted.

I knew there would be demand for the stickers, so decided that in order to recoup the time and costs, I would offer them for sale. If anyone would like a set then please message me, they are £35 for all 3 posted to your door, I can ship internationally too. I've sold over 20 sets so far.

Here's an overview of the different revisions:

Revision 1 - wrong colours and wrong texture:

IQRb3PkHtTdwQa5Wcc4rokmqAUuBDPrKrfKFct_AwmVRHf4


Revision 2 - texture was much better but colours were still off:

IQRxT8iRJUTqSIKZJLC-9ZjwAVPLzALmaSKYwAR-jXC1ITM


Although it had freshened things up while I continued on the design:

IQREYrN1E4BaRI-B2Id_-XsaAf8WZ25QGDdD5jOpwuBZ7rc


Revision 3 - Same product file but different supplier as the above, colours much closer, red slightly too red, not enough orange:

IQRKcjNGTQLBQJsSakG0uiiYAf-lWV-v3A66GCQ9jVW97Aw


Revision 4 - bang on

IQSxRynow059R4JASkmo9GGFAcvLziXXs8PcimwK58ia0QY


And this is what you get if you'd like to purchase them, pre cut to the right size ready to stick on.

IQT3ptt3VG5mSbgqKRlIV33jAeSofscvPj3x3SuwkrBSPu4
 
Last edited:
Moving the car in and out of the garage over the winter had revealed a weird issue. The car was sat on a CTEK charger to keep the battery topped up and healthy and it was starting without issue. However, when I left the car running in the garage to warm it up, it was exerting weird symptoms like the battery was flat.

I'd scanned the car for faults and had been getting a "communication fault with the alternator" for a while, but hadn't shown any charging related issues until now. A quick check with the multimeter did confirm that the car was no longer charging.

Looking on realoem, I discovered (as seems to be the theme with this car), that the alternator was E85/6 specific. Further research determined that the Z alternator was a 150a VALEO vs the 120a used on the E46 M3. The Z4 uses an electric cooling fan so the extra output is for that.

More research also led to me look at the voltage regulator that sits on the alternator and controls the output. I found a replacement after cross referencing some part numbers that was coming in at around £60. I'd been looking to try and price up a complete replacement alternator but was having issues sourcing an OE Valeo part without going through the dealer at £750 odd + vat. I found it highly unlikely that the unit was completely unique to the car - maybe the combination of pulley diameter and alternator body was but the alternator itself almost certainly was not.

Anyway after lots more searching, I finally managed to source a brand new OE Valeo unit for £215. At this point it seemed a bit of a risk to replace just the voltage regulator when I could get a brand new unit for that kind of money.

I also ordered a new belt tensioner and idler pulley for the aux belt, the belt itself was new and replaced at the inspection 2 service. I also took the chance to replace the tensioner for the AC belt.

I'd looked at replacing the water pump too as preventative maintenance, but again this was a specific Z4M part. I've since discovered the the E46 M3 pump is the same but has an additional outlet machined into it but it can be used if you blank that off.

I unfortunately don't have photos of the new parts but that was another set of maintenance out the way.
 
Last edited:
Vanos...

Spending too much time on the forums/facebook had convinced me that without a completing a vanos overhaul, catestrophic engine failure was imminent.

I was trying to understand what the ACTUAL failure points were for the S54 vanos, and what the likelyhood of failure was to make my own assessment on what the weakpoints are. My research had led me to a video of Mr Vanos doing a repair on a couple of cars at evolve and there was quite a difference in before an after in terms of engine noise. My car didn't have any excessive vanos rattle or any reason for concern so this would just be solely preventative.

From my research, I concluded that the main weakness in the S54 vanos system was failure of the oil pump drive tabs, the cam drive bolts backing out/ shearing off and the upper timing chain guide breaking. I suspect that the 3 issues are linked, my theory would be that the initiating event is the timing chain guide breaking, leading to increased vibrations which potentially backs out the cam gears/ causing excessive movement and subsequent chatter in the oil pump drive eventually breaking the tabs on the exhaust hub.

Anyway, with this in mind, I started compiling a list of what was needed to get this job out the way. I'd also noticed an oil leak at the back of the cam cover, which was frustrating because the car had only just had an inspection 2 service - which included a valve clearance check and should include a new VC gasket.

I'd settled on a list of parts that was required. I wasn't bothering with the anti rattle kit or S62 springs, as in my opinion if these were a worthwhile upgrade BMW would have superseeded the part for both the S54 and S62. I also wasn't bothering with a repair on the solenoid pack - by the time you start adding all these bits up you might as well just get a new unit from Germany for £1k. There is nothing that can really "fail" in the vanos unit, wear out yes, but this just leads to poor performance and not catastrophic engine failure which was really all I was trying to address at this point.

I want to add something here for those reading this in the future - doing this again I would do a vanos check in ISTA before dismantling the engine, this gives you reference adjustment times/ values. I would also measure the oil pressure in the vanos unit to confirm it was the target 100-115 bar. If the oil pressure in the unit is less than 100 bar, you're probably better off buying a new vanos unit (we'll get onto this later).

Parts I chose to replace were:

Vanos sealing plate - 11367831906
Vanos filter - 11361401971
Tming chain guide - 11317830159
O ring - 07119963418
O ring - 07119963342
Vanos bolts x 12 - 07129905536
Cam bolts x 12 - 07119913589
Oil drain line washer x 2 - 07119963129
Accumulator washer x 4 - 07119963071
S54 Diaphram springs not S62 ones (optional) x 2 - 11367830684
Besian vanos seal kit
Valve cover gasket - 11127832034
Spark plug rings - 11127831271 (or buy the elring kit that comes with both)
Vanos to head gasket 11367831938

Getting the VC off in the E85 is straightforward, first remove the engine cover:

IQTcptlBul05TYmtO8OIR7J6AR_7hOmh98C7ZCWdUk70Ty0


Once all the gubbins is out the way, the VC covers off:

IQSXexOCSmiMQ56szZVX9Qu5AW-Xa5J9lSA_QM8Pd7n95hI


Engine locked in TDC to remove the vanos - I'd needed to make my own tool for this, as the one in the S54 timing kit did not fit in the E8X chassis. That was fairly quick on the lathe. Vanos off and exhaust hub in tact which was good to see.

IQR43Ut8dF8XT6XpuEfoPtrEAfhYEAEzmwOUKQTEqF9_t2s


IQTvwA_wiIh7R7_WhDTMJjmyAY7gT6HVDqwMGWQx0t20CZg


With the vanos unit off, I proceeded to rebuild it with the besian seal kit as per their instructions. I did make myself some tools to make fitting the new seals easier, as personally I did not like the idea of using a sharp pick and screwdriver combination to put the seals on the pistons. This allowed me to stretch and compress the seals without risk of damage onto the pistons:

IQQLe2q2chPCQL9m_U1jSSGmARg_CBAbiwf89RQ4vkkSHpk


My controversial opinion on this part is that next time I would not bother with replacing the seals and would actually just leave the vanos unit alone. I really don't think this was necessary and if the unit is so tired that the seals are knackered, the oil pump will be as well and the unit won't make sufficient pressure. The pressure valve will probably need rebuilding as well etc etc etc.

I'd also taken the chance to redrill the oil pump disc with smaller holes:

IQTw-wy9Gn0US5llinntvj9-AdjlO5OPguV4SVohdOdrTnU


Everything ready to go back on the car:

IQSV1ezxRf0dQ4oSPImEZ5ITATJar7vT5XY2MSZx60aiMrg


Undoing of the vanos hub bolts allows the spline gears to come out and take both vanos hubs off:

IQQHi8PfFoCQQ41ANwMnp8qjAffDofXsk0TG-pXb-4vcwbs


Which allows replacement of the cam gear bolts, new bolts going in with loctite. I also replaced the cam chain guide at this point too, mine was still in one piece which was nice. When fitting the new guide, make sure it locates properly into the middle guide.

IQTTKrM1YWHMQ5MAcc0e4ajJAdh2tu0TnHoDHo_vL_QcYww


IQQ_jvrUgU3MTLByiKLCJrBeAZ67pxKeGnQcdpZJHAbUn0o
 
Last edited:
Retiming the engine:

Everyone seems to make a massive meal out of this, and it was the part I was most worried about. Having now done it and spent the time to understand the process, it is actually really straightforward.

What are we trying to achieve to time the engine?

With the cams in the TDC fully retarded position (ie where the timing tool puts them, sitting flush on the head with the pin that drops in to the hole in the cam), and the crank locked, the vanos gears must be bottomed out in the vanos housing before the hub bolts are tightened for the timing to be correct.

The way this is achieved in the online guides for the E46 is to attach the spline gears to the vanos pistons and to manually push them back until they bottom out on the housing before installing the vanos unit on the car. The problem with this method on the E8X platform is the massive chassis brace across the front of the engine that prevents you installing the vanos unit on the engine with the spline gears already installed. BMW tell you that you need their specific electronic tool to depressurize the vanos unit as well but the trick to avoid needing the BMW tool is to install the vanos unit with the solenoid pack removed.

So now we understand what we are trying to achieve lets do it on the E8X platform.

Insert the spline gears into the intake and exhaust hubs. Push the spline gears in until you have about 5mm of spline gear exposed.

Tighten the hub bolts down and back them off as per TIS. The purpose of this step is to create some preload on the diaphragm springs so that as you install the vanos unit on the engine, it pushes the vanos pistons back into the housing and bottoms them out rather than just pushing the spine gear into the hub.

Install vanos unit and tighten pistons to spline gears.

Tighten vanos unit onto the head until the vanos unit is about 5mm away from the head. Align the exhaust tbas with the oil pump disc.

Tighten vanos unit onto head.

Tighten accessible intake and exhaust hub bolts down using a crows foot wrench. Timing is set. Simple as that.

Remove timing tools and turn engine over to access and tighten remaining cam hub bolts. What I chose to do here was instead of turning the engine over to access the other bolts, was remove the vanos unit and tighten all the hub bolts to spec that way, then reinstall the vanos unit.

Turn over engine 720 degrees and recheck timing.

Because in this process you've had the timing chain tensioner out to do the upper timing chain guide, there is some slack in the timing chain. It's normal for the timing to end up a little off from perfect (which is why they give you the setting and checking tool in the timing kit). Mine was off a touch but it would have been absolutely fine, it just bothered me, so I just rotated the engine a few more times to take up slack in the chain and reset the timing. Also make sure that you only turn the engine clockwise - if you miss TDC by a fraction, don't rotate the engine counterclockwise to meet up with the timing tool, as any slack ends up back in the timing chain and the issue will keep repeating itself.

With the timing now set, I reinstalled the solenoid pack and the vanos was back on.

I also thought at the last minute that I'd double check the valve clearances, I mean there shouldn't really be any need to should there, it did only have an inspection 2 service less than 5k miles ago... well I checked the clearances and I think 4 or 5 were tight. They were tight enough that I am almost certain they would have been out of spec at the point of the service so what was the point of the service in the end? Seeing as most of what had been done I'd ended up redoing anyway, track rod, tracking. valve cover leaks, valve clearances out of spec and silicone on the diff plug instead of replacing the oring I assume.

New shims were ordered from BMW and I got everything back together.

Cleared the vanos adaptions in INPA and then ran the vanos test in ISTA to check everything was good. Vanos tests all passed. That's a relief:

IQTGYjdjVgzDQLXmGW0FUw71AYKihUHVApAgIPk9bM3NO5A


I'd ended up with 0.3 degrees offset on the intake and 2.1 degrees offset on the exhaust, which was less than I started with, so that was also nice:

IQRUdtPJrgtzTLvZ_34xGdAZAeZz4QvsODmD7GJYcY92RBA
 
Last edited:
I'd also chosen to revisit the exhaust situation and see if I could address the cracked flanges. I'd found a guy local selling a set of modified E46 M3 cats which looked in good condition, so headed over to Swindon to pick them up for £80. I wasn't hugely keen on using second hand flanges to repair mine, I'd wanted to source new parts but was having difficulty finding details on the profile of the original doughnut flange and gasket to get a section made. The flanges also seemed non standard and were awkward to match.

So with the cats removed again, I began the process of marking up and welding on the replacement flanges. Because of the different wall thicknesses, the tube diameters were slightly different, so I chose to cut the flanges off and the start of the extruded section where the downpipes fit in as this seemed to match the cloest.

IQRWNsiAdCfLRLcWZUlD-M9GAU5GT-Ym_09oMGB3fEw9xSA


IQQtSoLsgBESQr5cCueUrO8mAU1uPgR_pEig2-GtAFB-XNo


IQRh2ZqUK45qTLxOV5GKAlh6AZfpCd8mVmBx6AEd4DHwaJ8


Back ppurged to get a clean weld inside:

IQQPO2xJJHyRSLdjxSE1wuU7AUiK9mCTLiyS8bU1LZjZ5_A


Both flanges done:

IQT6c5xu9LSBSJryBPTz1s0WAR6vXH2bCyTHzCrqKFCaGzY


I'd also spotted that the other header had unfortunately suffered a similar fate, and cracked behind the weld where the flange fits. This is the front header, I'd already repaired the rear which I was pleased to see holding up well.

IQRw5uEzDDt-SpZq7xPWaqCLAbcqocUVLbAbmpNamtPCkJs


Back up to Bicester to get another section made up, he'd also got some flanges in stock which were very close dimensionally so I picked up a couple of those to replace the pressed flanges on the downpipes too.

A little bit of machining later and they were ready:

IQRQgU4uMArbSqvgTrK6SHoEAXIq9n_gk2drALSDS2ttp10


So now to weld the repair section and flange onto the other header. Orientation and position here is critical. I wasn't too pleased with this in the end, I'll end up redoing it again :rolleyes:.

IQRQIHPAUW88R5qwvlcqs1tkAaqSWugPD7-gnWHomN5WtZo


Everything back together, and the replacement flanges have cracked too :(. So I'll be doing this for a 3rd time!

IQTM7Uljm7fPQ7gWuSQT9wXJAYEsMYsvc3UCME8zNee5QD4
 
Last edited:
Vamos...
Whilst I was completing all this work in December 25 and Jan 26, I'd left my job and my house was up for sale. My wife is Spanish and had moved back to Spain a couple of years earlier. Throughout 2025, we'd been figuring out our long terms plans. I'd also started a new job in July 2025 but for one reason or another I couldn't see myself staying there. With that in mind, the decision was made that I would sell up and join her in Spain.

So what was going to happen with the car then? With all the effort I'd put in to it and how much I was enjoying it, I wasn't ready to sell it so started making plans to drive it out to the south of Spain.

The car has got a fairly good spec but was missing the desirable cruise control. With a long journey ahead, it seemed the perfect time to start the next project - cruise control retrofit.

I'd done research on this and knew that the ///M would not have the wires under the steering column, but it did have a partial installation in the engine bay. I was also aware the a forum member made up the looms for the install. My hesitation was that either his or the BMW loom would require splicing into the power wires from the light switch, which I'm not a massive fan of.

In the end I managed to source a loom from someone breaking a factory specced 3.0si equipped with cruise. This would allow me to run the power wires back to the fuse board as per the factory installation. After some confusion with the wiring diagrams, I managed to get the cruise stalk power and ground sorted, powered from pin 7 of X11005 and grounded in the ground block next to the fuse box as it would be from the factory.

For the Z4M, as above, the engine harness is already wired for cruise, but the connector that comes from the cabin is not populated with a wire. Therefore, for a factory install you just need to add the wire and male pin, part (BMW Pin-Contact ELO-Power 2,8 x 0,63 0,35-0,5m² 61138373293) from the cruise stalk to connector X102 in the ECU box. Super simple and not a single wire spliced.

In this picture the black connector is X102, the blue wire going off to the engine harness is the cruise signal to the ECU.

IQSDtWx6K9vwTZ4_u9zFDPzHAdrpHJrOp3-_JDFk-gMeWGY


With my steering shroud modified, the cruise stalk was now installed and working:

IQRAsHCTZmRMTo3OZQaOg1bSAXjNRcpt4_Trl4FIoCjLCOQ


I'd also taken the time to install an AUX socket, which opened up a can of worms - although it was plug and play when I finally got the correct AUX socket.

So with the cruise working, my useless aux socket working that I didn't need and my exhaust still blowing, I headed on down to the south of Spain:

IQRtsBxJD59DT6awOzoWol7aAc1mKnexI7LggwGLWyyFVI4


Where the car currently sits with me!

I got the ferry from Portsmouth to Caen and drove from Caen down to Malaga. I couldn't get a direct Bilbo or Santander service that would let me take my cat. Averaged about 29-30 mpg on cruise at 130 kph through France and 120 through Spain. Car was flawless and it is so quiet when cruising, no drone. Nothing.

So now I am in the process of swapping out the headlights so I can import it into Spain!
 
Last edited:
Back
Top Bottom