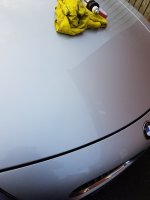
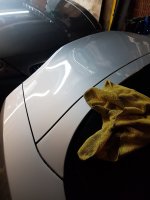
My little project Z4 2.0 Sport..

Ducklakeview said:
bladeowner said:
john-e89 said:
Scratch a marker between the ring and the motor housing Mike, then you’ll know where the ring sits from the factory. It’ll only turn approx 10mm clockwise IIRC, but approx 3/4 way round anti clockwise. Turn it clockwise, you only need approx 3mm, any more it’ll be too loose, but it’s a bit trial and error, I’ve heard people turning them 10-15mm but that’s extreme I think, try 3mm and go for a run. I think it’s the crown and pinion gears tightening as they get warm from the foot heater, mine was very bad, but only after about an hour with the blower on. Let us know how you get on Ok.

I already had tried the drill and grease method but moving the ring is the cure in my book. As John says it's trial and error. I tried 5mm at first on mine but it wasn't enough and so I went a bit more around 8-9mm. You can see which way to move it from the scratches on mine below:

20160605_1302491_zpsg1hi8gf0.jpg

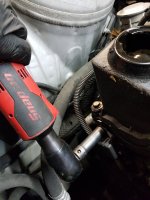
Just for reference, an 8mm flex head ratchet spanner is the PERFECT tool for this job, easily gets to both bolts. Done in 5 mins..

20171022_173436.jpg

Mike

Was yours not a torx head then?
 
bladeowner said:
Ducklakeview said:
bladeowner said:
I already had tried the drill and grease method but moving the ring is the cure in my book. As John says it's trial and error. I tried 5mm at first on mine but it wasn't enough and so I went a bit more around 8-9mm. You can see which way to move it from the scratches on mine below:

20160605_1302491_zpsg1hi8gf0.jpg

Just for reference, an 8mm flex head ratchet spanner is the PERFECT tool for this job, easily gets to both bolts. Done in 5 mins..

20171022_173436.jpg

Mike

Was yours not a torx head then?
Yes, they are E10 male torx, which are obviously six sided and just happen to be 7.86mm across, so the spanner fits perfectly!

Mike
 
I've got a set of torx sockets but for that sort of job a cheap set of torx ring spanners from fleabay

http://www.ebay.co.uk/itm/Siegen-by-Sealey-Torx-Ring-Spanner-Set-TRX-Star-E6-E8-E10-E12-E14-E18-E20-E24-/400688543932?epid=1505253334&hash=item5d4ae5f8bc:g:ttgAAOSwu4BV1fAi

doesn't add much to the job and might get you out of trouble once in a while. But.... if I can have a quick rant why use so many different 'spanner systems' on a car. Just done the DMF on a ford and need four different sets of socket/spanner drives. Gerrr....
 
Crazy Harry said:
I've got a set of torx sockets but for that sort of job a cheap set of torx ring spanners from fleabay

http://www.ebay.co.uk/itm/Siegen-by-Sealey-Torx-Ring-Spanner-Set-TRX-Star-E6-E8-E10-E12-E14-E18-E20-E24-/400688543932?epid=1505253334&hash=item5d4ae5f8bc:g:ttgAAOSwu4BV1fAi

No good for this job, not enough swing room to use them, only a flex head ratchet spanner would fit. I have a similar set of E-torx spanners which are slimmer than those in your link and they wouldn't work as not ratchet headed.

Mike
 
Ducklakeview said:
Crazy Harry said:
I've got a set of torx sockets but for that sort of job a cheap set of torx ring spanners from fleabay

http://www.ebay.co.uk/itm/Siegen-by-Sealey-Torx-Ring-Spanner-Set-TRX-Star-E6-E8-E10-E12-E14-E18-E20-E24-/400688543932?epid=1505253334&hash=item5d4ae5f8bc:g:ttgAAOSwu4BV1fAi

No good for this job, not enough swing room to use them, only a flex head ratchet spanner would fit. I have a similar set of E-torx spanners which are slimmer than those in your link and they wouldn't work as not ratchet headed.

Mike

I bought these and managed to get them undone but I could just have been lucky that there was enough angle to undo. https://www.ebay.co.uk/p/4-PC-Professional-Female-Star-Torx-Spanner-Set/1743399533?_trksid=p2047675.m4097.l9055
 
Ducklakeview said:
Crazy Harry said:
I've got a set of torx sockets but for that sort of job a cheap set of torx ring spanners from fleabay

http://www.ebay.co.uk/itm/Siegen-by-Sealey-Torx-Ring-Spanner-Set-TRX-Star-E6-E8-E10-E12-E14-E18-E20-E24-/400688543932?epid=1505253334&hash=item5d4ae5f8bc:g:ttgAAOSwu4BV1fAi

No good for this job, not enough swing room to use them, only a flex head ratchet spanner would fit. I have a similar set of E-torx spanners which are slimmer than those in your link and they wouldn't work as not ratchet headed.

Mike

When I had a restock of tools (thanks to some passing Pikies and Aviva) I got metric combination spanners each in three length sizes. Gets me into most spaces or applies enough torque. Can't get on with the idea of 'obstruction spanners' though - have found a socket on the end of a square drive flexible shaft screw driver can be a life saver even if you have to gaffer tape all the socket; drive converters and shaft together!
 
Ducklakeview said:
bladeowner said:
john-e89 said:
Scratch a marker between the ring and the motor housing Mike, then you’ll know where the ring sits from the factory. It’ll only turn approx 10mm clockwise IIRC, but approx 3/4 way round anti clockwise. Turn it clockwise, you only need approx 3mm, any more it’ll be too loose, but it’s a bit trial and error, I’ve heard people turning them 10-15mm but that’s extreme I think, try 3mm and go for a run. I think it’s the crown and pinion gears tightening as they get warm from the foot heater, mine was very bad, but only after about an hour with the blower on. Let us know how you get on Ok.

I already had tried the drill and grease method but moving the ring is the cure in my book. As John says it's trial and error. I tried 5mm at first on mine but it wasn't enough and so I went a bit more around 8-9mm. You can see which way to move it from the scratches on mine below:

20160605_1302491_zpsg1hi8gf0.jpg

Just for reference, an 8mm flex head ratchet spanner is the PERFECT tool for this job, easily gets to both bolts. Done in 5 mins..

20171022_173436.jpg

Mike
But the question is did it fix the problem?
 
adam1985 said:
Ducklakeview said:
bladeowner said:
I already had tried the drill and grease method but moving the ring is the cure in my book. As John says it's trial and error. I tried 5mm at first on mine but it wasn't enough and so I went a bit more around 8-9mm. You can see which way to move it from the scratches on mine below:

20160605_1302491_zpsg1hi8gf0.jpg

Just for reference, an 8mm flex head ratchet spanner is the PERFECT tool for this job, easily gets to both bolts. Done in 5 mins..

20171022_173436.jpg

Mike
But the question is did it fix the problem?

YES!

Mike
 
Not refurbing with tyres on are you Mike :?
file.php
 
Ducklakeview said:
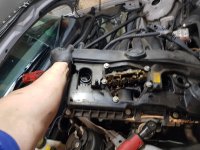
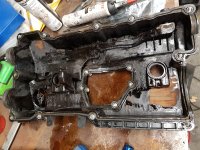
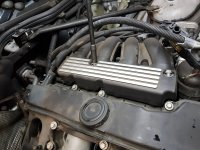
Then as there was sod all on TV, I decided to do the rocker cover gasket, which arrived yesterday from [ref]JINGLE[/ref] many thank Jamie..


20171021_200224.jpg


You can see where it's been leaking, in the usual place, onto the manifold shield, and it stinks..

20171021_200235.jpg

First thing to do is remove the offside strut brace to improve access, it'6 a 16mm bolt on the facelift, and a 16mm nut on the pre..

20171021_200346.jpg


Then remove the oil filler cap and pull the cover upwards to remove it.

20171021_200825.jpg 20171021_200835.jpg


Loosen the wiring harness by popping it out of these clips

20171021_200938.jpg


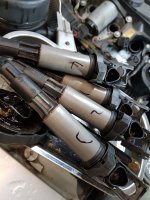
Then lift up the retaining blips on the coil packs, allowing the connectors to be slid out.

20171021_200954.jpg20171021_200958.jpg


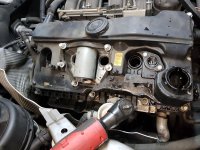
Remove the cam position sensor wiring plug, the valvetronic motor plug and the two earth points (10mm)

20171021_201025.jpg20171021_201331.jpg

Will continue when I get a min...

Mike

Continued...

Once that's done, remove the "other half" of the top cover - I always forget...

20171021_202039.jpg


I also remove this bolt at the front, which gives a bit more "wiggle room" on the harness, and makes getting the cover off easier.

20171021_201255.jpg


Then remove and mark the coil packs, 1-4 - Not strictly necessary, but I like things to go back where they came from.


20171021_201536.jpg


Then unbolt the 10mm bolts holding the cover in place, they are "captive" so won't fall out onto the undertray

View attachment 8


And lift the cover clear

20171021_202344.jpg


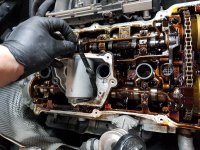
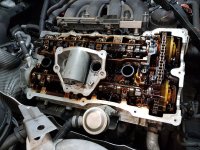
Don't forget the 2nd gasket around the valvetronic motor, they usually fall out and remain on the head.

20171021_202540.jpg


I then clean to cover with brake cleaner, paying attention to the grooves where the gasket sits.

20171021_205434.jpg


And then clean the mating surfaces on the head using either a proper gasket scraper, or a sharpened piece of hardwood, so as not to gouge the alloy surface. It needs to be CLEAN, with all traces of old gasket and/or sealant removed.

20171021_204740.jpg


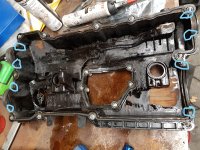
Fit the new gaskets to the cam cover, putting a little RTV sealant at the corners of the half moon shaped ends, I've marked the areas.

Inked20171021_205434_LI.jpg

Then it's back on, torque the bolts evenly to 9nm, and reassemble in reverse..

Leak cured :D


Mike
 

Attachments

  • 20171021_202302.jpg
    20171021_202302.jpg
    248.7 KB · Views: 2,243
Quick little fix last night I forgot about - For some reason the finish on the side of the lower column shroud was blistered..

Luckily, I kept hold of the old shroud from mine, as I got a factory cut one with my cruise, 2 mins to swap, and looks lots better..

20171022_184523.jpg

I like a cheap and quick fix!

Mike
 
The damaged shroud is probably from a cheap air freshener that's been touching the shroud. Looking good though Mike
 
A bit of paint correction today...

Decided to tackle the couple of marks/scratches on the car today, in readiness for the dentman tomorrow.

First off, I foamed and washed the car, giving the roof a scrub with a soft bristled brush and a touch of upholstery shampoo. The water on the hood was brown with dirt, interspersed with a bit of green from the algae! I then power washed it until the water was clear, the hood looked a LOT better after this.

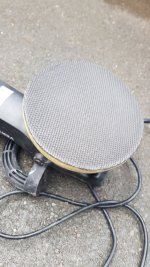
Then to decontaminate the car, I used a Nanoskin Autoscrub 6" pad on my DA - I LOVE these, not cheap but do a fantastic job in a fraction of the time it takes using clay.

The pad on the DA, feels like hard rubber, with a soft foam interface. I use it with Autosmart's spray wax detailer

IMG-20171023-WA0008.jpeg


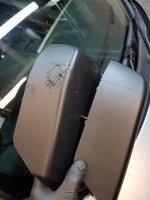
Once this was done I spotted a few marks I'd not noticed before, probably as the car was filthy..

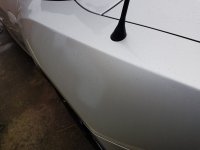
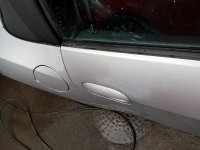
This on the bonnet being the worst.. Couple more marks on the drivers door and quarter, and the passenger quarter too..

20171023_150850.jpg


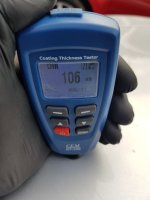
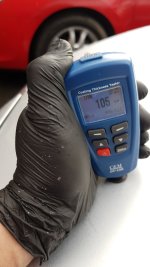
So, out with the paint thickness gauge on the bonnet, 106 microns in the scratched area indicated factory paint..

20171023_151106.jpg


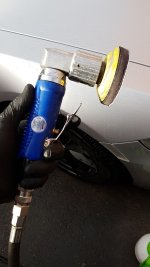
So out with the 75mm air DA, an interface pad and 1500 disc. Plenty of water too.

IMG-20171023-WA0016.jpg


Quick hit with the 1500, followed by 3000 and 4500 discs, and the bonnet looked like this.

IMG-20171023-WA0021.jpg


I also gave the other areas the same treatment

20171023_152600 - Copy.jpg20171023_152553 - Copy.jpg


Then out with the big DA and megs 105 followed by 205 compounds and job done, or so I thought.. A quick check on the scratched area on the bonnet showed that with 3 lots of sanding discs, followed by a couple of passes with each compound, I had managed to remove the grand total of ONE MICRON from the paint...

IMG-20171023-WA0018.jpg


However, this was enough, as the scratched area now looked like this.

20171023_160624.jpg

However, I spotted a few other marks, so ended up wet sanding the whole bonnet, tops of wings, doors, rear quarters and bootlid lol...

20171023_164622.jpg


Mike
 
Back
Top Bottom