Z4 on a budget refurb Parts 1-4

Hi All

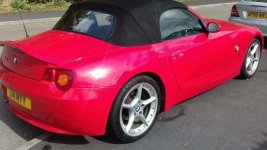
First update since i bought my budget Z4.


I have taken the car off the road for the winter and will complete the following

1. DIY refurbish of the alloys
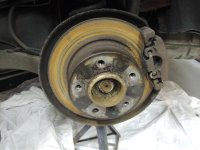
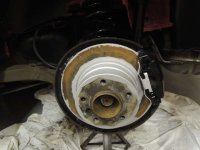
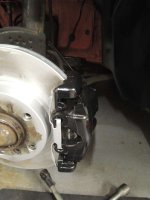
2. Clean and Paint under all arches
3. Fix cigarette lighter
4. Fix outside temp sensor
5. Fix rattling exhaust
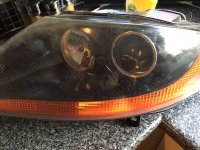
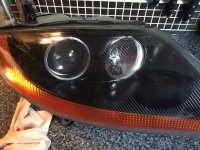
6. Polish headlights
7. replace all missing parts - front and right air ducts , sump guard , drivers sill seal. Drivers treadplate (it has one but the letter B is missing)
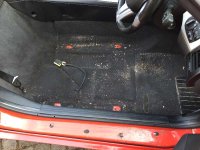
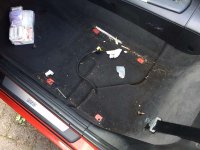
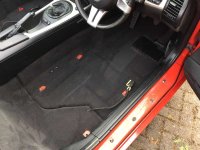
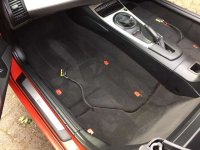
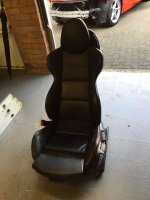
8. Clean interior , replace gear knob
9. Polish all paintwork
10. Engine clean


This is a starter for 10 and as i take anything off it will be cleaned or painted.


So to begin with i started on the interior.
 

Attachments

  • 1 dirty drivers interior .JPG
    1 dirty drivers interior .JPG
    77.3 KB · Views: 1,165
  • 2 dirty passengers interior.JPG
    2 dirty passengers interior.JPG
    59.7 KB · Views: 1,165
  • z4 6.JPG
    z4 6.JPG
    38.3 KB · Views: 1,165
Part 2.

Once interior was cleaned the seats were given a full leather clean and cream and bolts painted before going back in. The water from the carpet looked more like used oil.
 

Attachments

  • 3 clean drivers interior.JPG
    3 clean drivers interior.JPG
    81.4 KB · Views: 1,151
  • 4 clean passengers interior.JPG
    4 clean passengers interior.JPG
    80.3 KB · Views: 1,151
  • IMG_0863.JPG
    IMG_0863.JPG
    71.7 KB · Views: 1,151
  • Vax water from interior.JPG
    Vax water from interior.JPG
    125.5 KB · Views: 1,151
So after getting the interior sorted it was time to start on the brakes etc. I have done three so far , unfortunately two bolts are being a challenge , even to my 30 stone plus brother in law !! on the final one.

Wheel off , caliper cleaned and painted along with the discs. I am cleaning the arches , de-tarring etc as I go.
 

Attachments

  • DSCN0253.JPG
    DSCN0253.JPG
    83.9 KB · Views: 1,140
  • DSCN0262.JPG
    DSCN0262.JPG
    96 KB · Views: 1,140
  • DSCN0265.JPG
    DSCN0265.JPG
    90.9 KB · Views: 1,140
  • DSCN0281.JPG
    DSCN0281.JPG
    57.9 KB · Views: 1,141
Any final bit for now is front end is stripped and all lights removed etc head lights polished.

I'll keep everyone posted on further updates.

Hope you enjoy
 

Attachments

  • pre headlight polish.JPG
    pre headlight polish.JPG
    71.9 KB · Views: 1,174
  • post headlight polish.JPG
    post headlight polish.JPG
    70.9 KB · Views: 1,174
  • IMG_0862.JPG
    IMG_0862.JPG
    89.6 KB · Views: 1,174
Impressive work and great results :thumbsup:
Put it all in one thread and it will be easier to follow your work :wink:
 
Marlon said:
Impressive work and great results :thumbsup:
Put it all in one thread and it will be easier to follow your work :wink:

+1

Add all additional posts the the first thread :)
 
Best way probably to go into Part 2, edit the post, press CTRL+A (Select All), then CTRL+C (Copy). Then go back to Part 1, post a reply, click in text box, CTRL+V (Paste).

Do the same with Part 3.... then Part 4. Then just reply to Part 1 to continue the thread. :thumbsup:

Looking again you will likely need to re-add the attachments to the replies unless someone knows an easier way.

The mods could probably merge them though TBH if you asked them.
 
I saw this car for sale a few months back on Gumtree i think ?
London Car with a female seller and very basic advert with hardly any detail. However it did seem reasonably priced from what i remember ?

I remember the registraion plate and thought it unusual she wasnt retaining it !
 
Hi

Yes you are right. She ended up trading it in to a trader that I got it off. I think the general state of it put any body off buying it.

Plus I love a challenge ! :D

it will never be as good as some on here but I currently have a X3 2.0D and a 118D M sport so this is for a bit of fun with the possibility of changing all of the cars in the next 18 months or so and going back to two , one of which would be a E89.
 
That steering wheel is in a serious condition :o

Good progress on the stuff though :thumbsup:
 
Back
Top Bottom