Where to find coupe parts breakdown images

TOMGREEN413

Senior member
 Somewhere in deep darkest Wales
Hi folks,
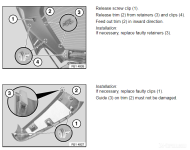
I'm looking to change out my rear centre brake light but unfortunately my post on how to remove the rear hatch trim to do this was meet by silence :tumbleweed: so plan B......does anyone know where I can find schematic breakdown images to help me locate the fixings l need to remove?
I'm sure Barty will know how to access this light :poke:
 
To replace the coupe specific 3rd brake light (different to roadsters), open the boot and unscrew/remove the two black covers.

Then using an 8mm deep socket and extender, remove the 3 x nuts and tension springs, don't forget to remove the connector which can also be stubborn.

Once you've removed the old one, make sure you clean around the hole that houses the light before refitting with a new unit :thumbsup:
 
... and after that, you have a 8mm deep socket extender in your toolbox which I have not used since :lol:
 
inkey$ said:
To replace the coupe specific 3rd brake light (different to roadsters), open the boot and unscrew/remove the two black covers.

Then using an 8mm deep socket and extender, remove the 3 x nuts and tension springs, don't forget to remove the connector which can also be stubborn.

Once you've removed the old one, make sure you clean around the hole that houses the light before refitting with a new unit :thumbsup:

Your an absolute legend Sir.......thanks, :thumbsup:
 
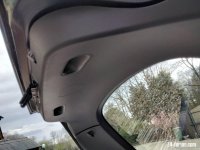
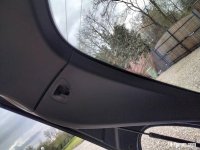
:headbang: 20230423_162040.jpg20230423_161942.jpg

Okay , I've removed all the screws l can see, just one on each side panel and two inside the grab holds......but nothing moving ??
Any help welcome as I'm stuck at the moment.....thanks :oops:
 
Yes there are clips, just needs a yank. You need to remove the central piece near the roof first before moving the sides.
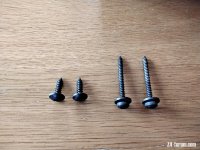
If you wouldn't mind could you post a photo of the 4 screws removed? I removed mine ages ago and unsure as to those that go back in from my 'pile'! Thanks
Screenshot 2023-04-23 172601.png
 
Legends!! All sorted, brutal force and nothing damaged did the job.
Really appreciate the prompt response, and yes, that electrical plug needed a serious tug!!
Photos of screws, the short ones go in the hand cut outs and the long screws the side trim. :thumbsup: 20230423_180851.jpg
 
Back
Top Bottom