What have you done to your car today?

RichieP said:
Frag said:
Ordered a Stromung exhaust for my 2007 Z4M. :driving:

Now debating if I get the AFE or MGruppe intake. I would go MGruppe, but the price is difficult for me to swallow. So I am still debating.
I’ve got a friend bring a MGruppe back from Australia in the summer for some reason they are cheaper there.
When you get your Stromung exhaust fitted will you be selling your OEM back box silencers as I would be interested ?

Hi Richie,

I will install those at the beginning of April. I will keep you posted but I will probably keep the original just in case. I will decide shortly after the install.

I will let you know.
 
ronk said:
Thrustyjust said:
Bought some new rear discs. Double checked the part numbers. Unpacked, degreased and painted the bells silver, then stripped the old ones off , to find they are the wrong ones , in the right box :(
Now arguing on them not accepting them back as painted , even though the part numbers and invoice and the packaging box was all correct. Some numpty at Mintex stuffed the wrong ones in the right box .................................grrrrrrrrr :headbang:

Of course it also means somebody is going to get your discs In their correct box!
Very true ............................ Just my luck :x Had to put the old discs and fiddle with handbrake drums to put it all back together again..............it just didnt twig at all , as didnt have the wheel off to notice the drum difference until the church bells rang out load and I said something similar to ' Fudge'.....................
Yes................. I know now :D
KyKMhKi.png
 
LordOxygen said:
Silverstar said:
LordOxygen said:
Refurbed the headlights this weekend, yellowing was only mild, but it was letting the car down.
Very pleased with the end result.

20200307_115847.jpg

20200307_143913.jpg

20200307_154312.jpg

20200307_154332.jpg

How did you do it?

Masked around the lights with 3 or 4 layers to tape.
Then rubbed 600 grit wet and dry paper (on a sanding block) all over the glass. Lubricating with water from a spray bottle. That removed all discoloration and introduced lots and lots of small scratches.
I repeated the process with 800, 1000, 1200 grit paper to slowly remove the marks from the previous paper. Followed by 1500, 2000 and 3000 grit pads on a drill attachment that are part of the autoglym headlight restoration kit. Once the lenses are clear of scratches I polished with the autoglym compound and pad on a cordless drill.
Finished with an extra coating to reintroduce some UV protection.
Allow and hour for each lens and make sure you have all the tools to hand and nerves of steel... Once you start there's no going back.

Many thanks! :thumbsup:
 
Silverstar said:
LordOxygen said:
Silverstar said:
How did you do it?

Masked around the lights with 3 or 4 layers to tape.
Then rubbed 600 grit wet and dry paper (on a sanding block) all over the glass. Lubricating with water from a spray bottle. That removed all discoloration and introduced lots and lots of small scratches.
I repeated the process with 800, 1000, 1200 grit paper to slowly remove the marks from the previous paper. Followed by 1500, 2000 and 3000 grit pads on a drill attachment that are part of the autoglym headlight restoration kit. Once the lenses are clear of scratches I polished with the autoglym compound and pad on a cordless drill.
Finished with an extra coating to reintroduce some UV protection.
Allow and hour for each lens and make sure you have all the tools to hand and nerves of steel... Once you start there's no going back.

Many thanks! :thumbsup:
It still amazes me after 40years experience in
French Polishing and antique restoration how sanding down a surface is so undervalued, especially in the workplace, good job silverstar
 
LordOxygen said:
Silverstar said:
LordOxygen said:
Refurbed the headlights this weekend, yellowing was only mild, but it was letting the car down.
Very pleased with the end result.


20200307_115847.jpg

20200307_143913.jpg

20200307_154312.jpg

20200307_154332.jpg

How did you do it?

Masked around the lights with 3 or 4 layers to tape.
Then rubbed 600 grit wet and dry paper (on a sanding block) all over the glass. Lubricating with water from a spray bottle. That removed all discoloration and introduced lots and lots of small scratches.
I repeated the process with 800, 1000, 1200 grit paper to slowly remove the marks from the previous paper. Followed by 1500, 2000 and 3000 grit pads on a drill attachment that are part of the autoglym headlight restoration kit. Once the lenses are clear of scratches I polished with the autoglym compound and pad on a cordless drill.
Finished with an extra coating to reintroduce some UV protection.
Allow and hour for each lens and make sure you have all the tools to hand and nerves of steel... Once you start there's no going back.

Obvious you have w_a_y more patience than I do :( The lenses look fabulous ! :thumbsup:
 
Silverstar said:
LordOxygen said:
Silverstar said:
How did you do it?

Masked around the lights with 3 or 4 layers to tape.
Then rubbed 600 grit wet and dry paper (on a sanding block) all over the glass. Lubricating with water from a spray bottle. That removed all discoloration and introduced lots and lots of small scratches.
I repeated the process with 800, 1000, 1200 grit paper to slowly remove the marks from the previous paper. Followed by 1500, 2000 and 3000 grit pads on a drill attachment that are part of the autoglym headlight restoration kit. Once the lenses are clear of scratches I polished with the autoglym compound and pad on a cordless drill.
Finished with an extra coating to reintroduce some UV protection.
Allow and hour for each lens and make sure you have all the tools to hand and nerves of steel... Once you start there's no going back.

Many thanks! :thumbsup:
I tried this method on the first set of headlights that needed it, and LordOxygen is correct, it does take a lot of time and perseverance to achieve a good result. The next set of headlights I needed to do I just gave them a few minutes each with Megs UC and a D/A polisher, and the results were either as good, or very near, for a fraction of the effort. But, this does not give the U/V protection that the final stage of the full process does, so I found they needed a quick touch-up every 12 months or so. Still much easier overall, though.
Just a suggestion if you don't want to go down the route of multiple grades of sandpaper, masking off, spending hours etc....
 
Amazing what 5 litres of gun wash found at work can do :thumbsup:
Bare discs.jpg
Even the part number on the disc was the right one :|
Now , where to get some rear discs.................
 
New headlights, BMW badge, kidney grills and the front bumper resprayed, just needs a wash now 👍
 

Attachments

  • IMG_20200309_142419.jpg
    IMG_20200309_142419.jpg
    229.3 KB · Views: 880
  • IMG_20200310_180643.jpg
    IMG_20200310_180643.jpg
    306.9 KB · Views: 880
CHIMV8 said:
Im in the process of using this kit,sorted all the rubbing down just need to polish with the paste,and hopefully have the same result as Lordoxygen :thumbsup:
https://www.ebay.co.uk/itm/Headlight-Restoration-Kit-Car-Plastic-Headlamp-Lens-Clean-Restore-Polishing/312832867334?ssPageName=STRK%3AMEBIDX%3AIT&_trksid=p2057872.m2749.l2649

I just got this kit too. Haven't used it yet though. Let me know how you get on with it.
 
Happy to simply get her out of the Garage for the first time in weeks and drive up over Bodmin moor after work today, on dry roads. Oh I so love driving my ///MR with the roof down on empty dry B roads. :driving: :D :thumbsup:
 
buzyg said:
Happy to simply get her out of the Garage for the first time in weeks and drive up over Bodmin moor after work today, on dry roads. Oh I so love driving my ///MR with the roof down on empty dry B roads. :driving: :D :thumbsup:

I’ve been nipping out in my bolide a bit more recently as well, might even start washing it soon :rofl:
Rob
 
Replaced the rear 4" speakers (what a PITA!!!) but no more rattley rear speakers, yay!

Roof has stopped working: booooo!!! i get a 2 seconds of an "eeeeeeeeeee" noise and then nothing. manual override doesn't even seem to work so i'm stuck with the roof down for now. FFS! :headbang:

edit: roof now up TFFT!
 
So, after still arguing with the supplier, who sent the wrong discs, they say I have to pay for postage back to deepest Kent. Weird how the invoice, box and even the discs have the correct part number on all, but the discs were wrong. Done at the Mintex factory, which although a british brand says made in china on the box :roll: . So, leaving this supplier off the large bay site , to decide what they want to and having chatted to a human from the 'bay' ( they are there ! ) who says it is all logged with her and its down to the supplier to sort out, but they wont butt in for another 7 days to resolve for me, I then went back on there and ordered some other discs from someone else from the Bay . Ordered 10pm Tuesday, arrived 9am on my work desk this morning. Marvelous. All coated, so no painting and cheaper than the others by a few quid.
1 1/2 hrs later ( love handbrake mechs) we are done and on and happy its all completed . Went on easy and handbrake is good. I cleaned out the handbrake mechanism with brake cleaner and sanded the shoes. Slid a little coppaslip behind the shoes where springs hold the shoes to the back plate and the infamous screech from the rocking drum when the handbrake is on has now disappeared. Not sure if it was the cleaning or coppaslip which cured it. Test drive and all is quiet. Need to bed the handbrake and all new brakes for an imminent MOT in the next few weeks :thumbsup:
KHN5EgP.png
 
Smartbear said:
buzyg said:
Happy to simply get her out of the Garage for the first time in weeks and drive up over Bodmin moor after work today, on dry roads. Oh I so love driving my ///MR with the roof down on empty dry B roads. :driving: :D :thumbsup:

I’ve been nipping out in my bolide a bit more recently as well, might even start washing it soon :rofl:
Rob

Is it just me waiting for a decent weekend of weather?
The z4s been tucked away in the garage all winter, on a charger. Every time I go in there (there’s a door from the kitchen), I look at it, admiringly, and think - yup I’ll take her out of hibernation this weekend.
But, seems it’s gonna rain again...
 
Today I had the 5 parts to the strut brace powder-coated £25 cash it is now fitted

I finished off the routing of the brake hoses and the ABS sensor wires etc at the rear of the car.
Fitted the Petreson external oil pressure relief valve
Re fitted the trim in the wheel arches
Bled the rear brakes
Fitted the wheels

Turned the engine over to get oil pressure
Checked for oil leaks
Fitted the cam/rocker cover
Fitted the spark plugs and coil packs
Fitted the engine covers

Started the engine
Stopped the engine
Lowered the car to the ground
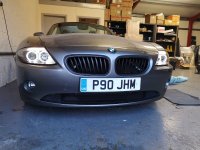
Drove it out of the garage
Power steering lumpy as a lumpy thing
Unpleasant noise from the engine bay this turned out to be the power steering after a few lock to locks and some more fluid it is all nice
Idled the engine for a short time turned it off to let the heat sink through
Run it a few more times to check and check and check all seams ok

Things left to do
A home 4 wheel alignment lazer line, string, steel rullers, digital angle finder, and set it up close as I can before a proper alignment. (Will keep the cost down as I will be charged by the hour)
Buy some new wheel spacers and fit them

Sort out my 1 series ABS issues

Tax it beginning of April and run in the rod bearings and then change the oil.

Start planing next winter maybe.........

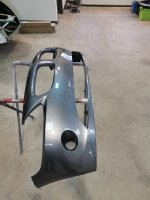
Below a few pictures of the inside of my garage and yes I did all of this winters work in there on my own with 4 axle stands and a trolly jack not complaining it is just what I have.

7D7E42D0-D732-4170-96B5-F83249D64BEC.jpegAAA82E90-0260-4B11-800D-80099F426BF1.jpegB4A2CFC0-BF5C-47C0-997B-5FF0F9B12CCC.jpeg97907C8D-79C6-49EF-8300-BD7DF92F8E8D.jpeg5756CA6A-2336-4522-A790-7CC6FA9E1864.jpeg9663E71C-A8F3-4E00-B304-21D460455582.jpeg12CE6400-27C9-44E5-BAB4-5F71F69B7C0D.jpegBAFFD0DF-F795-44FF-836F-2D93017429A5.jpeg95D2AD20-8404-497A-88AB-E622B90986FF.jpeg
 
Bonnet started to get difficult to open. Took off the catch , required number 20 torx. The spring was rusty and did not move back and forth. Left it immersed in diesel for a few minutes then wire brushed it. Greased and put back on, worked a treat.
 
Fitted the front strut brace and found an hour that it wasnt raining and the roads were dry this morning, so went for a drive :driving:
First time with spring height changes and new brakes fitted. All seems totally fine. Need to bed the brakes in now for the MOT. Happy days............ :thumbsup:
Happily to report I stuck the car away and then it chucked it down raining. Nice to get out in the Zed again 8)
 
Back
Top Bottom