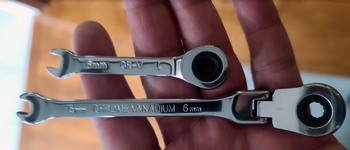
I'll take a good look. and of course, a decent pressure test. The OEM plastic one just seemed wrong for the task - plastic just doesn't radiate well... right?
You are using an out of date browser. It may not display this or other websites correctly.
You should upgrade or use an alternative browser.
You should upgrade or use an alternative browser.
Wasserpumpe ist kaputt
- Thread starter Christopher72
- Start date
Christopher72 said:I'll take a good look. and of course, a decent pressure test. The OEM plastic one just seemed wrong for the task - plastic just doesn't radiate well... right?
Some of them seem to have cracked after a couple of years..
Intuitively I agree about plastic end caps..I’m going for DO88
https://www.do88.co.uk/index.php?cPath=1261_695_1439
I guess I'll be a witness if it occurs. Picked it up from Ohio-based ECS Tuning, and they have a lifetime replacement on it -- so that's some comfort. Tomorrow I'll head to the front and replace the tensioner, spindle, belt, add the crank seal guard and capture...
Looking down at the water pump and thermostat, it's pretty tight in there, and pulling off the radiator gives a bit of access -- service manual says to release the stabilizer bar, and release screws on the front right diagonal support.
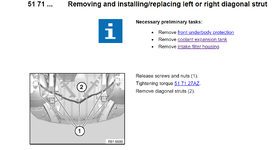
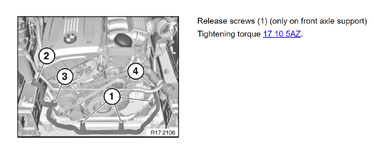
What is your experience with this replacement? Is releasing the stabilizer bar enough, or do I have to release the rest to do this? Can I support the removal with a jack/jack stand since I'm sitting up on cribs or am I going to have to borrow an engine bar and support from above?
Looking down at the water pump and thermostat, it's pretty tight in there, and pulling off the radiator gives a bit of access -- service manual says to release the stabilizer bar, and release screws on the front right diagonal support.


What is your experience with this replacement? Is releasing the stabilizer bar enough, or do I have to release the rest to do this? Can I support the removal with a jack/jack stand since I'm sitting up on cribs or am I going to have to borrow an engine bar and support from above?
Christopher72 said:What is your experience with this replacement? Is releasing the stabilizer bar enough, or do I have to release the rest to do this? Can I support the removal with a jack/jack stand since I'm sitting up on cribs or am I going to have to borrow an engine bar and support from above?
I’ve spoken to my son who did mine and he said as far as he can remember he only had to drop the sway/anti roll bar, removed the thermostat first and then the water pump, I think you need a swivel socket to be able to remove the rear bolt, I think it’s more by touch than sight.
Chippie said:I’ve spoken to my son who did mine and he said as far as he can remember he only had to drop the sway/anti roll bar, removed the thermostat first and then the water pump, I think you need a swivel socket to be able to remove the rear bolt, I think it’s more by touch than sight.
Thanks Chippie, I appreciate knowing its possible just with the sway bar. Does anyone know if the front right diagonal "strut" is taking weighted load, or just a lateral structural stiffener?
Yea, after digging into it, looks like a challenge. I guess I'll take a few photos in my attempt and see if they are useful enough for anyone else who wants to take this on. FCPEuro did a video on the N54 waterpump with a 335i, https://youtu.be/g8qozaA0PJU and it's better than nothing, but still doesn't show the magic of what's happening when he sticks his hand into the mix.B21 said:…my local garage did my water pump and said it was a pig…good luck ..
Life and kids take priority, but back at it.
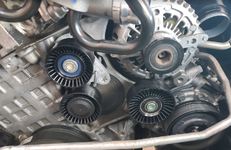
Belt tensioner and spindle (and belt) replaced - caps added later than pic
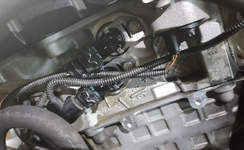
Vanos solenoids replaced - simple, remember to get the old gaskets out....
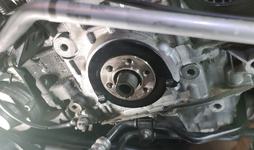
VTT Crank Seal Guard installed -- removing the existing bolts and installing the replacements at torque was a real pain and required jointed sockets/extensions :!:
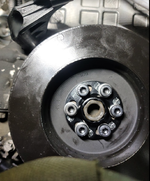
VTT Crank Bolt Capture installed - removing, installing, and torquing these was easier with the new accessory belt installed with tension. Blue threadlock added.
Tomorrow I'll get to the pump... hopefully. I'm starting to notice a massive pile of bolts on my bench. Here's hoping I remember where each goes...
The green is where the pump is. The blue is the right diagonal strut. I will put a jack under that center attachment point before releasing that bolt since I'm unsure of the loading of it. Getting it out of the way will make that pump removal much easier.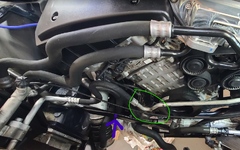
The CSF radiator arrived. I hope they don't add to the cost of the part spraying their logo on the front of a radiator that will be sandwiched against the condenser -- how ridiculous. Somebody tell Bob to put down the paint can and find a more helpful task -- he's gonna be first when there are labor reductions.
Belt tensioner and spindle (and belt) replaced - caps added later than pic

Vanos solenoids replaced - simple, remember to get the old gaskets out....

VTT Crank Seal Guard installed -- removing the existing bolts and installing the replacements at torque was a real pain and required jointed sockets/extensions :!:

VTT Crank Bolt Capture installed - removing, installing, and torquing these was easier with the new accessory belt installed with tension. Blue threadlock added.

Tomorrow I'll get to the pump... hopefully. I'm starting to notice a massive pile of bolts on my bench. Here's hoping I remember where each goes...
The green is where the pump is. The blue is the right diagonal strut. I will put a jack under that center attachment point before releasing that bolt since I'm unsure of the loading of it. Getting it out of the way will make that pump removal much easier.

The CSF radiator arrived. I hope they don't add to the cost of the part spraying their logo on the front of a radiator that will be sandwiched against the condenser -- how ridiculous. Somebody tell Bob to put down the paint can and find a more helpful task -- he's gonna be first when there are labor reductions.
Getting them out was a royal pain... a real Meghan. You have to be one with the Zen of the car to succeed. Essentially sticking your hands up in spaces, you can only visualize in your mind and be agile enough with the correct tools. So, to anyone looking into this... it's possible, and you may be more skilled than I am, but there's less space to work with than the 335i N54, so I'm hoping this part lasts for a long time.
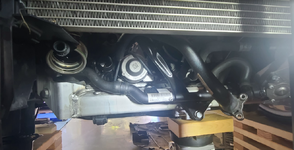
Getting that diagonal strut out and lowering the sway bar gives some space, but not much more than they use.
This picture makes it look huge... it's not. I could do it with my XL hands -- although I was tempted to have my 14 yr. old give it a go several times.
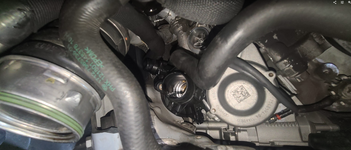
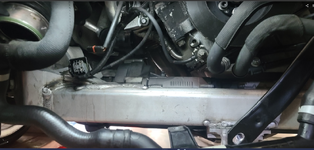
Unlike the 335i video, I couldn't get access to the 'U' tubing to release behind the pump, but only to release it from the thermostat.
Additionally, I left the tubing from the Thermostat to the 'Mickey Mouse' flange on since it wasn't holding it in place.
There's no way to access the electrical connection to the pump while it's in place -- but it's easy to disconnect on its way out.
And... WEAR eye protection and gloves... I was surprised several times by undrained coolant. And it spattered against my eye protection -- well worth dealing with the minor inconvenience of fogging not to be washing the pain out of my eyes.
I used the two existing pipes to reference the positional setup of the new therm and pump and associated silicone tubing.
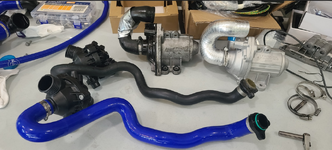
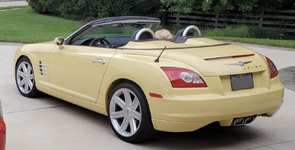
Stopping for the night and likely a few days. I was distracted this weekend working on a canary yellow 2008 Chrysler Crossfire roadster -- replacing lights, torn-up splash guards, and jack points. (family first)

Getting that diagonal strut out and lowering the sway bar gives some space, but not much more than they use.
This picture makes it look huge... it's not. I could do it with my XL hands -- although I was tempted to have my 14 yr. old give it a go several times.


Unlike the 335i video, I couldn't get access to the 'U' tubing to release behind the pump, but only to release it from the thermostat.
Additionally, I left the tubing from the Thermostat to the 'Mickey Mouse' flange on since it wasn't holding it in place.
There's no way to access the electrical connection to the pump while it's in place -- but it's easy to disconnect on its way out.
And... WEAR eye protection and gloves... I was surprised several times by undrained coolant. And it spattered against my eye protection -- well worth dealing with the minor inconvenience of fogging not to be washing the pain out of my eyes.
I used the two existing pipes to reference the positional setup of the new therm and pump and associated silicone tubing.

Stopping for the night and likely a few days. I was distracted this weekend working on a canary yellow 2008 Chrysler Crossfire roadster -- replacing lights, torn-up splash guards, and jack points. (family first)

I didn't consider it since I'm not trying for a bhp tune, just a clean reliable run. It looks fine from appearance... no cracking, etc.
Fixed! I've uploaded a How-to for anyone in the same situation.
Similar threads
- Replies
- 3
- Views
- 218
