The Finnish shed. '06 Z4 Coupe

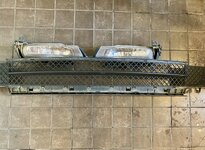
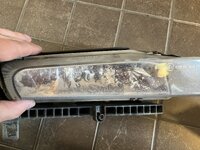
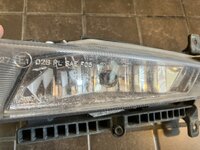
After reading on how to remove the front bumper and that lifting the car is not required, I decided to take it off to replace the foglights and the lower grill. Both fogs have seen better days and looked horrible (see below). Managed to get a new set for a decent price (1 came from the US and the other from Germany). The lower grill had a hole made to it to attach the engine block heater (Finland things…).
The bumper came off without any issues, only tricky part was where it attaches next to the fenders. It has been off before and one of the brackets had some damage, will order both and replace them when I’ll get the bumper off for paint.
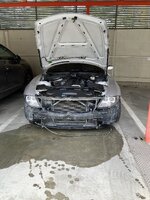
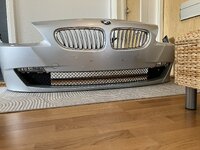
Bumper off
IMG_2155.jpeg
Parts taken off the bumper
IMG_2157.jpeg
IMG_2159.jpeg
IMG_2160.jpeg
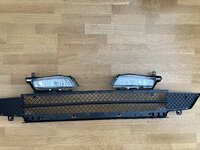
New lot
IMG_2162.jpeg
Installed onto the bumper
IMG_2164.jpeg
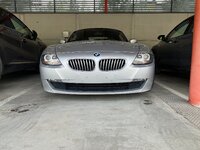
And bumper back on the car
IMG_2166.jpeg
I have to alogn the bumper a bit better. And without the plate it has more holes than cheese. Will get those repaired with the bumper respray, hopefully still this year.

Next time there will be some mechanical work, maybe already next weekend.
 
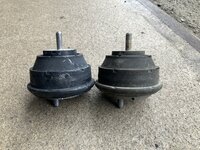
Not many updates lately even though some work has been done. In May I replaced both engine mounts with Corteco items. When I took the old ones out, I was surprised that they were in pretty good shape for almost 20 years of age, see pic below (left is new, right is old).
IMG_2253.jpeg

Other than that the car has been standing more than I expected, not really enjoying just driving it around or taking it to do the shopping.
Last week I took it for a longer drive (~250 miles) and it was really great, ate the miles like a champ and I really enjoyed driving it. To keep the spirit up, I have started planning a trip with some mates to the Ring for 2027.

Other than that I’ve done few more things to the coupe:
- replaced the front xenon leveling sensor
- flushed once more the coolant
- updated the Bluebus and now it works really well and has some new features
- managed to reset the anti-pinch for the driver window after trying numerous procedures (had the issue since I bought the car)
- finally got to adjust the GAL or radio volume level depending on speed to the minimum, what a difference

There must be something that I’ve forgotten but nothing major. It’s really nice to sort those minor but very annoying issues.

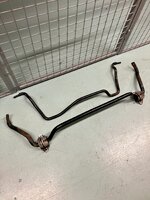
Next on the list are the front top mounts as I’m certain they’re still the original items and some other small stuff around the front suspension.
 
I’m keen to see how these cars cope on the Ring. I had a track prepped E90 M3 previously which was great on the Ring but needed a lot of go faster parts to really get it dialled.

I hoping just a few tweaks is enough on these to make them handle it. Though I don’t really want to turn my Z4 into a track car.
 
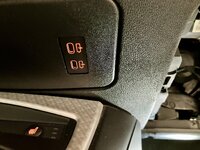
Installed yesterday the double USB-C retrofit in place of the aux port. Had the parts marinating for too long.
IMG_3323.jpeg

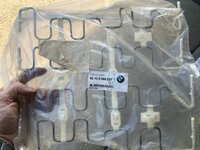
Today will take out the seats, give the rails a good clean as they look horrible and try to install the flex mat in the drivers seat.
 
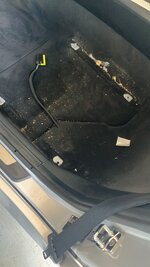
Took both seats out just to find dirt from past 20 years, no money to ease the pain. Picture is from drivers side, passenger was worse.
D2467DCC-1E00-4400-8D45-AAE8148AA36A.jpeg

Cleaned everything up and installed the flex mat in the drivers seat
IMG_3331.jpeg

Forgot to take an after pic. But the foam was not broken and the mat lifted it slightly. Now it does not feel like sitting on a park bench, would recommend this to anyone with the M-seats.

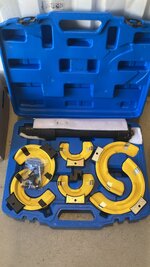
Also picked up a spring compressor so next week front struts will come out, more on that later.
 
Today was the day to take care of the last items from my DIY list for this summer.
As I mentioned earlier, I planned to replace the front top mounts and the spring pads while the front struts would be apart.
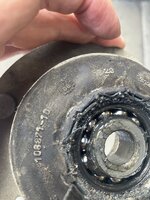
And the reason to do all that was 1 missing spring pad when the Bilstein B12 kit was installed few years back, before I owned the car. I had a slight suspicion that the top mount would be the original ones from 2006 and I was not wrong.
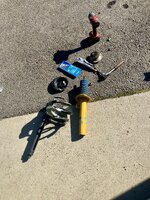
Here the passenger side already out
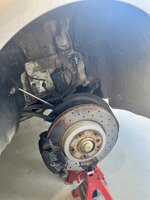
IMG_3346.jpeg
Few minutes later already apart
IMG_3347.jpeg
And back in 1 piece with new spring pads, top mounts and the strut plates.
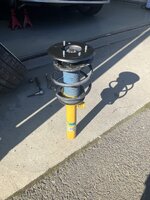
IMG_3349.jpeg
Here you can see the astonishing crafstmanship by someone
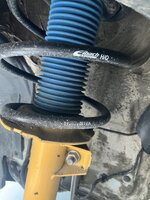
IMG_3350.jpeg
And already back together with all new parts
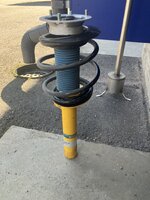
IMG_3351.jpeg
06 ”stamp” on the top mount
IMG_3352.jpeg
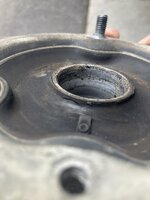
And small crack in one of them
IMG_3353.jpeg
They also had a small amount of play in them.
And while I was in there, I replaced both xenon bulb with some Osram ones, instantly much brighter. And the original pinch bolts were also ditched and new ones installed.
And this is a great tool, would recommend it to anyone
0FEA367F-0836-4CAB-93AC-059BC7A69646.jpeg

Next step will be the equivalent of an MOT in couple weeks time.
 
Back
Top Bottom