You are using an out of date browser. It may not display this or other websites correctly.
You should upgrade or use an alternative browser.
You should upgrade or use an alternative browser.
Retrofit Satnav screen
- Thread starter sk93
- Start date
srhutch said:What a mess you have made
I would get that all hoovered up quick.
Were you filing it?
A mess is an understatement!
I'm leaving the cleaning until I've got it fully mounted, as I've still a bit of trimming left to do.
And yep, I was cutting, filing, sanding, stroking it...
Ok, got a reply from DanMiddle2 yesterday in regards to power supply.
He's updated his main thread with the links to what he used (see first page for linkys).
However, I went via Amazon for pretty much the same price for these two items:
http://www.amazon.co.uk/gp/product/B008VORADW/ref=oh_details_o02_s00_i00?ie=UTF8&psc=1
http://www.amazon.co.uk/gp/product/B00ASJX5C8/ref=oh_details_o00_s00_i00?ie=UTF8&psc=1
One to power the Tablet / Arduino, and the other to power the motor.
I hate you! :|

AMAZING Job!! Well done, When can i book you in to do mine?
sk93 said:

AMAZING Job!! Well done, When can i book you in to do mine?
ESP said:I hate you! :|
sk93 said:

AMAZING Job!! Well done, When can i book you in to do mine?
I'm never, ever cutting a dashboard again.. I don't think I could deal with the pressure!
8)
Ok - time for an update 
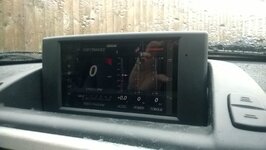
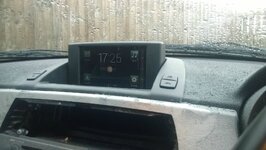
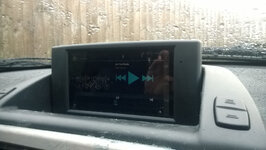
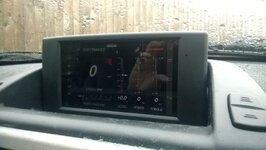
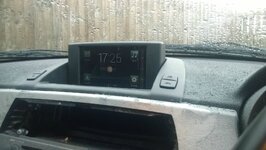
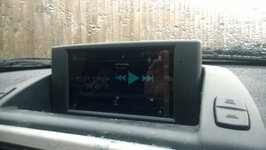
The device is now fitting flush(ish) with the dash and the phablet is all mounted in the housing correctly.
I ended up using some sticky foam numberplate mountings to pad out the space between the edges of the phablet and the housing, as well as under the green plastic mounts. This helped hold the device firmly in place, but also to ensure it wasn't damaged / scratched by any movement.
I also encountered an issue when trying to power the device.
Initially, I had planned to run the USB charging cable through one of the grommets and mount the two power converters needed to power everything on the underside of the dash, between my new gaping hole and the instrument cluster.
However, during assembly, I found that neither end of the USB cable would actually fit through the grommet - even after shaving away most of the plastic, it just wasn't going to fit :thumbsdown:
So, I've now reverted to mounting the 12v->5v converter inside the housing with the phablet itself.
The 12v->9v converter is arriving this morning, so I'll be checking how much space is left inside the housing and may also mount that inside too for "tidyness" sake... but we'll see this evening.
I did a test drive with it all mounted yesterday evening, and despite the unit not actually being powered, I got 4 hours of constant usage from it, with a starting charge of only 40% - so that's awesome.
It also correctly hooked up with my Pi installation and the bluetooth audio and phone headset link worked perfectly!
The unit itself is surprisingly quick and extremely easy to use whilst driving, which was the last great question for me (would it actually be usable!).
So, all in all, I should have everything done and dusted this evening!
Things left to do:
Once that's all done - stage 1 is complete!
After that, I think I'll be close to the same stage as DanMiddle2... and the only remaining task would be to figure out a way to ensure the stepper motor doesn't "overturn" itself.
To that end, I'm thinking of adding some opto-sensors to the gearing and getting the Arduino to test for the "home" or "stop" sensors being triggered.
More info on this bit will come once I actually get there 8)
The device is now fitting flush(ish) with the dash and the phablet is all mounted in the housing correctly.
I ended up using some sticky foam numberplate mountings to pad out the space between the edges of the phablet and the housing, as well as under the green plastic mounts. This helped hold the device firmly in place, but also to ensure it wasn't damaged / scratched by any movement.
I also encountered an issue when trying to power the device.
Initially, I had planned to run the USB charging cable through one of the grommets and mount the two power converters needed to power everything on the underside of the dash, between my new gaping hole and the instrument cluster.
However, during assembly, I found that neither end of the USB cable would actually fit through the grommet - even after shaving away most of the plastic, it just wasn't going to fit :thumbsdown:
So, I've now reverted to mounting the 12v->5v converter inside the housing with the phablet itself.
The 12v->9v converter is arriving this morning, so I'll be checking how much space is left inside the housing and may also mount that inside too for "tidyness" sake... but we'll see this evening.
I did a test drive with it all mounted yesterday evening, and despite the unit not actually being powered, I got 4 hours of constant usage from it, with a starting charge of only 40% - so that's awesome.
It also correctly hooked up with my Pi installation and the bluetooth audio and phone headset link worked perfectly!
The unit itself is surprisingly quick and extremely easy to use whilst driving, which was the last great question for me (would it actually be usable!).
So, all in all, I should have everything done and dusted this evening!
Things left to do:
- Hook up 12v->5v converter to the Phablet's USB cable
- Hook up the 12v->9v converter to the Arduino
- Hook up both converters to the "accessory" car loom (decided to just use the ciggy lighter fused loom for this. May add secondary fuse at later date)
- Test and configure Arduino's control of the stepper motor (initial testing done at 5v looked ok, but motor was clearly underpowered)
Once that's all done - stage 1 is complete!
After that, I think I'll be close to the same stage as DanMiddle2... and the only remaining task would be to figure out a way to ensure the stepper motor doesn't "overturn" itself.
To that end, I'm thinking of adding some opto-sensors to the gearing and getting the Arduino to test for the "home" or "stop" sensors being triggered.
More info on this bit will come once I actually get there 8)
pvr said:I am missing the vacuum bit
Looks great though, well done. I think a little copyright sign in the corner of the screen with "pvr" should be good 8)
good call - I finished the vacuuming yesterday.
I actually used a compress air blowgun to get most of the crap out from behind the dash too!
As for the copyright - submit your evidence boy-o

danmiddle2
Active member
Looking good.
When I get around to it, I want to tackle this too. The current thinking I have is to program it to count the steps to make it position aware (if that makes sense). This would avoid the need for additional sensors.
Might sit back and let you fix the issue first though!
Remember to add a pin code to the device when you drop it off for servicing though, don't want nosy mechanics snooping through your private data!
sk93 said:After that, I think I'll be close to the same stage as DanMiddle2... and the only remaining task would be to figure out a way to ensure the stepper motor doesn't "overturn" itself.
To that end, I'm thinking of adding some opto-sensors to the gearing and getting the Arduino to test for the "home" or "stop" sensors being triggered.
More info on this bit will come once I actually get there 8)
When I get around to it, I want to tackle this too. The current thinking I have is to program it to count the steps to make it position aware (if that makes sense). This would avoid the need for additional sensors.
Might sit back and let you fix the issue first though!
Remember to add a pin code to the device when you drop it off for servicing though, don't want nosy mechanics snooping through your private data!
danmiddle2 said:Looking good.
sk93 said:After that, I think I'll be close to the same stage as DanMiddle2... and the only remaining task would be to figure out a way to ensure the stepper motor doesn't "overturn" itself.
To that end, I'm thinking of adding some opto-sensors to the gearing and getting the Arduino to test for the "home" or "stop" sensors being triggered.
More info on this bit will come once I actually get there 8)
When I get around to it, I want to tackle this too. The current thinking I have is to program it to count the steps to make it position aware (if that makes sense). This would avoid the need for additional sensors.
Might sit back and let you fix the issue first though!
Remember to add a pin code to the device when you drop it off for servicing though, don't want nosy mechanics snooping through your private data!
good call regarding the lock
In regards to remembering its position, that will work, as long as the device isn't moved manually.. if it is, the whole thing will get messed up :/
Whilst you and I would probably never do this, I know for a fact that my other half, despite being told, will move it.. no doubt valeters / techs may also do this.
danmiddle2
Active member
sk93 said:good call regarding the lock
In regards to remembering its position, that will work, as long as the device isn't moved manually.. if it is, the whole thing will get messed up :/
Whilst you and I would probably never do this, I know for a fact that my other half, despite being told, will move it.. no doubt valeters / techs may also do this.
Indeed - but what I have already discovered is that if you open it twice in a row, it doesn't actually strip the gearing as I had suspected, so not the end of the world. I haven't done this a lot (for obvious reasons) but I am not sure if there is maybe some built in hardware protection? I would love to try and press the open button twice in a row on an original screen and see what the behaviour is?
It would also be nice to get the screen to remember the last position on the ignition live.
When I took it in for servicing, I added a pin and disconnected the wiring from the tap a fuse so that the mechanic didn't fiddle.
So much on my to do list, but I have too many projects and not enough time!
I'm afraid my mother scuttled my plans for the meet - but I'm looking at getting to as many as possible this year, so you still have an opportunity 
Anyways - further updates (pay attention DanMiddle2 )
)
I did some playing around with the stepper motor and arduino during the free spaces I found over the weekend
Now, the standard stepper motor doesn't have any position / angle tracking within it.
However, it does "stall" when it tries to push the screen beyond it's limit.
Checking with the multimeter on the four wires, I've noticed a spike in the current when it "stalls".
My current chain of thinking is that with a simple comparator / sense resistor, I should be able to detect a stall, and raise a flag pin on the arduino.
Then, obviously, by checking the state of the flag pin each time I try to step the motor further, I can detect if it's fully open, fully closed, or jammed.
I've ordered some bits n bobs to test this theory from Maplins, so once they've arrived and I've had a bit of time to do some tests, I'll let you know - but it does look promising!
Further to this, I decided against mounting the arduino and voltage converters in the unit itself.. it was all a bit tight and if I ever wanted to update the arduino, I'd have to remove the entire screen.
To that end, I bought a small project box from Maplin for £3 and ran the wires for the motor and switches in a new loom, down beside the air vent and up behind the radio - there's a MASSIVE gap back there, and loads of metal framework to attach the box to with cable ties
I'll hopefully have some pics and demo vid up later today or tomorrow.
I'm also going to write a bit about the different Tasker profiles I've created to shutdown / start up the Phablet
Anyways - further updates (pay attention DanMiddle2
I did some playing around with the stepper motor and arduino during the free spaces I found over the weekend
Now, the standard stepper motor doesn't have any position / angle tracking within it.
However, it does "stall" when it tries to push the screen beyond it's limit.
Checking with the multimeter on the four wires, I've noticed a spike in the current when it "stalls".
My current chain of thinking is that with a simple comparator / sense resistor, I should be able to detect a stall, and raise a flag pin on the arduino.
Then, obviously, by checking the state of the flag pin each time I try to step the motor further, I can detect if it's fully open, fully closed, or jammed.
I've ordered some bits n bobs to test this theory from Maplins, so once they've arrived and I've had a bit of time to do some tests, I'll let you know - but it does look promising!
Further to this, I decided against mounting the arduino and voltage converters in the unit itself.. it was all a bit tight and if I ever wanted to update the arduino, I'd have to remove the entire screen.
To that end, I bought a small project box from Maplin for £3 and ran the wires for the motor and switches in a new loom, down beside the air vent and up behind the radio - there's a MASSIVE gap back there, and loads of metal framework to attach the box to with cable ties
I'll hopefully have some pics and demo vid up later today or tomorrow.
I'm also going to write a bit about the different Tasker profiles I've created to shutdown / start up the Phablet
This is possibly thee Best mod iv seen on this forum!! To back this up I'll justify it.
In hindsight I'd have bought a Z4 with Satnav, but at the time I justified NOT needing it because I had sat nav on my phone + I never really used that. But after owning a Z4 and be ing on this forum I realised the satnav screen was actually a handy AND COOL tool for displaying music and phone data etc.... So I looked into retrofitting it.
After much research I concluded YES I still want 1, but the cost and hassle of retrofitting something that A; I'd never really use to its full benefit ( other than having a live map up), B; I don't really struggle with my iPhone / Bluetooth set-up I have, C; the actual BMW software is VERY old and totally superseded.
What you have done though has ENDLESS depth of possibility, with 1000's of Apps available.
Great work, I'm sure I'm not alone in being WELL JEALOUS
tomscott said:This is amazing! Cant believe how good it looks!
Now who's going to do it with an iPad?
I initially tried with an iPad mini - no dice.
even if you took it apart (which I did), and tried shaving bits of the board and relocating some of the hardware, it's just not going to fit.
The screen is just too big and the wrong dimensions :/
sk93 said:ok... covering cut, foam removed... just the plastic bit left to cut now!
Will be doing this myself very soon and was wondering if you could advise of the cutting thickness of the dash to avoid cutting into anything else when using a circular saw cutting disc in my dremel? I was intending to just use the disc to cut through the dash in one hit, obviously following my template marking and keeping to a set depth. Is this how you did yours?
Thanks
Similar threads
- Replies
- 11
- Views
- 774
- Replies
- 14
- Views
- 2K
