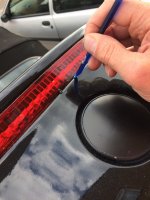
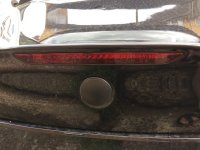
Replacing lens on 3rd brake light

DMC63

Active member
London
I've just bought an OEM 3rd brake light from ebay. All working except for a broken red lens. I have the red lens.
The auction was in it's final minute so there was no time to faff about checking whether it's possible to fit my lens from my old light to it.
I figured it's been put together so it has to come apart.
Anyone replaced just the lens?
I only paid £7 so no biggy if it's not possible.
 
cj10jeeper said:
Not designed to come apart but I did strip mine down to repair and add extra LED’s so possible to do

That's reassuring. Any pointers would be greatly appreciated cj.
 
I think there are a couple of locating pins for the circuit board, blob of glue or silicone should hold it on. Silicone the lens without the backing might also be a viable solution.
 
Scooba_Steve said:
I think there are a couple of locating pins for the circuit board, blob of glue or silicone should hold it on. Silicone the lens without the backing might also be a viable solution.

Thanks Steve. The light I've bought is a working unit and is just missing its' lens. From what I can see from the pics the lens is held on by clipping on to the unit itself. I was going to clip my lens on the unit and then use CT-1 as a gasket to seal it into the opening, masking off to get a nice level finish. The CT-1 should do the job of keeping any water out. I've used CT-1 for many things over the years and it's never failed, I've stuck the window in the back of my combo van using it and it's never budged or leaked :wink:
 
Not so sure you can just unclip the lense. But would be nice to know... future reference and all that! Let us know how you get on :)
 
I happen to have one in the kitchen as you do!

I've got a couple of LEDs blown in mine (in the middle so it looks balanced) and I was lucky enough to get a good light with cracked cover from 1972nail after posting on here - was going to do a thread about making one from two but haven't got round to taking mine off the car - well it is working and the MOT not due till next year as it blew a couple of days after the test!

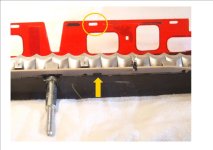
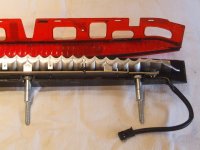
The red lens clips onto the body tag (arrowed) into the slots (circled) shown in the photos.

DSCF2109.JPG
3rd brake light construction.jpg

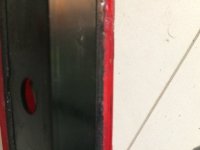
You can make out a thin line of sealant on the red lens. 1972nail split the unit but I guess a stanley/craft knife would do it. I was going to replace the blown LEDs so I had a spare pcb in case I had another set blow before the case cracked
 
Crazy Harry said:
I happen to have one in the kitchen as you do!

I've got a couple of LEDs blown in mine (in the middle so it looks balanced) and I was lucky enough to get a good light with cracked cover from 1972nail after posting on here - was going to do a thread about making one from two but haven't got round to taking mine off the car - well it is working and the MOT not due till next year as it blew a couple of days after the test!

The red lens clips onto the body tag (arrowed) into the slots (circled) shown in the photos.

You can make out a thin line of sealant on the red lens. 1972nail split the unit but I guess a stanley/craft knife would do it. I was going to replace the blown LEDs so I had a spare pcb in case I had another set blow before the case cracked

Thanks Harry for the pics. I've taken the old one off the car and it's cracked on the inside at the very end. I've ordered a bottle of EMA plasti-weld recommended by another member. The face of the lens isn't cracked, so a bit of glue and I should be good to go. I'm going to take the light apart (fingers crossed I don't break it any more than it already is) and drop the led panel in. More pics to follow :thumbsup:

IMG_6956.JPG
 
Here's an update on the light.
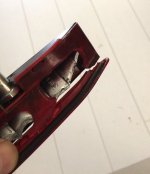
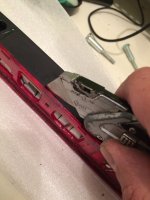
First off I had to separate the lens from the back unit of the light from my Z. Done this using a Stanley knife. BE WARNED - The lens is glued using a plastic weld type glue. The rubber seal was rotted, I removed this and will use a sealant to replace the rubber seal. Place the blade between the lens and unit and gently wiggle the blade in until it breaks the seal. It's a gamble doing this. Providing you don't break the face of the lens that will be seen, any other cracks or broken pieces can be welded back together using plastic weld. (Note this will NOT weld the lens to the unit so don't use it to do this, the plastic of the case is not compatible with the glue https://www.ebay.co.uk/itm/EMA-PLASTIC-WELD-LIQUID-POLY-CEMENT-FOR-HARD-TO-STICK-PLASTICS-ABS-BUTYRATE-ETC/221691715546?hash=item339ddb1fda:g:YNEAAOSwqu9U4N-S
IMG_6976.JPG

Next I took the led panel out of the 'doner' light from ebay and fitted it into the my light. Where my lens had cracked it finally broke off during the separation with the knife. I used the glue to weld this back together. Worked great.
IMG_7032.JPG
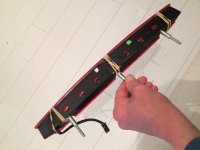
I then masked up the lens and unit and glued them together using sanitary clear silicone. Kept the unit and lens tightly pushed together using elastic bands.
IMG_7020.JPG

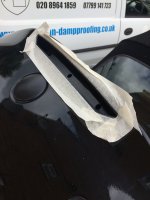
I then masked up the light well on the car as well as the lens.
IMG_7033.JPG

More in following post
 
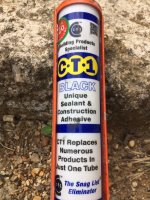
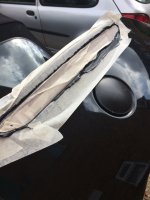
With the lens and car masked off I positioned the light in the well leaving a 5mm gap and then squeezed in a nice thick bead of black CT-1 sealant. Secured the springs and bolts and hand tightened the light into place with the help of pressing down from the outside on the lens. The CT-1 oozed out forming a very good seal. I ran my finger round the wet sealant making sure it was sealed. Removed masking tape and cleaned up with a sculpting tool. My theory is that the thick beading of sealant will cushion the light as well as hold it in place.
Jobs a good un for £10 including the light and glue :thumbsup:
IMG_7035.JPG
IMG_7036.JPG
IMG_7037.JPG
IMG_7041.JPG
 
Back
Top Bottom