Project Schmidtfire

GavStrong

Member
I guess this is the right place to post ? Just wanted to share my project. German car, British twist … Project Schmidtfire. The shell/victim. I have a grinder. And beer.
 

Attachments

  • IMG_4365.jpeg
    IMG_4365.jpeg
    1.4 MB · Views: 149
  • IMG_4364.jpeg
    IMG_4364.jpeg
    1.2 MB · Views: 48
The daily which will be converted …eventually ….(hopefully) 3.0i manual - absolutely love it
 

Attachments

  • IMG_0386.jpeg
    IMG_0386.jpeg
    1.4 MB · Views: 44
This inner tube was hard to cut through … must be toughened ?
 

Attachments

  • IMG_0357.jpeg
    IMG_0357.jpeg
    1.1 MB · Views: 36
  • IMG_0358.jpeg
    IMG_0358.jpeg
    1.3 MB · Views: 35
  • IMG_0356.jpeg
    IMG_0356.jpeg
    1.2 MB · Views: 31
  • IMG_0359.jpeg
    IMG_0359.jpeg
    967.9 KB · Views: 30
Started templating/CAD work - god bless IKEA PAX wardrobes
 

Attachments

  • IMG_0363.jpeg
    IMG_0363.jpeg
    1 MB · Views: 29
  • IMG_0362.jpeg
    IMG_0362.jpeg
    1.1 MB · Views: 35
  • IMG_0361.jpeg
    IMG_0361.jpeg
    1.1 MB · Views: 36
  • IMG_0360.jpeg
    IMG_0360.jpeg
    1.2 MB · Views: 31
  • IMG_0364.jpeg
    IMG_0364.jpeg
    965.8 KB · Views: 31
  • IMG_0365.jpeg
    IMG_0365.jpeg
    1,013 KB · Views: 32
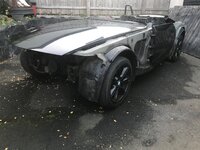
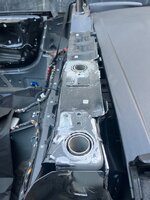
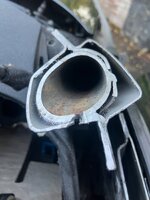
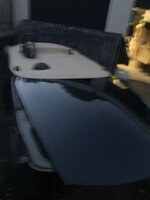
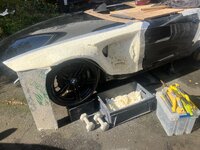
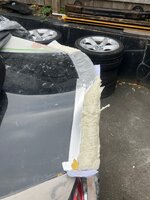
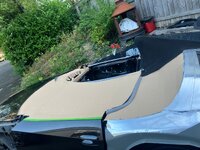
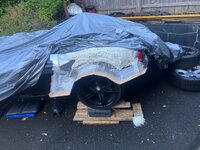
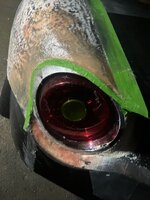
Started making a hoop/turbo intake (don’t ask) - pipe lagging from Screwfix cable tied to original hoop, 4 way stretch carpet … some cardboard tube from, er … ah yeah it was protective packaging for some black metal bar I bought … framed with aluminium tape - I like using this alu tape, it’s quite sturdy …. I’ll resin this carpet then foam, shape with surform, then skim with hairy bodge then finish with bodge to get the shape before moulding …. Need the bucket seat in place first though (next month) …. So this is just a means to an end to get the shapes I need … ‘there are no rules, just tools’ - I’ll be using a lot of cardboard/packaging/filler/foam to get what I need …. I like to ‘bloke it out’
 

Attachments

  • IMG_0377.jpeg
    IMG_0377.jpeg
    1.1 MB · Views: 35
  • IMG_0378.jpeg
    IMG_0378.jpeg
    999.3 KB · Views: 33
  • IMG_0375.jpeg
    IMG_0375.jpeg
    1.3 MB · Views: 34
  • IMG_0373.jpeg
    IMG_0373.jpeg
    1.2 MB · Views: 36
Some rear3/4 inspiration done on procreate … really like the Alfa Mito rear lights - simple, elegant design
 

Attachments

  • IMG_4354.png
    IMG_4354.png
    6 MB · Views: 40
  • IMG_4351.png
    IMG_4351.png
    5.9 MB · Views: 42
£18 later from eBay, we’re on guys …
 

Attachments

  • IMG_0384.jpeg
    IMG_0384.jpeg
    1.2 MB · Views: 38
  • IMG_0383.jpeg
    IMG_0383.jpeg
    1.2 MB · Views: 41
  • IMG_0382.jpeg
    IMG_0382.jpeg
    1.1 MB · Views: 39
  • IMG_0381.jpeg
    IMG_0381.jpeg
    1.2 MB · Views: 39
Soudal ‘genius’ foam - £10+ at screwfix … £8.75 at B&Q ….I nearly fell over
 

Attachments

  • IMG_0396.jpeg
    IMG_0396.jpeg
    1.1 MB · Views: 35
  • IMG_0393.jpeg
    IMG_0393.jpeg
    1.3 MB · Views: 35
  • IMG_0394.jpeg
    IMG_0394.jpeg
    1.2 MB · Views: 36
Foamy sculpture things … picked up set of 19” alloys for a bargain, need spacing out though …
 

Attachments

  • IMG_0408.jpeg
    IMG_0408.jpeg
    1 MB · Views: 37
  • IMG_0416.jpeg
    IMG_0416.jpeg
    1.1 MB · Views: 35
  • IMG_0411.jpeg
    IMG_0411.jpeg
    1.1 MB · Views: 34
  • IMG_0405.jpeg
    IMG_0405.jpeg
    925.8 KB · Views: 35
  • IMG_0404.jpeg
    IMG_0404.jpeg
    1.5 MB · Views: 34
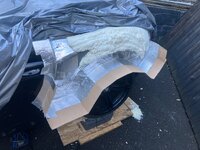
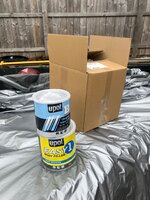
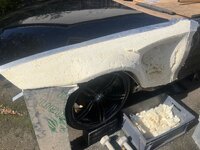
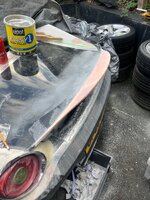
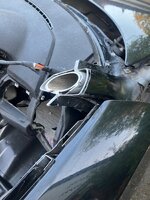
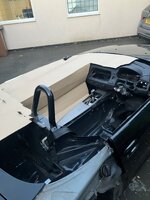
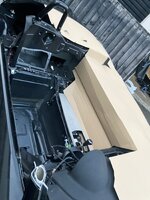
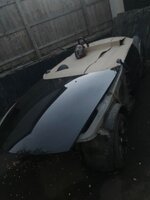
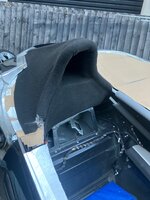
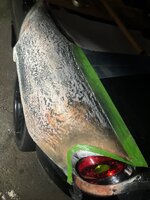
Hairy bodged. I don’t know if this is ‘the correct’ way to do this - remember, ‘no rules, just tools’ … plus the fact I’m ‘bloking this out’ That and I may have had a beer aka ‘connecting with my ancestors’
 

Attachments

  • IMG_0420.jpeg
    IMG_0420.jpeg
    1.2 MB · Views: 32
  • IMG_0419.jpeg
    IMG_0419.jpeg
    1.2 MB · Views: 33
  • IMG_0427.jpeg
    IMG_0427.jpeg
    1.2 MB · Views: 32
  • IMG_0426.jpeg
    IMG_0426.jpeg
    1.1 MB · Views: 32
  • IMG_0425.jpeg
    IMG_0425.jpeg
    1.2 MB · Views: 28
  • IMG_0418.jpeg
    IMG_0418.jpeg
    1.2 MB · Views: 33
First skim of bodge … should have waited but ultimately I’m still exploring, still learning … need Coilovers on and on the floor really (again, next month)
 

Attachments

  • IMG_0432.jpeg
    IMG_0432.jpeg
    1.4 MB · Views: 32
  • IMG_0437.jpeg
    IMG_0437.jpeg
    1.2 MB · Views: 35
  • IMG_0439.jpeg
    IMG_0439.jpeg
    1.3 MB · Views: 38
Hopefully Paddy, that’s the long term plan … just having fun at the moment - really enjoying getting my hands dirty again but also as Im new to Z4 ownership Im really enjoying driving the e85 platform. Low to the ground, RWD, hood down - bliss.
 
😊👍
Wow, great job thus far!
Looks like a professional job!
I'm looking forward to seeing this project progress, thanks for sharing and wishing you a smooth journey! 😊👍
 
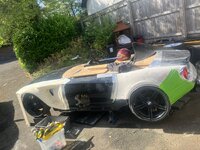
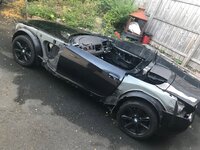
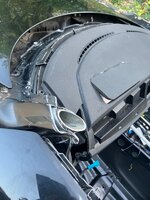
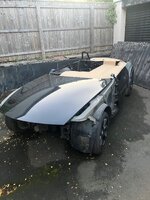
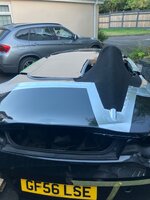
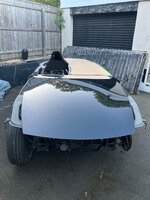
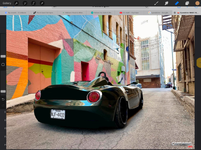
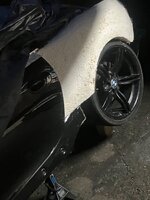
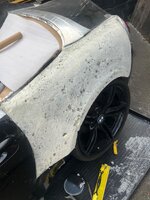
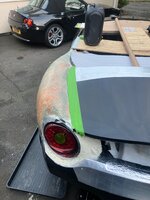
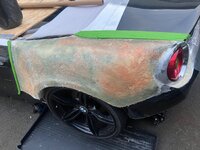
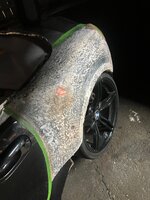
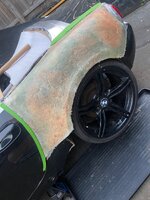
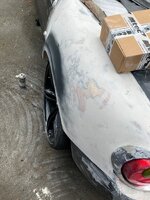
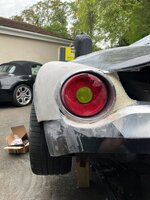
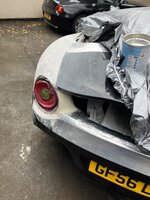
Bit of a logo attempt in procreate and then onto the front arch - just gauging where the maximum possible ‘swoop’ is in towards the chassis - quite a nice natural shape already exists - will get these surfaces nice then add in a dividing ‘strake’ like a e90 m3 - also then cut in some reliefs for ‘trapped air’ at a later date
 

Attachments

  • IMG_0453.jpeg
    IMG_0453.jpeg
    1.5 MB · Views: 33
  • IMG_0452.jpeg
    IMG_0452.jpeg
    1.3 MB · Views: 35
  • IMG_0451.jpeg
    IMG_0451.jpeg
    1.5 MB · Views: 36
  • IMG_4577.jpeg
    IMG_4577.jpeg
    694.2 KB · Views: 40
Once I get the surfaces right, plan is to attach/blend this to a factory wing/panel before making moulds - if anybody has any damaged front/rear arches available please let me know - even rusty arch ones would do as I only need the extremities of the panel
 
Slow month …. Started on a the rear spoiler. The main addition has been a mobile tools trolley - makes things much easier to grab an hour or so on it …
 

Attachments

  • IMG_0515.jpeg
    IMG_0515.jpeg
    1.5 MB · Views: 27
  • IMG_0507.jpeg
    IMG_0507.jpeg
    1.2 MB · Views: 29
  • IMG_0529.jpeg
    IMG_0529.jpeg
    1.7 MB · Views: 35
Back
Top Bottom