You are using an out of date browser. It may not display this or other websites correctly.
You should upgrade or use an alternative browser.
You should upgrade or use an alternative browser.
Orange peel removal
- Thread starter Sgr74
- Start date
You will need to machine polish it properly - ideally with a rotary rather than a DA. You can do it with a DA, but it willl take a lot longer. Which compound(s) and pads you need is a bit like asking how long is a piece of string.
Given the question, (and please don't be offended), it doesn't sound like you have the experience to do it yet. Get a scrap panel and practice on that. Also, see https://www.detailingworld.co.uk/ for guidance.
Given the question, (and please don't be offended), it doesn't sound like you have the experience to do it yet. Get a scrap panel and practice on that. Also, see https://www.detailingworld.co.uk/ for guidance.
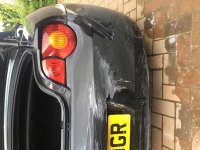
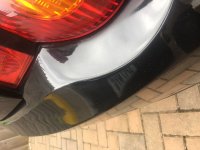
Love the DIY here! Can you upload a few pics of the bumper you've painted? Did you do this with just spray cans? Does it look a good match to the rest of the car?
In answer to your question, you can just wet sand it back (use a few different grades) and then I'd use a microfibre pad and something like menzerna heavy cut initially before refining. Good luck....pictures needed!
In answer to your question, you can just wet sand it back (use a few different grades) and then I'd use a microfibre pad and something like menzerna heavy cut initially before refining. Good luck....pictures needed!
Bought a compressor and spray gun, watched YouTube and went for it.Angelus666 said:Love the DIY here! Can you upload a few pics of the bumper you've painted? Did you do this with just spray cans? Does it look a good match to the rest of the car?
In answer to your question, you can just wet sand it back (use a few different grades) and then I'd use a microfibre pad and something like menzerna heavy cut initially before refining. Good luck....pictures needed!
Attachments

To be fair, it looks a decent job from that pic. Take a few more close up so we can properly scrutinise your work! 
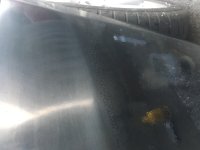
Maximum orange peel.Angelus666 said:To be fair, it looks a decent job from that pic. Take a few more close up so we can properly scrutinise your work!
it’s had 3 coats of H69 Vantix clear coat so I have no worries about sanding it down. Just need to do both rear quarter panels now due to a bad job before I got her, but it doesn’t fit in my garage. I may have to bite the bullet and get the body shop to do it.You've come this far...I'd just have a go yourself. Just do a test patch all the way to a polished finish, get it into a finish your happy with then approach the rest of the bumper in the same manner. Although, I would have done it with the bumper being off the car, must make it a lot easier to do.
A bit flimsy I thought. It’ll be fine. Nothing better to do, apart from change the suspension, wire the heated seats, try to form aero cills somehow etc......Angelus666 said:You've come this far...I'd just have a go yourself. Just do a test patch all the way to a polished finish, get it into a finish your happy with then approach the rest of the bumper in the same manner. Although, I would have done it with the bumper being off the car, must make it a lot easier to do.
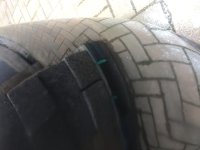
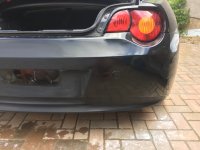
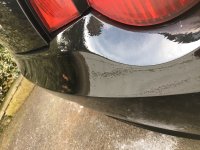
All done. Wet sanded and rotary buffed. Not perfect, but it’ll do for my first attempt.
Attachments

hey a fifer!
Not too shabby, damn good effort for a first attempt id say!
Not too shabby, damn good effort for a first attempt id say!