You are using an out of date browser. It may not display this or other websites correctly.
You should upgrade or use an alternative browser.
You should upgrade or use an alternative browser.
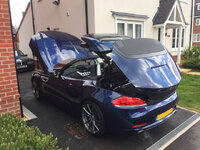
New to me Deep Sea Blue Z4 35i DCT
- Thread starter Beeacon
- Start date
craig3.2 said:Beacon,maybe worth dropping Dave1972 a pm as I don't think these alloys are that old,and may be covered by a warranty?
Worth asking him?
Though I could be wrong,no had in asking?
Craig, that's a great idea and one of the many perks of buying from a forum! As you say, no harm in asking (though I'm not sure whether alloys get a warranty cover).
Beeacon.
Hi all,
The Z4 goes in for its service this month and I was hoping for a bit of input from you guys on my choices below for service items and whether there is anything else I should consider.
Car History:
59 plate 35i DCT, adaptive M-sport suspension, remap to 370bhp, and feels just a tad underbraked (though the front brakepads are due to be replaced, and it only felt underbraked with a full car at Christmas). I'm toying with the idea of uprating the brake hoses, fluid, and pads for slightly better stopping power without going down a very expensive BBK route but haven't put enough research in yet.
The car is my daily driver and will be doing spirited road driving at most, no track. I've had it for 6 faultless months and want to keep it that way. It has done 63k miles and will be going to a reputable BMW indy (BN Dynamix in Wigan; owner runs a 135i with the same engine and is very knowledgeable).
Previous Owner Service History:
Jun 2011 - BMW @ 13860miles - Brake fluid/oil/air filter
Jun 2013 - BMW @ 25330miles - Vehicle check/brake fluid/mobility system/oil
Jul 2014 - BMW @ 28150miles - Vehicle check
Jun 2015 - BMW @ 31880miles - Brake fluid/oil/micro-filter
Sep 2016 - BMW @ 41410miles - Rear brakes
May 2017 - DW///M Indy @ 52470miles - Vehicle check/brake fluid/oil/spark plugs/micro-filter/air-cleaner element (cleaned)
My Ownership History:
Jan 2019 - BN Dynamix @ 64234miles - Service - Vehicle check/Front brake discs/Front brake pads/oil/oil filter/cabin filter
Jun 2019 - Auto-Base (Eccles) @~66000 - Wheel alignment/brake fluid/rear springs
Aug 2019 - BN Dynamix @ 67000miles - Water pump
Jan 2020 - BN Dynamix @ 69000miles - Service - Vehicle check/oil/oil filter/spark plugs
Sep 2020 - BN Dynamix @ 70000miles - Rear brake pads (EBC Red Stuff DP32047C)
Oct 2020 - BN Dynamix @ 70000miles - Front brake pads to match rear pads (EBC Red stuff DP32006C)
Jan 2021 - BN Dynamix @ 70000miles - Service - Vehicle check/oil/oil filter/cabin filter
Aug 2021 - Zed Shed @ 74000miles - Roof cable repair
Jan 2022 - Zed Shed @ 77000miles - Service - Vehicle check/oil/oil filter/cabin filter
Feb 2022 - Zed Shed @ 77000miles - Refurbished front shock absorbers
Nov 2022 - Zed Shed @ 77000miles - Roof cable repair, other side
Jan 2023 - Zed Shed @ 79000miles - Service - Vehicle check/oil/oil filter
Service Components for N54B30, E89 35i:
Air Filter - MANN-FILTER Air Filter (C36 004) (I have a K&N filter (33-2367) that won't need replacing, just cleaning, but thought I'd spec an air filter for others that may find it useful)
Cabin Filter - MANN-FILTER Cabin Filter (CUK 2339) (same for all E89)
Oil Filter - MANN-FILTER Oil Filter (HU 816 x)
Oil - Castrol Edge 0W-30 (From Mobil's website it would be Mobil Super 3000 XE 5W-30, 6.5l total)
Brake Fluid - ATE DOT 4 TYP 200 (Castrol React SRF is apparently the best, but double the cost and will only make a difference on track)
Brake Pad (F) - EBC Red stuff DP32006C / Hawk Performance HPS 5.0 HB534B.750 / Pagid T2029 / Akebono EUR918 / Mintex MDB3133 / ATE non-ceramic 13.0460-7238.2 / ATE ceramic 13.0470-7238.2 / Stop Tech Street 309.09181
Brake Pad (R) - EBC Red Stuff DP32047C / Hawk Performance HPS HB669F.671 / Pagid T1769 / Akebono EUR1170 / Mintex MDB2948 / ATE non-ceramic 13.0460-2760.2 / ATE ceramic 13.0470-2760.2 / Stop Tech Street 308.14730
Brake Discs -
Spark Plugs - Bosch ZGR6STE2 (I stuck with regular OEM spark plugs as I've not noticed any pre-ignition with 370hp, for more info look at spark plugs source)
Other Consumables:
Wiper Blades - Bosch Aerotwin flat (AR22U Drivers, AR20U Passengers)
Gearbox Oil - Don't F'in touch it for the DCT! According to a horror story in the sources.
Regarding the brakes, I'm hoping that upgrading the pads and fluid will make a big difference, but considering braided brake hoses/lines as they're not a big expense (£25-30 for a front pair). Goodridge do a kit, and HEL will allow you build a custom one so I'd get them to design it.
Any thoughts on these?: https://www.goodridge.co.uk/products/car-brake-kit-for-bmw-z4-e89-all-2009-2018?variant=17701449105473
Thanks,
Beeacon.
Sources:
Brake Fluid 1 - https://e89.zpost.com/forums/showthread.php?t=541167
Brake Fluid 2 - https://www.e90post.com/forums/showthread.php?t=300199
Brake Fluid 3 - https://z4-forum.com/forum/viewtopic.php?f=2&t=41447&start=15
Brake Fluid 4 - https://z4-forum.com/forum/viewtopic.php?f=9&t=80785
Spark Plugs - https://www.bimmerworld.com/About-Us/BMW-N54-N55-Spark-Plugs/
DCT Horror Story - https://e89.zpost.com/forums/showthread.php?t=442369
Brake Pad Vehicle List (Part 12) - http://www.realoem.com/bmw/enUS/showparts?id=LM72-EUR-01-2010-E89-BMW-Z4_35i&diagId=34_1557
Bedding in brake pads - http://ebcbrakes.com/articles/how-to...ban-driving-2/
Cleaning Regime:
I have the previous owner of the car to blame for my wash regime. I used to be happy with a bucket, sponge, car shampoo, and a hose but after watching some youtube videos following his advice I fell into the washing world hard. Below I've copied my list of what works (more as a reminder to myself and keeping the info in one place). As the car has a ceramic coating I don't need to wax and polish it which really helps (and thank god as that would be another massive expense that I'd fall for! :lol: )
Exterior Clean Method:
https://youtu.be/yLiePQRMFc8
Only wash in cloudy conditions/late afternoon to prevent products drying onto car/streaking.
1. Prepare hose / pressure washer / products / microfibre towels / snow foam lance / snow foam / latex gloves.
2. Rinse vehicle with pressure washer (start at top and work way down).
3. Wet paper towels applied locally to bird poo and left for 5 minutes.
4. Spray bug remover (Gyeon Q2M Bug & Grime) locally to bugs on front of car, leave for 2 mins. Rinse off with pressure washer.
5. Apply snow foam (Gyeon Q2M Foam) with snow foam cannon (start at top and work way down, snow foam left on for 5mins).
6. Fill up 1 bucket with warm water & grit guard, 1 bucket with warm water and measured shampoo (25ml Gyeon Q2M Bathe+) and grit guard.
7. Rinse off snow foam.
8. Starting with the back wheels, spray tyre degreaser (Gyeon Q2M Prep) on tyres leaving for 30secs, then spray wheel cleaner with iron remover (Gyeon Q2M Iron) onto wheel face and barrel, brush tyre degreaser off tyre walls with tyre brush.
9. Use pointed wheel brush and 2 bucket method (dip in water bucket to rinse off, rubbing dirt onto guard, then into shampoo bucket) to clean barrel of each wheel, then soft bristle wheel brush to clean face of the wheel.
10. Rinse soap off wheel.
11. Repeat step 8 to 10 for each wheel.
12. Clean and refill water bucket and shampoo bucket (15-20ml Gyeon Q2M Bathe+). Have spare bucket of water waiting for when water gets low.
13. Shampoo car using microfibre mitt and 2 bucket system working top down and back to front.
14. Rinse off shampoo.
15. [Quarterly] For uncoated car, spray ‘wet coat’ onto a wet car then rinse off panel by panel. No towelling needed. Do once every 3 months to top up.
16. Dry roof with microfibre towel, then windows with squeegee, wiping blade clean on microfibre towel.
17. Dry car from top down using large microfibre towel. Use small microfibre towel to dry sills, door jambs, boot jamb, bonnet jamb, wheels, exhaust.
18. [Optional] Use air blaster to blast water away from wing mirrors, sills, window corners, wheels, etc.
19. [Quarterly] Spray silica sealant (Gyeon Q2M Cure) onto small microfibre towel on one side, rub onto car, then flip over towel and buff off; panel by panel. Do once every 3 months to top up/protect ceramic coat.
20. Put tyre dressing onto foam applicator pad, spread around pad with finger, then rub onto tyre walls. Buff off any excess.
21. [Every 6 Months] Apply rubber seal restorer (Sonax Gummipfleger) to all seals throughout the car, leaving to dry for 10 mins before wiping away excess with a clean microfibre towel.
22. [Every 6 Months] Apply non-stick rubber protector (Sonax Gummipfleger Stift] to window seals, wiping away excess.
23. [Every 6 Months] Spray PTFE lubricant into wing mirror gap to prevent plastic on plastic squeaking.
24. Exhaust tips [look up].
25. Wash microfibre towels and cloths at 40degrees using a small amount of washing powder (NO fabric softener!) and allowing to dry naturally.
26. Done!
Any water spots left can be removed with a water spot remover (Gyeon Q2M Water Spot) and wiping away excess immediately with a microfibre towel to prevent spoiling of ceramic coat.
Wax/Polish:
Not required as car has a ceramic coating (Siramik) with 2 year protection, removing the need for wax/polish.
Interior Clean Method:
https://youtu.be/X7z1iFoykEM
Only wash in cloudy conditions/late afternoon to prevent products drying onto car/streaking. Remove all rubbish from inside the car.
Floor mats:
1. Remove and vacuum the mats.
2. Spray carpet and upholstery cleaner (Auto-finesse Total) directly onto mats, then scrub with carpet and upholstery brush.
3. Blot and wipe away excess using a microfibre towel.
4. Can apply fabric protector to carpets. [look up]
5. Leave to dry while doing the rest of the car.
Head liner:
1. For any stains apply upholstery cleaner (Auto-finesse Total) lightly onto detailing brush, apply in swirls onto affected area and the clean and blot away with a clean microfibre towel.
Interior:
1. Dust interior using soft detailing brushes and vacuum cleaner.
2. Screens to be wiped with a clean microfibre cloth.
3. Vacuum interior thoroughly, moving seats back and forward. Vacuum in the folds of the seats.
4. For leather seats use a leather cleaner (Gyeon Q2M Leather Cleaner) directly onto seats and then brush with a leather brush working from top to bottom. Same for steering wheel but spray onto bristles. Wipe away excess with a clean microfibre towel.
5. For fabric seats use a carpet & upholstery cleaner (Auto-finesse Total) directly onto seats and then brush with a carpet & upholstery brush working from top to bottom. Wipe away excess with a clean microfibre towel.
6. [Every 6 Months] For protection of leather seats use a leather protectant (Gyeon Q2 Leather Coat), spray onto microfibre pad and then gently apply to leather surface, leaving to dry for 2 hours.
7. [Every 6 Months] For protection of fabric seats use a fabric protectant [look up].
8. Use all purpose cleaner (Auto-finesse Total) on interior trim by applying to towel and rubbing trim. For scuff marks, spray APC onto a Mr Clean bar and run affected area to get rid of scuffs. Wipe away with microfibre towel.
9. Apply trim dressing to applicator pad and then brush onto trim. Good for plastics, vinyl, and rubber [look up].
10. Use air freshener (Autoglym Autofresh) to spray into cabin. Put air con on full blast and recirculating mode, then spray into footwell to coat vents.
Door jambs:
1. Use all purpose cleaner and microfibre towel to clean door jambs, boot edges.
Glass:
1. Use Mr Clean Magic Eraser and all purpose cleaner (Auto-finesse Total), spray onto pad then wipe interior of glass. Then use isopropyl alcohol mix (Gyeon Q2M Prep) to deep clean glass using pad. Then wipe down with microfibre silk-weave cloth.
3. Then use premium glass cleaner (Gyeon Q2M Glass) onto microfibre waffle-weave towel and apply to window, then buff off using silk-weave cloth.
5. Can use a spray wax [look up].
Glass fog protection:
1. Spray glass with premium glass cleaner (Gyeon Q2M Glass) and clean using waffle-weave microfibre cloth, buffing off with a silk-weave microfibre cloth.
2. Spray glass with Isopropyl alcohol mix (Gyeon Q2M Prep) and clean using microfibre cloth.
3. Spray applicator suede cloth with anti-fog (Gyeon Q2 Fog) and apply in cross hatch pattern, leave for 3-5mins, then buff off with clean microfibre waffle-weave towel.
Engine Bay Clean Method:
https://youtu.be/6LwCbmvLYb0
Work on a cloudy day and cover any electrical or sensitive components with plastic sheeting or a carrier bag (alternator / ECU housing / exposed air filters). Make sure all caps and dipsticks are fully secured. Also wear gloves, degreaser is nasty stuff on your hands.
1. Spray a degreaser (Autoglym Engine & Machine Cleaner) on the underside of the bonnet and let it dwell for a couple of minutes. Use large soft wheel brushes to clean the underside of the bonnet. Do not touch the heat shield.
2. Rinse using a normal hose or a pressure washer on the lowest setting.
3. Rinse the engine bay to remove loose dirt and contaminants.
4. Spray a degreaser (Autoglym Engine & Machine Cleaner) in the engine bay and let it dwell for a couple of minutes.
5. Clean the engine bay with wheel brush, bendy thistle brush, and small detailing brush for hard to reach areas.
6. Rinse.
7. This can be done two ways: 1) Apply a wet dressing (Autoglym Vinyl & Rubber Care) and leave to dry before buffing off. 2) Dry the engine bay using either microfiber drying towels or air dryers/leaf blowers. Make sure it’s completely dry, then using a spray dressing to restore faded plastics.
8. Remove protective plastic bags and start the engine up and leave to run for a few minutes to dry out those last few hidden recesses. Done!
Exterior Equipment:
K’A’rcher K4 Full Control pressure washer
Extended rubber pressure washer cable
Snow foam cannon
Tyre brush
Wheel brush
Gyeon Q2M large wheelbrush
Gyeon Smoothie wash mitt
Water blade squeegee
Microfibre cloths x6 http://amzn.to/2wCENCn
Microfibre towels x3 blue (plush, 16” x 16”, edgeless/labelless, ~490gsm)
Microfibre towels x3 purple (plush, 16” x 16”, edgeless/labelless, 500gsm)
XL Drying Towel x2 - 500gsm Korean Towel
Meguires Tyre Dressing Pad
Wool metal polishing wheel cone x4
Syringe 100ml
Exterior Products:
Bug Cleaner - Gyeon Q2M Bug & Grime
Snow Foam - Gyeon Q2M Foam
Tyre Degreaser - Gyeon Q2M Prep
Wheel Cleaner & Iron Remover - Gyeon Q2M Iron
Wheel Soap - Gyeon Q2M Bathe+
Car Shampoo (ph neutral, ceramic coating safe (I.e no waxes or sealants) - Gyeon Q2M Bathe+
Hydrophobic Coat - Gyeon Q2M Wetcoat
Silica Spray Sealant (tops up ceramic coat) - Gyeon Q2M Cure
Tyre Dressing (water based) - Gyeon Q2M Tire
Water Spot Remover - Gyeon Q2M Water Spot
Rubber Protector - Sonax Gummipfleger
Rubber Frost Protector - Sonax Gummipfleger Stift
Exhaust cleaner - Autosol Metal Polish
Engine Degreaser - Autoglym Engine & Machine Cleaner
Vinyl/Engine Dresser - Autoglym Vinyl & Rubber Care
Evostick Impact Adhesive
GT86 PTFE lubricant
Interior Equipment:
Black & Decker Wet&Dry Vacuum Cleaner 7.2V
Leather brush
Carpet & upholstery brush
Small soft bristle detailing brush - 3x Hoghair Brushes
Microfibre cloths x3
Mr Clean Magic Eraser - Flash Magic Eraser
Waffle weave cloth for glass cleaning
Silk dryer cloth for glass buffing
Baby wipes
Interior Products:
Glass Cleaner - Gyeon Q2M Glass
All Purpose Cleaner - Auto-finesse Total
Carpet & Upholstery Cleaner - Auto-finesse Total
Carpet & Upholstery Protector -
Leather Cleaner - Gyeon Q2M Leather Cleaner
Leather Protector - Gyeon Q2 Leather Coat
Air Freshener / Odour Remover - Autoglym Autofresh
Interior Trim Dressing - Autoglym Vinyl & Rubber Care?
Glass Spray Wax -
Stuff Wanted:
Microfibre cloths
Gyeon Iron
Gyeon Wetcoat
Syringe
Gyeon Q2M Quick Detailer
Painter’s tape
Gyeon Tar
Gyeon Tyre Cleaner
Gyeon Clay Lube
Gyeon Clay
Wheel sealant (alloy safe) - Gyeon Q2 Rim/CarPro Dlux
Carpro Gliss (topcoat preventing water spotting)
Gyeon Q2M Silkdryer
Wash shampoo - Gyeon Q2M Bathe Essence (Once bathe+ is finished). £8.50 polishes bliss.
Microfibre waffle-weave towel
Air blaster (also for dog) [optional] -
Gyeon Q2 Fog
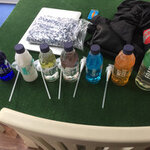
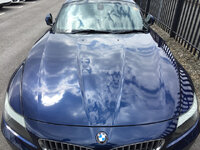
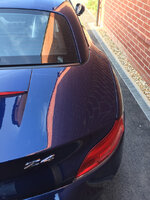


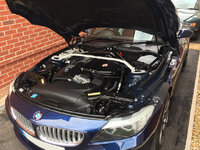
Full external and internal clean, seal restoration, and got around to fully cleaning the engine bay today!
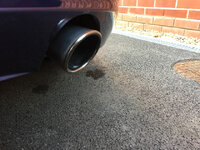
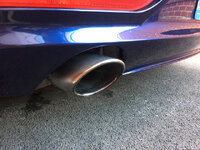
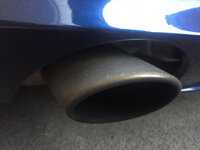
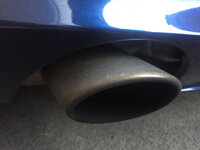
Just need to figure out how to clean the exhausts without affecting the brushed chrome finish.
Engine Bay Clean Method:
https://youtu.be/6LwCbmvLYb0
Work on a cloudy day and cover any electrical or sensitive components with plastic sheeting or a carrier bag (alternator / ECU housing / exposed air filters). Make sure all caps and dipsticks are fully secured. Also wear gloves, degreaser is nasty stuff on your hands.
1. Spray a degreaser (Autoglym Engine & Machine Cleaner) on the underside of the bonnet and let it dwell for a couple of minutes. Use large soft wheel brushes to clean the underside of the bonnet. Do not touch the heat shield.
2. Rinse using a normal hose or a pressure washer on the lowest setting.
3. Rinse the engine bay to remove loose dirt and contaminants.
4. Spray a degreaser (Autoglym Engine & Machine Cleaner) in the engine bay and let it dwell for a couple of minutes.
5. Clean the engine bay with wheel brush, bendy thistle brush, and small detailing brush for hard to reach areas.
6. Rinse.
7. This can be done two ways: 1) Apply a wet dressing (Autoglym Vinyl & Rubber Care) and leave to dry before buffing off. 2) Dry the engine bay using either microfiber drying towels or air dryers/leaf blowers. Make sure it’s completely dry, then using a spray dressing to restore faded plastics.
8. Remove protective plastic bags and start the engine up and leave to run for a few minutes to dry out those last few hidden recesses. Done!
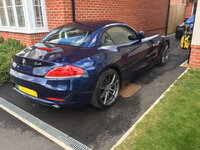


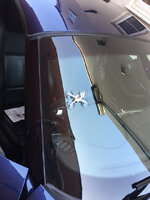
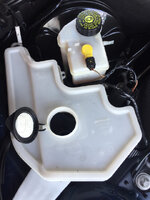
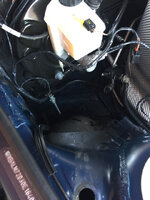
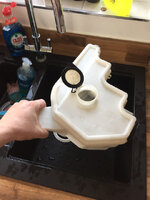
I've been on a tinkering spree recently having repaired a windscreen chip and then noticed that the windscreen washer jets were not spraying very effectively. After a quick search on the forum I found that the usual issue is that the mesh filter under the wiper fluid tank gets clogged up with slime. Looking in the tank you can see it is black in there (filled with sludge like the bottom of a pond) I took the tank out, cleaned it with bleach, washed it thoroughly and then put it back in, good as new. Took all of 15 mins to do the whole thing.
Now you can see the blue liquid through the tank. Method shown in the following link:
https://z4-forum.com/forum/viewtopic.php?p=1178260#p1178260
Next up: cleaning the exhausts and drying out the offside rear lamp unit as I've noticed a tiny bit of condensation starting to form in winter.
I'll use the following method and video to sort:
https://z4-forum.com/forum/viewtopic.php?f=45&t=80852&start=15
https://www.youtube.com/watch?v=wHJa6z6e-a0
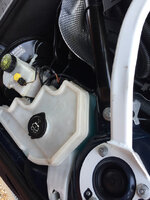


I notice you have a strut bar fitted, what’s your thoughts on it?
Lovely car by the way.
Lovely car by the way.
Finally got around to fixing the condensation in the rear passenger taillight. Lots of pictures below to show the process but mainly I followed Flybobbie's writeup and video shown below:
https://z4-forum.com/forum/viewtopic.php?p=1229403#p1229403
https://www.youtube.com/watch?v=wHJa6z6e-a0
Glue used was the Evostick Spray Mount:
https://www.diy.com/departments/evo-stik-general-purpose-spray-adhesive-200ml/5010591003125_BQ.prd
Looks as though the seal wasn't seated correctly:
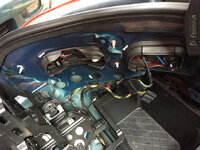
You can see where the water runs over the light on the top left hand side where all the muck is:
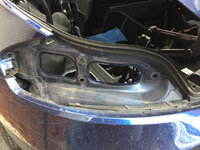
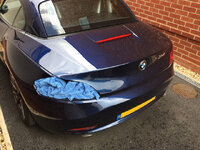
Light out with condensation:
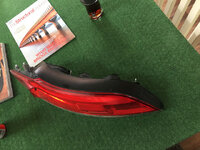
The figure 8 seal that causes the issue:
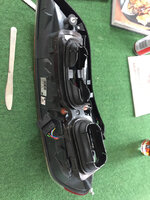
Water in the seal being the culprit, cleaned and glued this back in, then glued to the light unit:
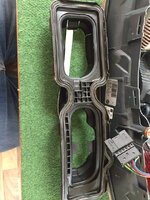
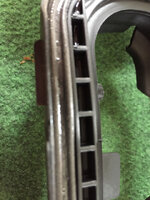
Water pooled in one corner causing the condensation:
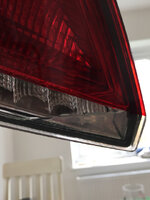
Re-fitted and no more condensation!:
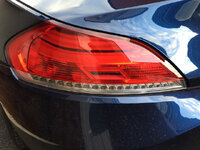
https://z4-forum.com/forum/viewtopic.php?p=1229403#p1229403
https://www.youtube.com/watch?v=wHJa6z6e-a0
Glue used was the Evostick Spray Mount:
https://www.diy.com/departments/evo-stik-general-purpose-spray-adhesive-200ml/5010591003125_BQ.prd
Looks as though the seal wasn't seated correctly:

You can see where the water runs over the light on the top left hand side where all the muck is:


Light out with condensation:

The figure 8 seal that causes the issue:

Water in the seal being the culprit, cleaned and glued this back in, then glued to the light unit:


Water pooled in one corner causing the condensation:

Re-fitted and no more condensation!:

After much arguing with BMW, they will not replace the wheels 
Wheels had corrosion to the face of one of the rear wheels, heavy corrosion behind the hubcap on both wheels, and both rears have very minor cracks (radial ovality measurement showed 1.02mm).
They denied the claim as the wheel with no corrosion to the face they could see some repair work to the face, and thus void the warranty despite the cracks (fair enough). The wheel with corrosion to the face they said that the crack was caused by hitting a pothole and was not due to a manufacturing defect even though the corrosion is a manufacturing defect, and void the warranty on that wheel too.
I queried the manufacturing defect element as the ovality of the wheel used to have a maximum out of ovality of 2mm up until ~2016 when they reduced it to 1mm. My wheels were manufactured in 2011 and sold to the previous owner of the car in 2017. Thus the wheels were probably out of the new ovality limit upon purchase making the warranty void. When they told me it was 1.02mm (20 microns, a human hair is 65microns thick) I nearly blew my lid :violent1:
They wouldn't budge on the issue and I'm feeling a bit defeated on it really. Anyone got any advise on what to do? Or am I to buy a nice set of replicas and sell the two good fronts (Style 313M)?
sounds about as would be expected.Beeacon said:After much arguing with BMW, they will not replace the wheels
Wheels had corrosion to the face of one of the rear wheels, heavy corrosion behind the hubcap on both wheels, and both rears have very minor cracks (radial ovality measurement showed 1.02mm).
They denied the claim as the wheel with no corrosion to the face they could see some repair work to the face, and thus void the warranty despite the cracks (fair enough). The wheel with corrosion to the face they said that the crack was caused by hitting a pothole and was not due to a manufacturing defect even though the corrosion is a manufacturing defect, and void the warranty on that wheel too.
I queried the manufacturing defect element as the ovality of the wheel used to have a maximum out of ovality of 2mm up until ~2016 when they reduced it to 1mm. My wheels were manufactured in 2011 and sold to the previous owner of the car in 2017. Thus the wheels were probably out of the new ovality limit upon purchase making the warranty void. When they told me it was 1.02mm (20 microns, a human hair is 65microns thick) I nearly blew my lid :violent1:
They wouldn't budge on the issue and I'm feeling a bit defeated on it really. Anyone got any advise on what to do? Or am I to buy a nice set of replicas and sell the two good fronts (Style 313M)?
unfortunately, we as a country tend to have a moan, then let it go.
america, if i have this correct, kicked off with bmw and they were forced to replace a lot of alloys as deemed not fit for purpose, due to cracking with runflats.
as most of us know, replacing with normal tyres and correct pressures certainly seems to reduce the risk considerably, but does not get over the fact a lot of the alloys just were not robust enough for our potholed roads.
you either pick up a good set of used oem, or a set of reputable after market wheels for similar money to a single oem wheel new from bmw.
bearing in mind the cost of those wheels in 2017 would have been in the region of 2000 pounds, it seems crazy that they can walk away from this 
Phoenixboy said:bearing in mind the cost of those wheels in 2017 would have been in the region of 2000 pounds, it seems crazy that they can walk away from this
I think Dave1971 managed to get very lucky with his purchase of them as he put a cheeky bid in for £1000 and they accepted the offer. But its still not good if they're having issues after only 2 years (18 months really as they've been in the garage over winter). I'm gobsmacked as its very clearly a manufacturing issue on at least one of the wheels.
Beeacon said:Phoenixboy said:bearing in mind the cost of those wheels in 2017 would have been in the region of 2000 pounds, it seems crazy that they can walk away from this
I think Dave1971 managed to get very lucky with his purchase of them as he put a cheeky bid in for £1000 and they accepted the offer. But its still not good if they're having issues after only 2 years (18 months really as they've been in the garage over winter). I'm gobsmacked as its very clearly a manufacturing issue on at least one of the wheels.
no definately poor show.
they seem good at wiggling out of these issues.
still even at 1000 pounds, its pretty poor to say the least.
what is the warranty on oem wheels then?
although it would appear they seem to wiggle out of it in most cases.
Phoenixboy said:no definately poor show.
they seem good at wiggling out of these issues.
still even at 1000 pounds, its pretty poor to say the least.
what is the warranty on oem wheels then?
although it would appear they seem to wiggle out of it in most cases.
The warranty is for 2 years from purchase of the part minus the following exceptions:
- Corrosion must be to the face of the wheel
- The wheel must not have been refurbed
- The wheel must not be cracked (unless the ovality is out by less than 1mm. Used to be 2mm)
- The wheels must be put on the car by BMW and have a VIN model number on the parts receipt (unless they're a performance set)
- Your car must be blue
- It must be a Tuesday
- You must be able to argue for a sustained period of at least 5 minutes without blinking
- Your name must have at least 5 vowels in it (middle names do not count)
- It must be a Thursday
- You must present, if asked, a 2 minute demonstration on how to yo-yo
- You must have at least 72% of your own teeth
- You must be minimum shoe size 9
- You must be maximum shoe size 9.5
- Finally, It must be a Wednesday
Similar threads
- Replies
- 0
- Views
- 501
- Replies
- 8
- Views
- 558
