New E85 3.0i owner

The driver (passenger less so) inner door pull had some paint peeling on the factory finish:
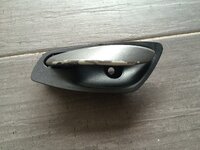
24118819816_46585fcb5d_k.jpg


Decided to improve the cosmetics of this part by re-painting with Krylon satin black:
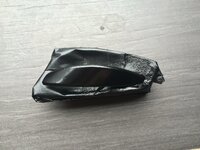
24036817332_6f95d7f93c_k.jpg
Unfortunately there were some serious chips on the driver side pull which the paint was unable to fill. Looks like will have to go get some putty to apply over these dings and smoothen out before re-spraying again in the future. In the mean time, at least the pulls are uniformly black to satisfy my aesthetic eye.
 
Well done. One of the things I appreciate most about fora such as this is finding others that like to DIY. You certainly have done a considerable amount of personalizing and re-conditioning.

The pulls on mine are beginning to show their age and will be receiving paint in the near future.
 
^^Been there done that with my other older cars :D It is generally cheaper and less trouble to fix, re-condition (good term which I will now use in the future) and update on your own since you tend to be more careful and aware when working on your personal car :)

Of course I draw the lines at more complex tasks like internal engine or transmission work since I neither have the space nor tools to carry it out although the heart is willing :P
 
owm said:
Of course I draw the lines at more complex tasks like internal engine or transmission work since I neither have the space nor tools to carry it out although the heart is willing :P
I am that way also, for the most part. Were I to have the requisite tools and shop then I would be all over doing engine work.

My bike, on the other hand, has few secrets. :evil:
 
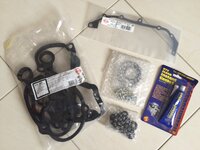
Received the following from X8R Ltd UK:
24310626105_7815d64911_k.jpg
Hope to carry out the procedure in Feb as the car is starting to exhibit the symptoms of VANOS failure.


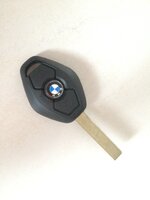
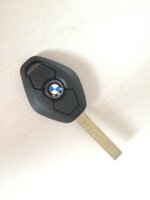
Also got a spare key with 315MHz radio frequency which I will pair and cut the key profile by this weekend as the car is 300+km away from where I am now:
24310626825_c62f957a85_k.jpg
 
owm said:
Hope to carry out the procedure in Feb as the car is starting to exhibit the symptoms of VANOS failure.
What symptoms? Mine has a slight flutter on throttle up but I checked the DISA as has been suggested and it is as fresh as a newborns backside. That would lead me to suspect something else and the VANOS has been alluded to.
 
Nothing that serious yet but at times the engine is sluggish and bogs at lower RPMs but is OK over 3K+. There is also infrequent idle droops. For peace of mind, I prefer fixing this problem once and for all.

Likewise for the DISA valve, mine checks out OK (for now) but would rather nip the problem in the bud :)
http://www.z4-forum.com/forum/viewtopic.php?t=73600

I got this as I had a voucher from the vendor:
https://x8r.co.uk/index.php/products/bmw/disa-repair-kits/bmw-disa-valve-intake-adjuster-unit-rebuild-upgrade-rattle-aluminium-fix-m54-3-0.html
 
X8R gave me a discount voucher as thanks for purchasing their VANOS rebuild kit :)


rjsimmons said:
Voucher? What voucher? Where'd you get a voucher?
 
Paired the new key fob using Method 2 here:
http://www.z4-forum.com/forum/viewtopic.php?t=33506

Then realised the key needs to be laser cut and the locksmiths around my area are unable to carry out this job...duh.


owm said:
Also got a spare key with 315MHz radio frequency which I will pair and cut the key profile by this weekend as the car is 300+km away from where I am now:
24310626825_c62f957a85_k.jpg
 
Finally managed to cut the key. Original on top, duplicated unit below:
12670169_602195276598312_4554658063232523309_n.jpg


Machine scanning the profile of the original key:
12651139_601014710049702_1268107657606219930_n.jpg


Machine cutting the key profile after scanning the original key:
12512552_602195373264969_5619689317241244942_n.jpg


Cost of cutting the key: GBP3.30
Cost of programming the key to the GM5 module: GBP41.40
 
I purchased the following uprated DISA valve (https://x8r.co.uk/index.php/catalogsearch/result/?q=disa) about a month ago and although my current OE plastic unit was still looking good, I had my mechanic install this new piece as a preventive measure while at the same time replacing the oil filter housing gasket which was causing oil seepage in the parking lot:
12698398_602991099852063_5399149161839598295_o.jpg


Next up is to study the rain sensor which is acting intermittently when auto wipers are on. Looks like the adhesive gel pad needs to be swapped out. Also need to troubleshoot on the PDC which is non operational :/
 
Wanted to respray the seat belt guide cover to stainless steel and that necessitated removal of the whole seat back so I could gain access to the lower Phillips screw holding said cover:
10386933_608547019296471_7787353594046502124_o.jpg


The guide that I used to remove the electric seat from the car:
http://www.z4-forum.com/forum/viewtopic.php?t=4474


The blasted screw holding the seat belt guide cover to the body:
12717413_608660102618496_7438277976796048189_n.jpg

The seat belt guide cover does not come off with just removing the upper Torx screw. Both screws must be removed before the cover will separate cleanly from the guide body.


The two separated pieces:
12716072_608547032629803_9082410772841139166_o.jpg


The resprayed guide cover in stainless steel and body in black with an acrylic top gloss coat:
12705735_608660085951831_3289587245721363504_n.jpg


Gives a nice added contrast to the seat belt guide area:
12744753_608933912591115_477177988555946049_n.jpg
 
The fabric that goes over the shell was delaminating as the adhesive used has lost its staying power especially around the edges. Duct tape used to reinforce these areas:
12717152_608659942618512_6836799481106713401_n.jpg


Cleaned up passenger seat bottom:
12742624_608659982618508_6982753026328388803_n.jpg


Fixed the common squeaking issue with the driver seat by dousing the areas in red with white lithium grease:
12734041_608671429284030_6728533192631142218_n.jpg

No more funny noises whilst driving! :driving:
 
The soft top compartment shelf has a tendency to rattle badly when going over uneven road surfaces. Taking cue from this excellent guide here:
http://www.z4-forum.com/forum/viewtopic.php?f=26&t=30400

The underneath of the shelf was stuck with Butyl strips to mass load/damp the plastic shelf.

Stock shelf underside:
12764359_608933872591119_2734237193203098953_o.jpg


Damping strips added:
12764884_608933829257790_1024128200096802380_o.jpg


Point to note, the retaining clips for the shelf has to be inserted top down and takes a fair bit of dexterity to do so!
 
Hi there!
Nice to see a fellow Malaysian on the forum. Where are you located at? Maybe we can tackle the roof motor relocation together :wink:
 
Hey there!

I am in JB but the car is mostly in PJ :)

The roof motor boot relocation project is definitely something I will be carrying out but will need to familiarize myself with the car further. I gather you have an E85 as well? Glad to see another MY-plate Zee here as well! :)
 
Back
Top Bottom