I have just completed a rather unorthodox audio upgrade which I thought I would share with you in case you have any inklings to be as mad as me. It is a fair bit of work though.
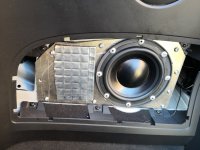
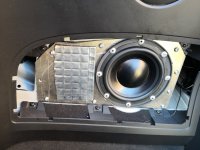
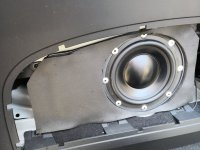
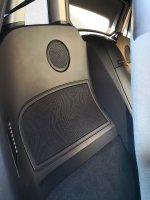
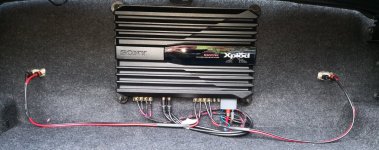
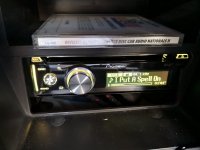
The audio upgrade involved: adding a second head unit (Pioneer DEH-X8700DAB) fitted in the rear lockable cubby box between the two seats; fitting a 4x70W power amplifier (Sony XM-N1004) in the rear bulkhead of the boot; fitting a pair of Reckhorn D165 6.5” long throw speaker driver in place of the two rear stowage areas (after a fair bit of modification to the stowage area body panels).
Preparation:
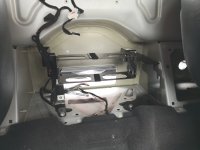
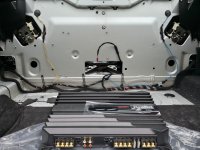
Removed all trim in the boot to access the rear bulkhead; removed the centre rear cubby box and two rear speaker panels; removed the 6 disc CD changer; removed front centre console switchpack and handbrake trim panel, removed the passenger’s side glovebox, glovebox carrier and drop the fusebox to gain access to the connectors on the rear (some pictures shown below)
Head unit installation:
I decided to utilise the CD changer mounting bracket to mount the radio where the CD changer was. The LHS of the bracker (looking rear) had holes that matched well to the side fixing holes in the radio. For the RHS I made an angle bracket out of some 3mm aluminium I had knocking around (the squared edge isn't an issue, nothing is anywhere near it).
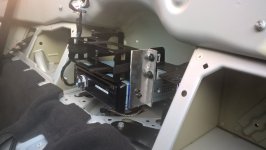
The connections to the radio aligned perfectly with the rectangular cutout on the rear bulkhead.
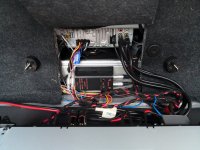
Wiring was straightforward, because I was using an amp I did not need to connect the speaker which left four wires to connect up:
1. B+
2. Aux
3. Ground
4. Amp control
I made a small harness to go to the fusebox and connected as follows:
Connector X11005 Pin 2 in fusebox (spare fuse 3 now 7.5A) to radio B+ using 2.5 sq.mm TWC.
Connector X11007 Pin 3 in fusebox (fuse 47 infotainment 7.5A) to radio Aux using 0.75 sq.mm TWC.
Ground X13004 (RHS rear) to radio ground using BMW ground bus.
I disconnected the two BMW rear speakers and fed these into the aux in connector on the headunit using a high level to low level converter, this allows the existing BMW head unit to play FM through the Pioneer head unit and I don’t have to mess around with a second FM antenna or splitters to listen to FM. I used a stick on DAB antenna on the front screen for DAB.
Speaker Installation:
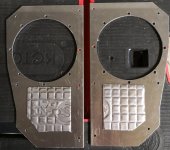
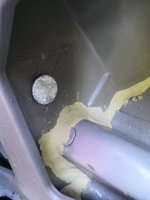
My plan all along was to use the steel fabricated stowage areas to create a sealed box sub woofer. The challenge was sealing them, these boxes are literally like colanders. Aside from a big rectangular hole in the top of the box, a 35mm diameter hole at the back and a 10mm hole in the side, most seams had big airgaps.
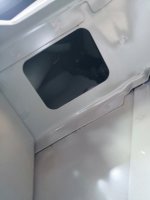
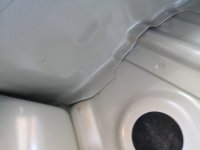
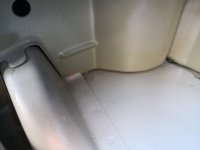
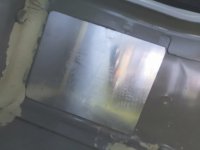
For the speaker to perform well they all needed to be airtight. I made a rectangular plate out of 2mm aluminium for the top hole, and used a electrical box knockout for the 10mm hole in the side. I decided to use the rear hole to take two speaker connectors out. To do this I cut out some 5mm ABS plastic slightly larger than the cutout fitted from the rear. All these were glued with epoxy resin. I then patched over the top of them with glass fibre matting. I filled all the seams with Milliput.
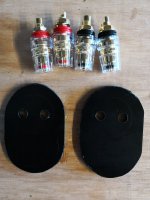
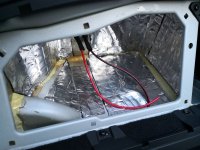
I then liberally covered all flat panels with Silentcoat.
To be continued as it won't let me add any more files.
The audio upgrade involved: adding a second head unit (Pioneer DEH-X8700DAB) fitted in the rear lockable cubby box between the two seats; fitting a 4x70W power amplifier (Sony XM-N1004) in the rear bulkhead of the boot; fitting a pair of Reckhorn D165 6.5” long throw speaker driver in place of the two rear stowage areas (after a fair bit of modification to the stowage area body panels).
Preparation:
Removed all trim in the boot to access the rear bulkhead; removed the centre rear cubby box and two rear speaker panels; removed the 6 disc CD changer; removed front centre console switchpack and handbrake trim panel, removed the passenger’s side glovebox, glovebox carrier and drop the fusebox to gain access to the connectors on the rear (some pictures shown below)


Head unit installation:
I decided to utilise the CD changer mounting bracket to mount the radio where the CD changer was. The LHS of the bracker (looking rear) had holes that matched well to the side fixing holes in the radio. For the RHS I made an angle bracket out of some 3mm aluminium I had knocking around (the squared edge isn't an issue, nothing is anywhere near it).

The connections to the radio aligned perfectly with the rectangular cutout on the rear bulkhead.

Wiring was straightforward, because I was using an amp I did not need to connect the speaker which left four wires to connect up:
1. B+
2. Aux
3. Ground
4. Amp control
I made a small harness to go to the fusebox and connected as follows:
Connector X11005 Pin 2 in fusebox (spare fuse 3 now 7.5A) to radio B+ using 2.5 sq.mm TWC.
Connector X11007 Pin 3 in fusebox (fuse 47 infotainment 7.5A) to radio Aux using 0.75 sq.mm TWC.
Ground X13004 (RHS rear) to radio ground using BMW ground bus.
I disconnected the two BMW rear speakers and fed these into the aux in connector on the headunit using a high level to low level converter, this allows the existing BMW head unit to play FM through the Pioneer head unit and I don’t have to mess around with a second FM antenna or splitters to listen to FM. I used a stick on DAB antenna on the front screen for DAB.
Speaker Installation:
My plan all along was to use the steel fabricated stowage areas to create a sealed box sub woofer. The challenge was sealing them, these boxes are literally like colanders. Aside from a big rectangular hole in the top of the box, a 35mm diameter hole at the back and a 10mm hole in the side, most seams had big airgaps.


For the speaker to perform well they all needed to be airtight. I made a rectangular plate out of 2mm aluminium for the top hole, and used a electrical box knockout for the 10mm hole in the side. I decided to use the rear hole to take two speaker connectors out. To do this I cut out some 5mm ABS plastic slightly larger than the cutout fitted from the rear. All these were glued with epoxy resin. I then patched over the top of them with glass fibre matting. I filled all the seams with Milliput.


I then liberally covered all flat panels with Silentcoat.
To be continued as it won't let me add any more files.
