You are using an out of date browser. It may not display this or other websites correctly.
You should upgrade or use an alternative browser.
You should upgrade or use an alternative browser.
My Life with a Z4M Bumper !
- Thread starter Bumpy
- Start date
Update ....
Decisions or Not ?
Grills ?
As many here already know, changing out a grill is about a 15 second exercise.
Many also opt for the totally blacked out grill with some discussion as to whether a gloss black is preferred to the flat black 'bad boy (or girl)' version.
I have 3 grills to play mix or match with. Plus I have 3 different grill trims to ramp up the decision making process.
Grills are in argent, white and black.
Trims are chrome, black chrome and flat black.
Any opinions ?
Black or white ?
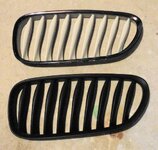
Stock ?
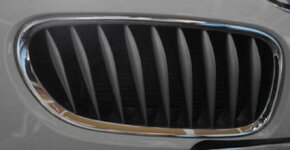
Actually I am not finished with the black grills. They are currently all flat black. Im considering gloss clear coating the grills while leaving the trim flat black.
Also the white grills will be flat white to contrast with the gloss body colour. That's something I learned from my biker daze. Same colours with different gloss makes for more interest.
Decisions or Not ?
Grills ?
As many here already know, changing out a grill is about a 15 second exercise.
Many also opt for the totally blacked out grill with some discussion as to whether a gloss black is preferred to the flat black 'bad boy (or girl)' version.
I have 3 grills to play mix or match with. Plus I have 3 different grill trims to ramp up the decision making process.
Grills are in argent, white and black.
Trims are chrome, black chrome and flat black.
Any opinions ?
Black or white ?

Stock ?

Actually I am not finished with the black grills. They are currently all flat black. Im considering gloss clear coating the grills while leaving the trim flat black.
Also the white grills will be flat white to contrast with the gloss body colour. That's something I learned from my biker daze. Same colours with different gloss makes for more interest.
Next up ...
Fawx Brake Cooling Ducts.
As mentioned I have been curious about colour matching the brake ducts after I saw a rear bumper aero pan that was body coloured and exposed much more of the visual impact of that detail than the more common black or argent.
Also the Z4M bumper deletes the much loved by some, foglights.
I currently have the foglights and rarely use them, but the designer in me figured that, with the wiring already in place ..Why not swap in some LED Fogs for when I need more light.
Here is what I've currently worked up :
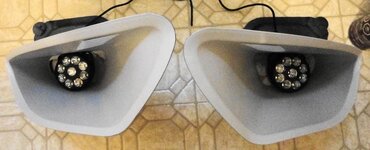
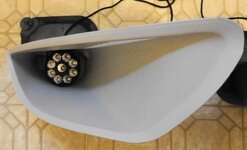
If I don't like the colour matching a relatively painless spray with black bumper paint will return me back into the Z4M Bumper fold with the all too common black faux brake cooling ducts.
Bumpy
Fawx Brake Cooling Ducts.
As mentioned I have been curious about colour matching the brake ducts after I saw a rear bumper aero pan that was body coloured and exposed much more of the visual impact of that detail than the more common black or argent.
Also the Z4M bumper deletes the much loved by some, foglights.
I currently have the foglights and rarely use them, but the designer in me figured that, with the wiring already in place ..Why not swap in some LED Fogs for when I need more light.
Here is what I've currently worked up :


If I don't like the colour matching a relatively painless spray with black bumper paint will return me back into the Z4M Bumper fold with the all too common black faux brake cooling ducts.
Bumpy
Sad News ...
The attempt at spraying and clear coating the front bumper with custom blended rattle cans has been judged a failure !
I have had to accept that some things are best left to the pros.
After 3 cans of white I wasn't happy with the finish or the colour coverage.
I could have gotten a couple of more cans mixed with the hope that my colour was still showing some of the gray / silver base bleeding through..
Or I could just take what I have to a paint shop and plead for financial mercy.
A visit to a local autobody shop :
The painter agreed to a reasonable (?) cash price to do the job.
He actually complimented me on my prep
When it came to 'colour' I was schooled on the complexities of modern factory paint .
DIY doesn't have a chance because the factory colours are anything but consistent.
After searching his database of Alpin Weiss 300/0
There were a dozen variations spread over the years of production.
Next he took out this portable contraption that looked like a Game Gear video controller with a large suction cup attached
Cleaned off a section of my front fender, nearest the bumper and stuck the thing on it.
Next he explained that this paint analyser takes shots of the paint from 3 different angles to determine the colour.
Back at the database computer, the download suggests exact factory matched as well as a custom mix.
Actually being a late 08 model I was surprised that the closest match was the current Mazda White ?
But the painter explained he will custom blend the colour.
So I wasted almost $200 on miss matched custom colours hoping for the best
But I am now schooled in what is possible which I consider an education for the better.
Bumper should be completed by Monday at the latest.
Cheers Bumpy
Brilliant thread and some great work! It's ways nice to be able to do things yourself and huge credit for attempting to do the spray job on your own! I think that's the headrest thing to get right with all this modding, the paint. I've had to spray my front and repair and spray the rear and shuddered at just the thought of attacking it myself!! Had a good friend with a paint shop sort it and came out top!
You'll have the added satisfaction though of prepping it, which is arguably the hardest part anyways!
You'll have the added satisfaction though of prepping it, which is arguably the hardest part anyways!
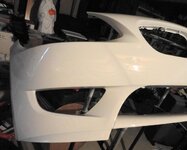
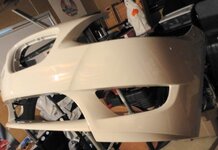
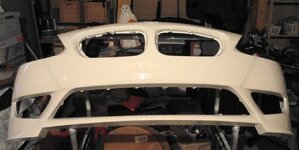
Probably my last post on this project until I do the bumper swap.
No sense in doing it now just in time for winter to blast the thing.
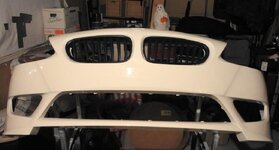
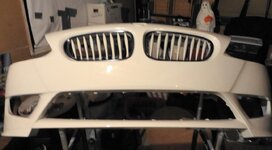
Trying to get a feel for the grill colour and brake duct match.
I can always go with stock, but who wants to look like everyone else ?
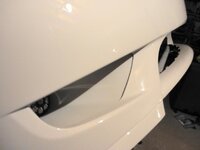
Colour Matched ducts
Black Grills ?
White Grills?
Salt and Pepper?
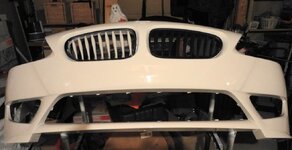
Apologies for the picture quality
Low light in the basement.
Cheers Bumpy
No sense in doing it now just in time for winter to blast the thing.
Trying to get a feel for the grill colour and brake duct match.
I can always go with stock, but who wants to look like everyone else ?
Colour Matched ducts

Black Grills ?

White Grills?

Salt and Pepper?

Apologies for the picture quality
Low light in the basement.
Cheers Bumpy
neilthomas
Member
Loving the white grill mate!!
Sent from my GT-I9100 using Tapatalk 2
Sent from my GT-I9100 using Tapatalk 2
spr_bimmer
Member
i like the colour matched ducts and grills!
white grills are looking classy and the all black is more aggressive, since you have both you can always swap em at any time.
you could also wrap (so you can change it back later) the middle bottom section where the lower grill sits matte black.
white grills are looking classy and the all black is more aggressive, since you have both you can always swap em at any time.
you could also wrap (so you can change it back later) the middle bottom section where the lower grill sits matte black.
shortfuse 2
Senior member
nice to see the finished job on the z 
DPG said:When are you getting this fitted?
I'll be fitting the Z4M bumper in the Spring.
It took a while to get the left brake duct support from BMW.
That was the only missing piece and it arrived mid October.
Couldn't see subjecting the M Bumper to the Canadian winter right away.
 Bumpy
BumpyWell I did it!
Installed the Z4M Bumper today.
Removal of the Facelift went without much drama.
The push rivets in the wheel wells on my 08 3.0si appear to have been improved and could not be reused.
A trip to Home Depot (Auto Fastener trays) located the older version at a cost of less than a Canadian Buck
Inspection of the undertrays exposed some slight damage to 3 fittings.
I cut some material from my donner bumper and used epoxy (JB Weld) to repair and reinforce these areas.
Installing the M Bumper went as described by many.
The previously mentioned short coming of the Facelift undertray is being solved via a piece from the donnar bumper as well.
I made a template that will fill the gap with a transition piece ..I'll add that here later later.
Here it is !
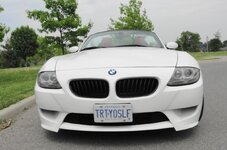
Note the colour matched brake cooling ducts. As mentioned previously I went with this to maximize the visual depth of the duct. While the colour is matched, I didn't clear coat the duct, preferring a flat white.
The Kidney Grills are flat black with the trim ring glossy black.
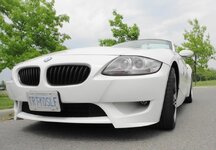
You can see the glossy trim on the kidney grill in this pic.
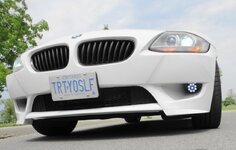
Fog Lights in the brake duct.
The wiring was already there on the facelift bumper.
I went with a round LED Fog / Driving (?) Light mounted deep in the brake cooling duct.
The original bulb was a halogen and I couldn't locate a female receptacle so I took out my solderless connectors and modified a simple blade connector (cut it's width via tin snips so it fit)
Checked the polarity and taped everything snug. Worked like a charm.
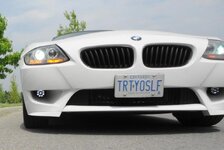
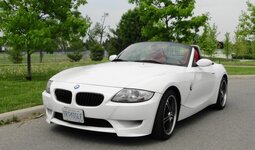
I went with the stock lic. plate holder. Seeing as the local paper did a story on the constabulary taking offense to obstructed and modified plates. Actually I preferred the stock bracked turned upside down and mounted about an inch lower than stock.
So there yah have it !
Cheers
Bumpy
Installed the Z4M Bumper today.
Removal of the Facelift went without much drama.
The push rivets in the wheel wells on my 08 3.0si appear to have been improved and could not be reused.
A trip to Home Depot (Auto Fastener trays) located the older version at a cost of less than a Canadian Buck
Inspection of the undertrays exposed some slight damage to 3 fittings.
I cut some material from my donner bumper and used epoxy (JB Weld) to repair and reinforce these areas.
Installing the M Bumper went as described by many.
The previously mentioned short coming of the Facelift undertray is being solved via a piece from the donnar bumper as well.
I made a template that will fill the gap with a transition piece ..I'll add that here later later.
Here it is !

Note the colour matched brake cooling ducts. As mentioned previously I went with this to maximize the visual depth of the duct. While the colour is matched, I didn't clear coat the duct, preferring a flat white.
The Kidney Grills are flat black with the trim ring glossy black.

You can see the glossy trim on the kidney grill in this pic.

Fog Lights in the brake duct.
The wiring was already there on the facelift bumper.
I went with a round LED Fog / Driving (?) Light mounted deep in the brake cooling duct.
The original bulb was a halogen and I couldn't locate a female receptacle so I took out my solderless connectors and modified a simple blade connector (cut it's width via tin snips so it fit)
Checked the polarity and taped everything snug. Worked like a charm.


I went with the stock lic. plate holder. Seeing as the local paper did a story on the constabulary taking offense to obstructed and modified plates. Actually I preferred the stock bracked turned upside down and mounted about an inch lower than stock.
So there yah have it !
Cheers
Bumpy
Similar threads
- Replies
- 5
- Views
- 662

