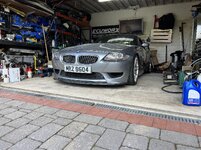
Martyn's Z4M Coupe

This is amazing, great work. Hope to see more updates and maybe some videos?

Does the Z4m have the same traction and stability control systems as the E46 M3 and are you doing anything in that department to handle the extra horses Martyn? I wonder if you could implement E92 or later systems which are superior to the old gen stuff.
 
Regarding traction / stability, as I'm not using the stock ECU any more DSC is totally defunct, I'm using MaxxECUs traction control setup which is much more advanced than the stock system (The MK60 the Z4M uses is very similar to the MK60 setup in the later E46 M3), which craps its pants any time I went near the throttle lol.

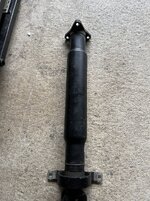
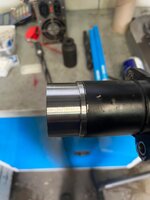
I didn't get much done yesterday, or today but I did manage to measure the required length for the prop so it could be shortened and have the yoke changed to suit the gearbox. I dropped it off to a friends engineering company to see what he can do with it.

I cut the yoke from a 335i prop, ready to be grafted to a donor Z4M prop.
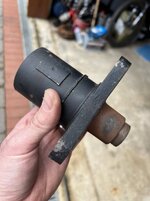
IMG_1846.jpg

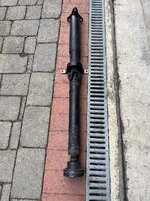
Donor Z4M prop.

IMG_1847.jpg

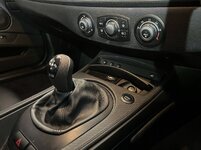
Next up was to fit the DCT shifter to the car, the holes for the shifter were already there, and in exactly the right places! I chucked in some rivnuts, bolted it down and tested the trim. It all fits, but the gaiter really needs re-trimming due to the bulk of the E92 M3 DCT shifter.
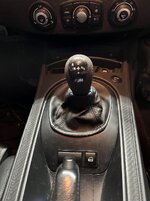
IMG_1877.jpg

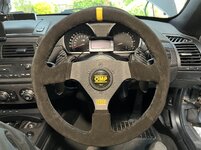
I also modified the wiring for the paddle shifters I'll be using so they mimic the resistance of the OEM E9x M3 paddles. I'm going to re-use the pins from the stock clock spring as I'll no longer be running the stock multi function steering wheel. Once I have the position of the steering wheel where I want it I'll crimp on some dupont connectors and connect them to the clock spring.
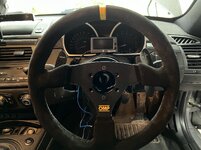
IMG_1879.jpg

I hope to fit the inline thermostat for the gearbox and connect up the gearbox oil cooler lines tomorrow, then I can partially fill the gearbox. I won't completely fill the gearbox until I have some form of exhaust on for obvious reasons.
 
Martyn said:
Thanks all.

The wheels are Atomic CSL reps from BM Autosport.

I gave it a quick machine polish as it was covered in crap and light marking where Ive been working on.

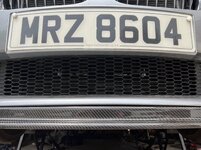
The splitter is from here: https://www.schmiedmann.com/en/product/1946128-new?product=FRLSTE8586EDCAR

Great! Thanks for the info Martyn. Quite interesting stuff you are doing. Was doing my own tuning on my built 5.0L Mustang due to the expense for professional tuning on a dyno everytime I made a tweak... Really need a Dyno for tuning rather than collecting data on the street. Too expensive for a Dyno, unless tuning other cars to augment cost.
 
Made some good progress yesterday, I got the shift wires run to the clock spring where I re-pinned the stock connector. I fitted dupont connectors to the horn and shift paddle connections so it's plug and play.

IMG_1881.jpg

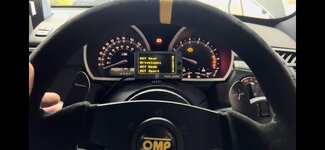
I also configured my Plex USDM to display DCT related status such as gear, drivelogic mode etc

IMG_1890-1.jpg

Something I'd overlooked when deciding to do the conversion was how the reverse light would be triggered, luckily it was pretty easy to sort. I used a male connector to plug directly into the reverse switch connector, then ran that to a small relay and then to a spare output on the MaxxECU. I configured the MaxxECU to ground the output when R is selected. This closes the contacts on the relay and the reverse lights and PDC spring to life.

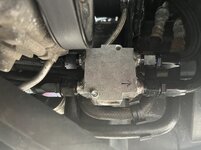
I also made up the gearbox oil cooler lines with AN fittings, mounted the F8x M3 DCT thermostat and filled the box with gearbox oil.

Lastly I ran the engine and checked that the starter engaged the new flywheel OK and that I could engage gears, thankfully I could engage R, 1st and 2nd without any issue, I couldn't get any higher gears due to the lack of propshaft (no wheel speed reported obviously).
 
A few more small updates while I wait for the prop.

A wanted a clean location for the drivelogic button, so I drew up an ashtray insert in Fusion360 and printed a panel to sit in the ashtray.

IMG_1897.jpg

I also filled the gearbox properly after temporarily fitting the exhaust. I had to clearance one of the lugs on the back of the gearbox to make the exhaust fit but there was plenty of 'meat' there to take off without causing any issue.

IMG_1898.jpg

F8x DCT Thermostat mounted securely. Exhaust the welding on the AN fittings, it wasn't my finest work!

IMG_1899.jpg

DCT oil cooler mounted above the main engine cooler.

IMG_1904.jpg

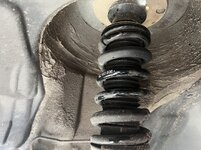
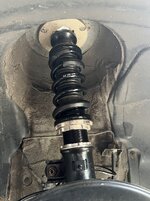
Lastly I swapped out the front springs on my BCs from 8kg/mm to 6kg/mm.

IMG_1902.jpg
IMG_1903.jpg
 
Very cool DCT swap!

How are you liking the BC Coilovers for normal driving comfort and which spring rates did you choose for the rear? I'm considering these coilovers for daily use.
 
Thanks.

I'm not convinced on the 8Kg springs hence trying the 6Kg ones. The rears are currently 10Kg, I've tried 12Kg too but prefer the 10Kg so far. The ride is great at speed, but feels a little harsh at lower speeds, hopefully the 6Kg ones should help a bit with this.

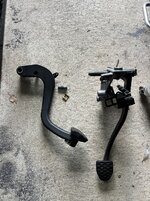
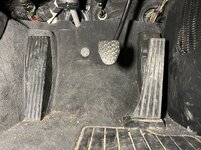
Another minor update, but I removed the clutch pedal today :o

IMG_1906.jpg

Excuse the state of the footwell! The master cylinder has been disconnected from the bottle but I've left it bolted up to the pedal framework, in case I ever need to revert back to manual.

IMG_1907.jpg

I've disconnected the slave at the junction for the hardline and drained it down.

Hopefully the propshaft should be ready for the weekend :driving:
 
Oh, my engineering guy just sent me an update on the propshaft.

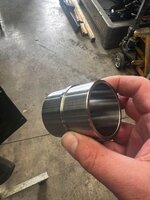
He's machined a sleeve to insert into the 2 halves of the prop.

344477324_1427036184731276_4981875145016339295_n.jpg

He'll face the ends of the propshaft and yoke, set the length then insert and weld.

344439474_1029998095042100_1929426283627940462_n.jpg
 
I didn't know that they modify propshafts using a coupler like that. Now it makes sense how they keep the modified propshaft straight.

I believe the BC's come with 8kg/mm rear and 6kg/mm front spring. I'll probably give those a try before changing for a higher rear spring rate.

I just read the whole build and I noticed that you used to have the Geoff Steel CSL intake on the car. I'm going the carbon intake route and I wanted to ask if the .stl is available for the snorkel piece?

Looking forward to more DCT updates :thumbsup:
 
absolutely incredible and THE best z4m thread . EVER.... bar NONE. well done , a total credit to the z4m community.
 
Thank you!

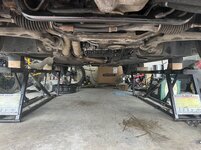
Well, my friend dropped the finished prop round after dinner so I did my chores and cracked straight on.

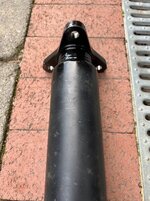
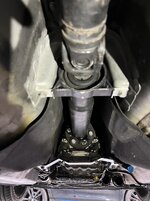
I gave the end of the prop a quick dusting with some black paint to cover the welds, then got it bolted up!

IMG_1911.jpg

IMG_1912.jpg

IMG_1913.jpg

IMG_1914s.jpg

Everything is now back together apart from the small cover that covers the gearbox, which no longer fits so I may modify that, or just leave it off.

First testing tomorrow, fingers are crossed!
 
i like seeing the gearbox sump.... looks so cool! please make videos, with a blower this will actually be a complete supercar slayer!
 
IMG_1915.jpg

It's back on the deck and sporting new 'lows' due to the softer front springs and the lardy DCT gearbox so I need to sort that out! :roll:

The good news is it moves!

[youtube]c3MbLbp3_cA[/youtube]

Take up is super smooth after a few tweaks.

It gets down the road and grabs gears without too much drama but it's gonna need a few hours of tweaking to get the estimated torque table for the DCT dialled in. Once i've done that I'll try and find the suction mount for the GoPro. :thumbsup:
 
Back
Top Bottom