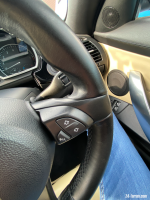
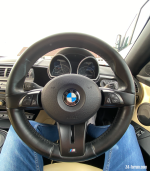
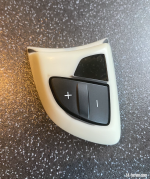
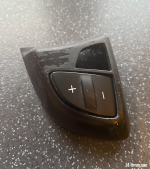
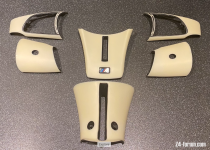
M Sport steering wheel button/trim surrounds

mikeyadamson

Member
 Scotland
Hi everyone,

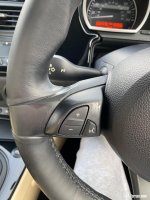
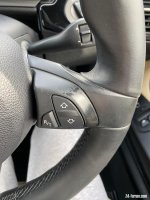
I’ve not long acquired my E85 Z4, however the steering wheel plastics as you will see on the attached images are quite worn out. Looks quite tatty, so I would like to do something about it.

Just wanted to reach out to anyone who’s had similar experience, and what you did to resolve it?

Looking online for the replacement buttons with surrounds, looks to be £140 a side, which is daft for bits of plastic!

If there is clear instructions on removing these plastic sides, as well as the larger M Sport moulding at the bottom of the steering wheel, I would be up for giving it a go.

Once extracted from the steering wheel they look like a bit of fine sanding, followed by some plastic matte black spray paint might bring them back?

Any advice or support would be very appreciated

Cheers!
 

Attachments

  • C18AEEE5-808E-42FF-A5F5-EB9A21B79770.jpeg
    C18AEEE5-808E-42FF-A5F5-EB9A21B79770.jpeg
    133.8 KB · Views: 540
  • 575A0195-6011-4C48-8B9F-89CD8F75E274.jpeg
    575A0195-6011-4C48-8B9F-89CD8F75E274.jpeg
    150.7 KB · Views: 536
The paint that is worn off is a kind of rubber paint, you'll have to remove that first.
You need to remove the airbag, check on youtube, lots of tutorials on how to do it safely, then remove the steering wheel.
Turn the wheel over and you'll see the screws holding the trim on, the up, down,+- buttons pop out the front, the speaker,R/T buttons push in to remove them.
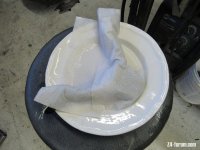
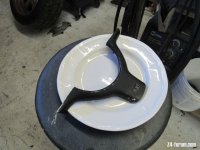
The best way I found to remove that soft rubber paint is Methyl Hydrate (wood alcohol) soak the trim pieces in that until it rubs off with a cloth, you can also soak a paper towel with the alcohol so you won't use as much. Now you are ready for paint or black vinyl wrap.

The first pic is vinyl wrap,
 

Attachments

  • IMG_0220.JPG
    IMG_0220.JPG
    145.4 KB · Views: 501
  • IMG_0219.JPG
    IMG_0219.JPG
    149.2 KB · Views: 502
  • feb62.JPG
    feb62.JPG
    112.2 KB · Views: 500
I did a rubbishy write up as mine were in a state when I got it:

https://z4-forum.com/forum/viewtopic.php?t=137897
 
smorris_12 said:
I did a rubbishy write up as mine were in a state when I got it:

viewtopic.php?t=137897

Thanks for sharing this Scott, your results look excellent.

Any advice on removing the offending components from the steering wheel, without the need to take out the centre airbag section? Can I just undo the screws on the back and pop these out easily enough?

And any further advice you could add would be sweet. Thanks again!
 
Thanks. I honestly couldn't say if the trim will come off without the airbag coming out. Removing the airbag isn't terribly difficult and as I've got INPA it's never worried me if I trigger the airbag light.
 
Just wanted to provide an update on the above for anyone who is interested.

Just to confirm, all of the following parts can be removed from the steering wheel without removing the centre airbag section.

For either side, there is only one screw in each of the back plates which needs to be removed. For the lower centre section, there is only two screws in the back of this. Once you have removed all of these screws, use a plastic pry tool to separate the parts away from each other (front and back sections). You should now also be able to pull the button sections out easily, and disconnect these from their block connectors behind.

As for the button sections, I initially dissected these using a T7 screwdriver to remove the backing screws. This allowed me to remove the buttons, leaving me only with the outer shell. As for the rocker buttons, these are a bit more fiddly to remove from the outer shell, they just need wedged out from behind using something narrow down the side of it (I forgot to take pictures of the buttons popped out, as initially I was about to mask them off when I thought they couldn't be removed).

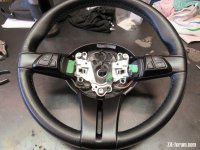
Pics 1-3 below show after I very finely sanded these back to base, using fine grit wet sanding and steel wool. Please note, the gummy stuff takes some effort to remove! I did also opt for some white spirit to aid this process.

In the end I ended up opting for Plasti Dip in a matt black finish. Very carefully applying light coats at 20-30 minute intervals, maybe 4-5 coats for even coverage. Left them to sit for a day to fully set, and put it all back together again. Very happy with the textured rubbery-like finish that Plasti Dip offers. See results below pics 4&5;
 

Attachments

  • Screenshot 2023-05-22 at 19.13.36.png
    Screenshot 2023-05-22 at 19.13.36.png
    1.5 MB · Views: 342
  • §.png
    §.png
    1.4 MB · Views: 339
  • Screenshot 2023-05-22 at 19.12.53.png
    Screenshot 2023-05-22 at 19.12.53.png
    1.4 MB · Views: 340
  • Screenshot 2023-05-22 at 19.12.39.png
    Screenshot 2023-05-22 at 19.12.39.png
    1.1 MB · Views: 342
  • Screenshot 2023-05-22 at 19.12.32.png
    Screenshot 2023-05-22 at 19.12.32.png
    2 MB · Views: 343
Back
Top Bottom