legacy4cam
Member
Thought I would write up my install on Hydraulic steering conversion for anyone else attempting. I'll try and add some photos once home.
I gathered an 330 E46 purple tag rack, reservoir, pump, belt , cooler and pipes , and eventually tracked down a Z4M intermediate shaft (between column and rack).
Costs- Z4M shaft- £120
E46 kit -£150 ish.
Gates Belt 6Pk 1540...£20
Take the time and clean all of the parts thoroughly. Also if you are re-using the track rods, loosen them before you start to ease tracking at the end.
Once I had the Z4M shaft, and compared it to the original, they are identical in every aspect except the bottom spline size.I believe it would be relatively straightforward to change the bottom yolk on the lower universal joint on a standard Z4 shaft, and replace it with a top UJ yolk, as the E46 rack splines are the same as the column end. The UJ yolks are crimped in, but could be removed by a decent engineering firm and then recrimped/riveted.
I started by raising front of car onto good axle stands or similar , removing front wheels, and belly pan. I also removed the cross member assembly under the sump as it afforded better access to the rack bolts and bottom coupling.
Tip...TAKE A PHOTO OR SKETCH OF BELT ROUTE.
I removed both the AC belt (12mm Torx in body of tensioner to release) and the Alternator belt, 15 mm socket onto tensioner from below and a long bar .
The rack is removed by disconnecting the track rod ends (18mm) at either front hub, the coupling at the bottom of the column, and then 2 bolts through the column (bolthead 15mm, nuts 16mm) and the rack slips out.
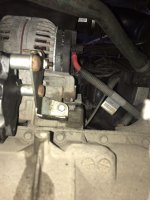
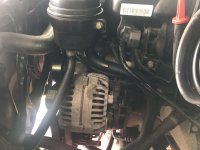
The pump is fitted in place of the lower idler pulley , under the alternator and accessed from below. Remove the pulley and bracket (2 x 13mm bolts) and fit pump in place (pulley removal from pump allows better access to bolts and pipe) . Reuse the 2 bolts from idler and also need one short 8mm stud to attach rear of pump to existing tapped hole.
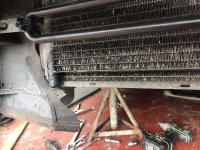
Sit the rack into place and then offer up hoses. The E46 hoses from the rack across to the pump and cooler are supported on the rack itself, worth ordering the small bobbins for here (I had to make some) . The cooler positioning needs the bumper off to do correctly.
Also need to cut a slot in the nearside lower sealing trim between bumper base and undertray. Give clearance to avoid any rubbing issues. I had some trim edging in rubber I glued in to the slot I cut.
Bumper removal is 7 torx across bonnet shutline, 4 plastic rivet style fixings down each wheel arch liner, and then 2 8mm speedfix screws each side into underside of car. Unclip carefully from wing edge , disconnect foglights and headlight washer hose. Idela to have someone helping here as the hose will be tight as a tight thing! I cut it in the end as there was spare length.
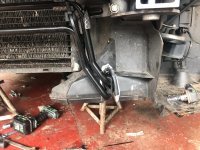
With bumper removed, offer cooler up and fix loosely in place with some simple bracketry, or cable ties if you are feeling cowboy urges..
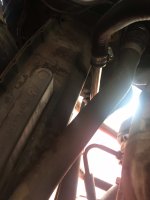
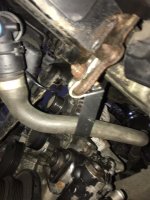
Running the pipes is then dependant on what car the parts come from...I think. In my case, from the pump to the rack was easy, remember the pipe into the pump needs an o-ring , then from rack to cooler likewise, plenty of length and flexible enough to take a nice tidy safe routing. From the cooler back up to the reservoir needed extended, so I cut off the push-on connector at the cooler end and fitted a piece of stainless instrument tubing to extend up the chassis leg where I could pick up the rubber hose from the reservoir. The feed from the reservoir to the pump runs down the back of the Alternator.
Banjo connectors onto rack need a washer (aluminium or copper ) either side to ensure leak free connections. Often missing from second hand pipes and racks.
Refit new drive belt and
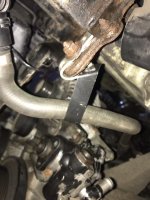
I did have to make up a bracket to hold the Radiator bottom hose clear of the PAS pump pulley, which is larger diameter than the idler. Also a few clips and cable ties to keep the pipes and hoses tidy and avoid "chaffing " ....
The reservoir itself bolts onto the Oil filter housing with 2 8mm studs.
The coupling shaft can be fitted with the rack in place, or slip the rack forward for more space if needed. At this stage ensure the rack is centralised (pointer on the plastic pinion shaft cover) and the steering wheel is locked straight ahead. I had an issue , caused possibly by someone refitting the plastic cover in wrong orientation, whereby my steering wheel was well off centre. ( I'll come back to that).
Connect up track rod ends, refit belts and fill system with ATF.
Wash hands (!) and proceed inside car, remove bottom half of steering cowl, (1 phillips screw and a sharp tug down) and lower dash panel, 3 phillips screws and the interior footwell light.
I was familiar with the motor fixing bolts as I had adjusted it a hundred times! With an 8mm multi point spanner I was able to loosen the steering motor from the column and then , in what can only be described as an act of bloody mindedness, managed to get the bolts out and the motor dropped down and disconnected . This needs patience as access to the bolts is awkward, and then there are 3 cables to be disconnected and made safe/tied off tidily under the dash.
Start your engines! and prime steering by turning lock to lock, and top up fluid as required. Check for leaks and any hoses lose to rotating components.
Switch off, refit bumper, undertrays and cross member. Lower car from axle stands and tidy up tools.
If the steering wheel is centred okay, you should only be left with the warning light for no electric steering, and a sport button that no longer illuminates. I had a dash full of lights, brakes, tyre pressure, ESC and ATC or whatever the acronyms are, because the steering wheel , and therefore the angle sensor was out of the range .
I find my car steering is slightly heavier than before, but the feedback/positivity without stickiness in the straight ahead position is a big improvement.
Time wise, I was about 8 hrs, but that included making some over fancy bracketry and bobbins , and pondering why the steering wheel was miles off centre. For a while!!!
I'd happily talk anyone through any of it, and will try and attach photos .
Hope this helps someone decide to have a go. I would describe myself as a reasonably competent home mechanic, but the knowledge I got from reading others installs was invaluable.
Thanks to those who responded to my plea for advice before I undertook the conversion.
Thanks,
Iain

