Hi everyone ! Let's go !
In this very first "how-to" (be kind about this), we'll talk about the following subject :
« There's condensation/water inside the headlights of my Z4. WHAAAAT am I supposed to dooo ?!? »
Or :
« Z4-E85 : Front Bumper Removal & Front Headlight Removal for dummies »
The Front Bumper Removal
Front Bumper Revival... em... removal
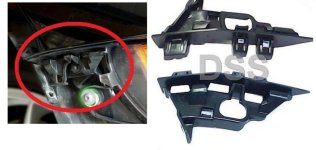
Because you need to remove the bumper to get to the headlights.
Before I start, I wish to thanks mister_roger for his DIY threat. It's the only help I found on the web... There's a very few informations on that topic (and on the DIY of your Z4... especialy in french
 ) : When you own a BMW, you're supposed to have enought money to take it to your BMW dealer ? Let's try to deny that !
So here's come my version !
Tools :
- Torx screwdriver
- 8 mm socket
- A thin screwdriver or a thin stick
- Idealy, a dude.

That's the result. Nothing to say. Let's get it done.


Firstable : The clips along the fenderwell. There's 4 on each side. These are specific holders. It works like screw-plug : you need to push with the thin screwdriver on the middle rod to get them out. The rod falls inside and you will get the rod back when the bumper will be removed.
NB. I got the idea of the tutorial after I took off the clips (that's why i don't have pictures of it). For more details, read the original topic
") .
.
Then remove the 7 screws under the bumper with the 8mm' socket.

Remove the 7 torx on the further side of the engine compartment. The bumper is insert next to the healight : it is not supposed to fall (make sure it's true before droping it).

Remove the red bar.

Unplug the bumper on each side.
On this step, the help of another personne is welcome to hold the bumper.
I didn't understand exactly the direction in which it was necessary to pull
 . Globally, we try to take away the bumper besides, thus we pull towards the outside and foward. Alternate top and low, it could be necessary to force a little. If it did not comes, try something else.
For the records, mister_roger unpluged the bumber before removing the screws in the engine compartment. Maybe it's an other solution if you're alone to do the job... On our side, we didn't run the risk to pull it while it was still attached.

And Tadaaa !
:!: Keep in mind to protect your body car any time.

For the reassembling, you push toward the wheel. Same as before : You could force a little but not too much.
For the rest : All the previous steps backward !
You could use the first part of this "how-to" for many reasons : changing condenser A/C (air conditioning), radiator, fog lights, paint job or just looking under the bumper for fun
 .
.Headlight removal

Damned condensation !


- Right headlight pics -
What fixing the headlight : 4 torx screws
- 2 below
- 1 on the hood side
- 1 on the external side
:!: Once you have removed all screws, the headlight is not held anymore : You may finish by the screws below.
NB. For the hood-side below screw, we needed a curved screwdriver : The space in front of the screw does not allow to use a classic screwdriver.


remove the backcover in the wheel's protective casing : Lower the red rod and take off the cover (already removed on the picture)
Your choice : You can do that before or after screw off the headlight.


Unplug the headlight : There's 2 plugs. The blue (on the médial side) is easy : you push on the side and you pull it. The red one (on the lateral side) possesses a rail which slides for unlock. You need to push on the side too to allow it sliding (you can use a little flat screwdriver to push on the side)

Scumbag water...


Drying operation with hair dryer. Not too hot. It's sooo long...

So, why this condensation is here ? We checked all the water drainage weepholes at the back and below, we noticed a little depression between the glass and the lightcase... too small to be sure that it is the reason. Sediments left suggest there's a water passage.
To fix/prevent that, we made the tour of the junction of the window with waterproof/outdoor-proof joint. A month and a few washing later, the headlight is still dry !!
Many people on the internet put their car beneath the sun and let it dry... I hope this may help them !

During the reassembly, you can also re-align the curve of the headlight with the wing's curve if this one moved. To be two persons is also helpful
 .
.Thanks for reading !
Hope our experience may help !
Siewicz :drinkwine:
Searching tags : Misted, steamed up, BMW, Z4, E85, E86, Frontbumper, Headlight, Parechoc, Phare, Bloc Optique, DIY, Démontage, Remove.
This is a first version... I will improve my grammar, my spelling and the layout