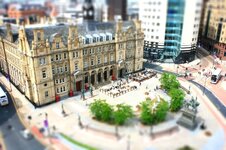
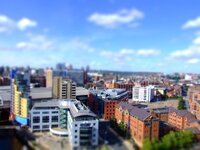
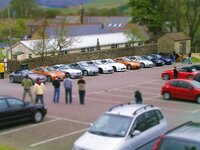
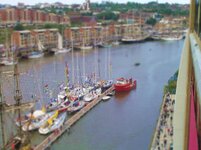
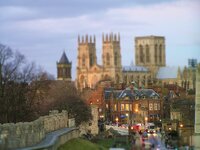
My attempts at Tilt Shift (toy car) photos have always been well received so I thought I'd try a How To. Have meaning to do this for a while, slightly tired after a lot of driving yesterday I'm finally in one place long enough to do it.
You can buy a Tilt Shift SLR lens at around £1,400, or it can be done in PhotoShop... for the lens money I could have an LSD so I use PhotoShop. There are a few ways doing this, below is mine. The example is using PhotoShop Elements for Mac. The full version of PS makes this easier, the Windows version may look slightly different.
Source photo is best taken from a distance and from an elevated angle if possible. The basic principal is to blur all but a narrow band of the image, that contains the main subject, and make the colours more artificial.
Open the source image in PS. I work with the original - 10MP, do any editing you want before you start - I removed a bird from the sky.
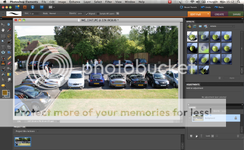
Using the layer pallet start by duplicating the background layer. You can do this without the Layer Pallet, but having it visible makes the process far easier.
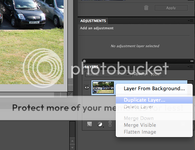
Create the required number of layers and name accordingly for Blur and Top - I begin with 'Blur 16', 'Blur 15' and work down from 15 in 1.5 increments to 9.0, plus a final layer called 'Top'.
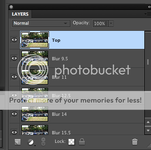
Click the small eye icon to make all layers invisible from Top down to and including 'Blur 15'
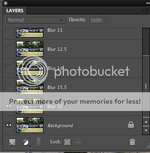
Select the 'Blur 16' layer. From the top menu bar select Filter > Blur > Gaussian Blur... Set the radius to 16 pixels and click OK.
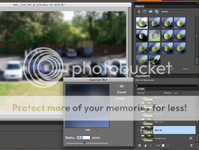
One by one make the layers visible and apply the Gaussian Blur to that layer - the radius being equal to the layer name eg 'Blur 15' = radius 15 pixels. Do not blur the Top layer.
Click the rectangular selection tool and set Feather to 50
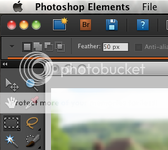
Again, make all layers invisible down to 'Blur 15' but keep this visible. On that layer use the tool to select an area of about 3/4 of the screen, and then use menu > Select > Inverse to invert the select. Push Delete.
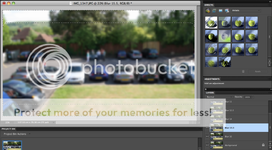
Work up through the layers narrowing the selection area, you can see from the layer pallet each image becoming smaller, you want to work toward the Top layer where you want as a small band tight to the part of the picture that you want in focus.
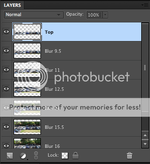
You should finish with something that looks like this:
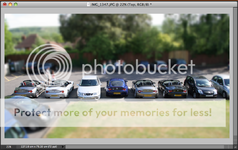
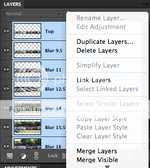
In the layer pallet select all layers from 'Blur 16' to Top and Merge.
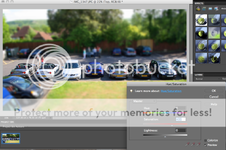
Finally, adjust the colour saturation. From the menu > Enhance > Adjust Colour > Adjust Hue/Saturation... Drag the saturation slider to the right - mine typically seem to be around +30, but this can vary depending up on the colours in the source image. With preview on you can see the image as you adjust. This should give the photo a more vivid artificial feel.
Hopefully you will be left with something toy like (or better ):
):
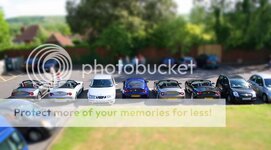
Variations
If you have the full version of PS or another package with the facility, you can apply a gradient adjustment layer working from the outside in (heavy to light) with a clear band over the cars in the centre. Apply the blur filter and proceed to the colour saturation. This gradient method is far better if you have that option.
Using layers and gradually applying less blur is to simulate the gradient affect (best method) you may use more or less layers depending on your patience, the more the better.
In this example I have used Gaussian blur. If you have a photo editing package with the function, apply a lens blur.
My original photo was 10MP, if you use one larger or smaller you will need to adjust the blur radius accordingly.
Lazy Option
Alternatively, you can use this web site - with better results largely as it has the Bokeh filter, although I am trying to improve:
http://tiltshiftmaker.com/
I uploaded this image:
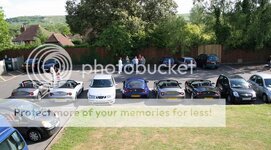
Within seconds it produced this:
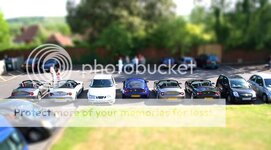
Although it takes me longer and I am still refining my technique I prefer to do this myself.
You can buy a Tilt Shift SLR lens at around £1,400, or it can be done in PhotoShop... for the lens money I could have an LSD so I use PhotoShop. There are a few ways doing this, below is mine. The example is using PhotoShop Elements for Mac. The full version of PS makes this easier, the Windows version may look slightly different.
Source photo is best taken from a distance and from an elevated angle if possible. The basic principal is to blur all but a narrow band of the image, that contains the main subject, and make the colours more artificial.
Open the source image in PS. I work with the original - 10MP, do any editing you want before you start - I removed a bird from the sky.

Using the layer pallet start by duplicating the background layer. You can do this without the Layer Pallet, but having it visible makes the process far easier.

Create the required number of layers and name accordingly for Blur and Top - I begin with 'Blur 16', 'Blur 15' and work down from 15 in 1.5 increments to 9.0, plus a final layer called 'Top'.

Click the small eye icon to make all layers invisible from Top down to and including 'Blur 15'

Select the 'Blur 16' layer. From the top menu bar select Filter > Blur > Gaussian Blur... Set the radius to 16 pixels and click OK.

One by one make the layers visible and apply the Gaussian Blur to that layer - the radius being equal to the layer name eg 'Blur 15' = radius 15 pixels. Do not blur the Top layer.
Click the rectangular selection tool and set Feather to 50

Again, make all layers invisible down to 'Blur 15' but keep this visible. On that layer use the tool to select an area of about 3/4 of the screen, and then use menu > Select > Inverse to invert the select. Push Delete.

Work up through the layers narrowing the selection area, you can see from the layer pallet each image becoming smaller, you want to work toward the Top layer where you want as a small band tight to the part of the picture that you want in focus.

You should finish with something that looks like this:

In the layer pallet select all layers from 'Blur 16' to Top and Merge.

Finally, adjust the colour saturation. From the menu > Enhance > Adjust Colour > Adjust Hue/Saturation... Drag the saturation slider to the right - mine typically seem to be around +30, but this can vary depending up on the colours in the source image. With preview on you can see the image as you adjust. This should give the photo a more vivid artificial feel.

Hopefully you will be left with something toy like (or better

Variations
If you have the full version of PS or another package with the facility, you can apply a gradient adjustment layer working from the outside in (heavy to light) with a clear band over the cars in the centre. Apply the blur filter and proceed to the colour saturation. This gradient method is far better if you have that option.
Using layers and gradually applying less blur is to simulate the gradient affect (best method) you may use more or less layers depending on your patience, the more the better.
In this example I have used Gaussian blur. If you have a photo editing package with the function, apply a lens blur.
My original photo was 10MP, if you use one larger or smaller you will need to adjust the blur radius accordingly.
Lazy Option
Alternatively, you can use this web site - with better results largely as it has the Bokeh filter, although I am trying to improve:
http://tiltshiftmaker.com/
I uploaded this image:

Within seconds it produced this:

Although it takes me longer and I am still refining my technique I prefer to do this myself.
