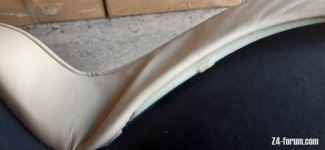
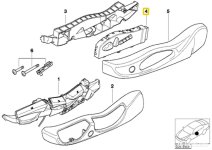
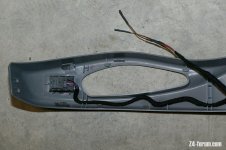
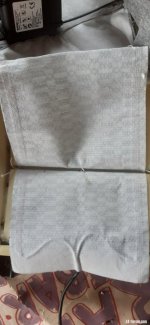
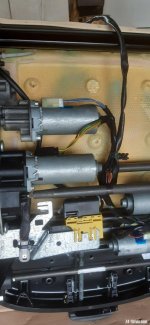
My Zed came without heated seats, and I thought I'd do a retrofit.
Firstly, thanks to Fishy Dave (amongst others) for his details about retrofitting the X3 harness in this thread
https://z4-forum.com/forum/viewtopic.php?f=2&t=83970
The X3 harness (and the original Z4 retrofit harness) are out of production, so after hours and hours of research, I found that the E46 retrofit harness is usable.
This harness has the exact same wiring colours as for the Z4 retrofit instructions, so no need to look up the E46 instructions (I've done it for you and it used different wiring nomenclature.).
https://www.keepandshare.com/doc2/119303/z4-retrofit-heated-seats-pdf-339k
Note that wherever the instructions refer to "Passenger Side", cross it out and write "Right Hand Side" and for "Drivers Side" write "Left Hand Side".
There are actually two E46 cable kits required - the "Wiring Set" 61116930656 (£36 from BMW) and "Wiring Harness" 61116902951 (£7 from BMW).
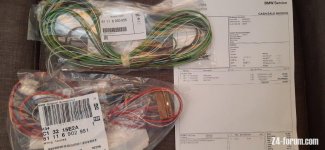
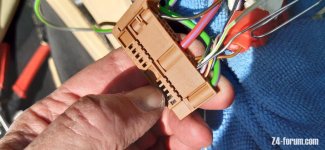
The "Wiring set" comprises 3 wires, the brown connector block (X1869) which attaches to the back of the centre console switch panel and a fuse. The only part from this kit that was actually needed in my car was the main red/violet 4mm power wire which runs from that block to the fusebox, as all the other parts were already fitted in my car (i.e. connector block, fuse, and the 2 other thin wires which I think are CANBUS related)
The "Wiring Harness" comprises the wires that run from the X1869 connector block down to the seats. There are 3 wires for each side - power, ground, and temperature feedback. The only slight difference between the E46 and Z4 is that the brown ground wire needs a ring connector putting on one end instead of the existing spade terminal.
Here's my guide:
1. Always remember to disconnect the battery before messing with the wiring. especially before disconnecting the seat wiring otherwise you will get an airbag warning light (also reconnect the seat wiring before the battery).
2. Buy a centre console switch panel with heated seat buttons and swap it over with the existing one.
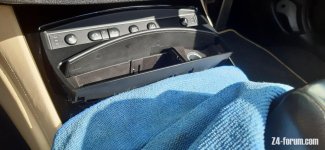
To do this, chock the wheels, put the car into Drive (Automatic) or 6th (manual) and switch the engine off. Disconnect the battery. Remove the screw at the bottom of the ashtray and pry it and switch unit out together, starting at the bottom. Use a soft cloth to protect the centre trim as there are sharp parts on the bottom of the ashtray.
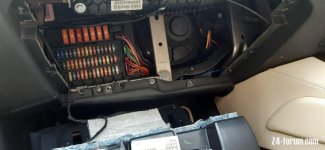
3. As per the instructions, run the main red/violet power wire from the centre console block (X1869) to the fuse box. To get to the fusebox, drop the glove box fully down (2 clips at the top). Unscrew the 6 screws from round the glovebox and remove it. I found I could use a piece of thin coat hanger to help feed the wire forward under the centre console towards the fusebox. The connector on the end of the power wire is not exactly the same as those installed in the fusebox connector block (X9633), but it does the job fine. That power wire fits into the bottom right hole of the bottom right block in this photo:
4. Put the fusebox and glovebox back together.
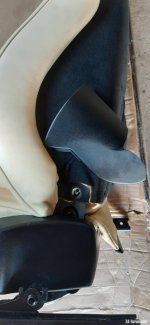
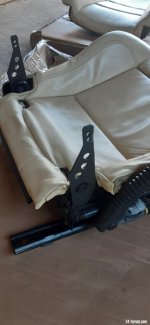
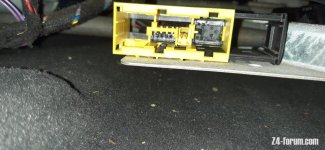
5. Reconnect the battery as required so that you can move the seat around to get to the front and rear mounting bolts (16mm). Unclip the seatbelt from the shoulder guide and seatbelt floor anchor nut (16mm), this may be a bit easier with the seat partially out. Remembering point 1, disconnect the under seat wiring block (X275 on left and X279 on right) , by sliding the black cover clip to one side then pulling the yellow block out. Place an old towel over the door sill and remove the seat.
 .
.
6. Vacuum the crud (I found a a big beetle, a shoe brush and a VIP ticket to the Empire State Building, - does a previous owner on here remember that trip ?)
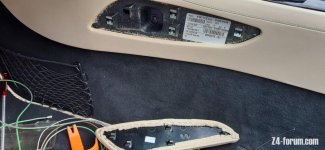
7. This is where I deviated from the instructions - as is often the case there is no real need to disassemble more than you need and I found that if I loosened off the sides of the centre tunnel trim (3 screws per side), I could feed the wires up inside it (towards the top) routing to the back of the car then under the carpet, forward to connect up with the existing seat loom. I found removing the knee pad trim quite difficult. You need a really strong plastic trim removal tool and a lot of force. I used some polyester cable braiding to protect the exposed new wires under the seat.
I also used the rear inner seat attachment bolt for the ground wire (10mm ring connector), rather than running it all the way to the front of the car again (The brown ground wire supplied in the kit is quite short anyway). [ Edit: I found an another bolt used for a cable clip under the carpet near the seat runner which I used for the earth instead. I just had to run a nut up and down it to get the paint off it. ]
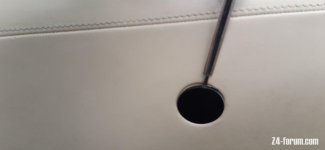
8. Insert the cables into the connector blocks (X1869 and X275/X279). I found that a paper clip helped to get the smaller cable fitted properly.
9. Buy some heated seats and fit back together, or ...
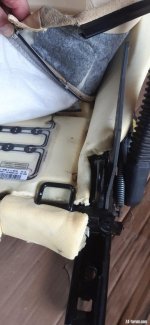
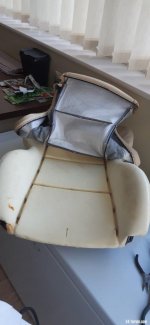
10. Alternatively, like me and Fishy Dave, pull your existing seats apart and fit some aftermarket heating elements. This I still have to do. The slight snag here is that you will not have the correct connector block on the end of the aftermarket heating element wires to then fit in the X275/X279, so I have had to use 3 pin connector blocks to sit under the seats.
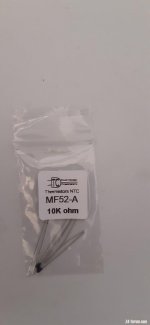
The other snag is that aftermarket elements do not come with the temperature feedback wire. Fishy Dave reportedly used a variable resistor placed between that wire and ground then adjusted it to about 6 Ohms which fooled the control unit into thinking all was OK and got the heat level right. I will go one step further and try a 10 Ohm (at 25 deg C) NTC thermistor and put that in the seat pad to see if that controls the temperature as required.
Hope that helps someone.
I'll report back if I have any useful updates.
Firstly, thanks to Fishy Dave (amongst others) for his details about retrofitting the X3 harness in this thread
https://z4-forum.com/forum/viewtopic.php?f=2&t=83970
The X3 harness (and the original Z4 retrofit harness) are out of production, so after hours and hours of research, I found that the E46 retrofit harness is usable.
This harness has the exact same wiring colours as for the Z4 retrofit instructions, so no need to look up the E46 instructions (I've done it for you and it used different wiring nomenclature.).
https://www.keepandshare.com/doc2/119303/z4-retrofit-heated-seats-pdf-339k
Note that wherever the instructions refer to "Passenger Side", cross it out and write "Right Hand Side" and for "Drivers Side" write "Left Hand Side".
There are actually two E46 cable kits required - the "Wiring Set" 61116930656 (£36 from BMW) and "Wiring Harness" 61116902951 (£7 from BMW).

The "Wiring set" comprises 3 wires, the brown connector block (X1869) which attaches to the back of the centre console switch panel and a fuse. The only part from this kit that was actually needed in my car was the main red/violet 4mm power wire which runs from that block to the fusebox, as all the other parts were already fitted in my car (i.e. connector block, fuse, and the 2 other thin wires which I think are CANBUS related)
The "Wiring Harness" comprises the wires that run from the X1869 connector block down to the seats. There are 3 wires for each side - power, ground, and temperature feedback. The only slight difference between the E46 and Z4 is that the brown ground wire needs a ring connector putting on one end instead of the existing spade terminal.
Here's my guide:
1. Always remember to disconnect the battery before messing with the wiring. especially before disconnecting the seat wiring otherwise you will get an airbag warning light (also reconnect the seat wiring before the battery).
2. Buy a centre console switch panel with heated seat buttons and swap it over with the existing one.
To do this, chock the wheels, put the car into Drive (Automatic) or 6th (manual) and switch the engine off. Disconnect the battery. Remove the screw at the bottom of the ashtray and pry it and switch unit out together, starting at the bottom. Use a soft cloth to protect the centre trim as there are sharp parts on the bottom of the ashtray.

3. As per the instructions, run the main red/violet power wire from the centre console block (X1869) to the fuse box. To get to the fusebox, drop the glove box fully down (2 clips at the top). Unscrew the 6 screws from round the glovebox and remove it. I found I could use a piece of thin coat hanger to help feed the wire forward under the centre console towards the fusebox. The connector on the end of the power wire is not exactly the same as those installed in the fusebox connector block (X9633), but it does the job fine. That power wire fits into the bottom right hole of the bottom right block in this photo:

4. Put the fusebox and glovebox back together.
5. Reconnect the battery as required so that you can move the seat around to get to the front and rear mounting bolts (16mm). Unclip the seatbelt from the shoulder guide and seatbelt floor anchor nut (16mm), this may be a bit easier with the seat partially out. Remembering point 1, disconnect the under seat wiring block (X275 on left and X279 on right) , by sliding the black cover clip to one side then pulling the yellow block out. Place an old towel over the door sill and remove the seat.
 .
.6. Vacuum the crud (I found a a big beetle, a shoe brush and a VIP ticket to the Empire State Building, - does a previous owner on here remember that trip ?)
7. This is where I deviated from the instructions - as is often the case there is no real need to disassemble more than you need and I found that if I loosened off the sides of the centre tunnel trim (3 screws per side), I could feed the wires up inside it (towards the top) routing to the back of the car then under the carpet, forward to connect up with the existing seat loom. I found removing the knee pad trim quite difficult. You need a really strong plastic trim removal tool and a lot of force. I used some polyester cable braiding to protect the exposed new wires under the seat.
I also used the rear inner seat attachment bolt for the ground wire (10mm ring connector), rather than running it all the way to the front of the car again (The brown ground wire supplied in the kit is quite short anyway). [ Edit: I found an another bolt used for a cable clip under the carpet near the seat runner which I used for the earth instead. I just had to run a nut up and down it to get the paint off it. ]


8. Insert the cables into the connector blocks (X1869 and X275/X279). I found that a paper clip helped to get the smaller cable fitted properly.

9. Buy some heated seats and fit back together, or ...
10. Alternatively, like me and Fishy Dave, pull your existing seats apart and fit some aftermarket heating elements. This I still have to do. The slight snag here is that you will not have the correct connector block on the end of the aftermarket heating element wires to then fit in the X275/X279, so I have had to use 3 pin connector blocks to sit under the seats.
The other snag is that aftermarket elements do not come with the temperature feedback wire. Fishy Dave reportedly used a variable resistor placed between that wire and ground then adjusted it to about 6 Ohms which fooled the control unit into thinking all was OK and got the heat level right. I will go one step further and try a 10 Ohm (at 25 deg C) NTC thermistor and put that in the seat pad to see if that controls the temperature as required.
Hope that helps someone.
I'll report back if I have any useful updates.
![20210506_103041[1].jpg 20210506_103041[1].jpg](https://z4-forum.com/data/attachments/78/78818-61a6fc4c7cc87382f1b231b10bd7f674.jpg?hash=rwhgZyTI90)
